
The Sweetest Homemade Whoopie Pies Recipe Ever
Baking delightful whoopie pies can transform an ordinary afternoon into a sweet celebration of comfort.
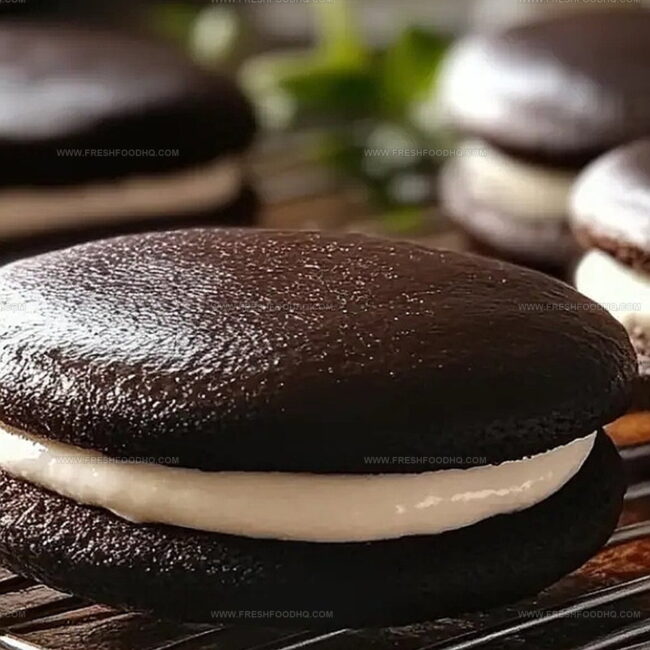
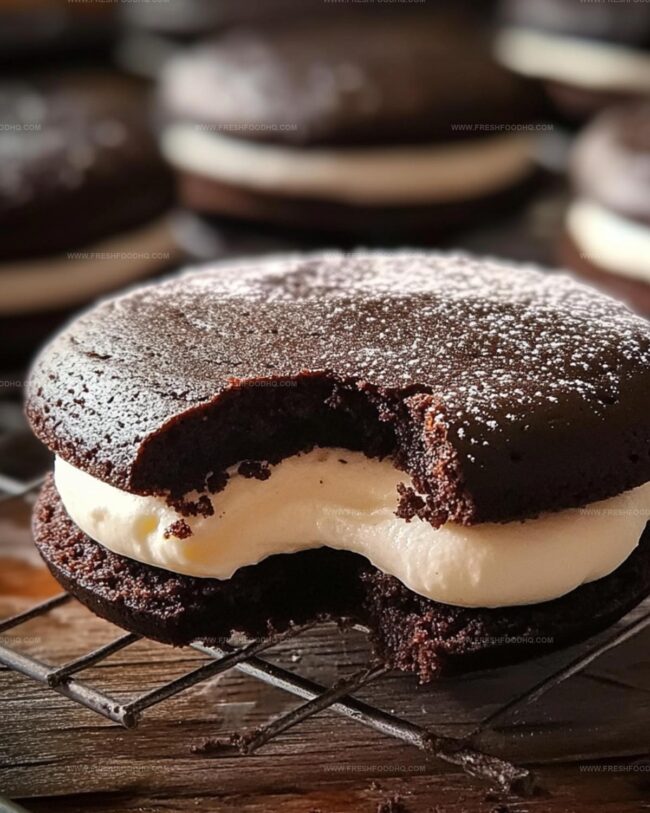
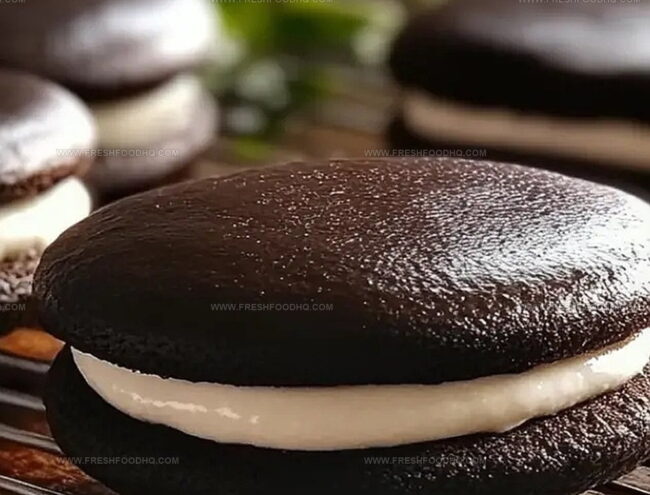
Soft clouds of chocolate cake sandwich creamy filling like a delicious dream.
Marshmallow-like textures and rich flavors dance across your palate with each incredible bite.
Pennsylvania Dutch traditions inspire this classic treat that feels both nostalgic and modern.
Crafting these delectable desserts requires minimal effort but delivers maximum satisfaction.
Simple ingredients come together to create magic in your kitchen.
We can’t wait for you to experience the joy of making these irresistible whoopie pies that will surely become a family favorite.
Whoopie Pies – Classic, Creamy, and Oh So Fun
Ingredients for Soft and Chewy Whoopie Pies
For the Cake Batter:For the Wet Ingredients:For the Filling:How to Make Perfect Whoopie Pies at Home
Step 1: Fire Up the Oven and Mix Dry Ingredients
Crank the oven to a toasty 375F (190C). Grab a sifter and blend these dry ingredients into a light, airy mixture:Set the fluffy dry mix aside, ready for action.
Step 2: Create the Magical Batter
Grab a big mixing bowl and whip the butter and sugar until they transform into a cloud-like, creamy dream. Crack in the egg and splash of vanilla extract, mixing until everything dances together smoothly.
Now, play a little mixing game – alternate adding your dry ingredients and milk to the butter mixture. Start with dry, end with dry, and mix just until everything comes together.
Let the batter rest and catch its breath for 5-10 minutes.
Step 3: Shape and Bake Chocolate Clouds
Grab a tablespoon and drop perfect little rounds of batter onto a parchment-lined baking sheet.
Give each dollop some breathing room. Slide the sheet into the hot oven and bake for 8 minutes until they’re set and looking gorgeous.
Transfer the cakey discs to a wire rack and let them cool completely.
Step 4: Whip Up the Creamy Filling
In a clean mixing bowl, beat these ingredients until they become a fluffy cloud of deliciousness:Keep beating until the mixture looks light and irresistible.
Step 5: Sandwich the Whoopie Pie Magic
Use the same scoop to dollop or pipe filling onto the flat side of one cakey disc. Crown it with another disc to create a perfect sandwich.
Repeat until all your whoopie pies are assembled and ready to devour.
Pro Tips for Creamy and Fluffy Filling
Variations to Customize Your Whoopie Pies
Pairing Suggestions for Whoopie Pies
Storage Advice for Whoopie Pies
Store whoopie pies in an airtight container between parchment paper layers for up to 3-4 days. Keep refrigerated to maintain freshness and prevent filling from melting.
Wrap each whoopie pie individually in plastic wrap, then place in a freezer-safe container. They’ll stay delicious for 2-3 months. Thaw at room temperature for 30-45 minutes before serving.
Separately freeze cake rounds and filling in sealed containers. When ready to enjoy, thaw cakes and filling, then assemble for maximum texture preservation.
If serving within 24 hours, keep whoopie pies at room temperature in a covered container. Avoid direct sunlight or warm areas to prevent filling from becoming too soft.
FAQs
Whoopie pies are actually cake-like sandwich treats with soft, puffy shells and creamy filling, originating from the Northeastern United States, particularly popular in Pennsylvania Amish communities.
Not at all! They’re surprisingly simple to prepare, requiring basic baking ingredients and minimal technical skills. The key is ensuring even-sized cake shells and smooth filling.
Absolutely! While marshmallow filling is traditional, you can experiment with cream cheese, buttercream, peanut butter, or chocolate ganache fillings to suit your taste preferences.
Print
Whoopie Pies Recipe
- Total Time: 33 minutes
- Yield: 12 1x
Description
Chocolate whoopie pies deliver classic Pennsylvania Dutch comfort with silky marshmallow cream nestled between rich chocolate cake-like cookies. Delightful little dessert sandwiches promise sweet nostalgia and pure indulgence you won’t want to miss.
Ingredients
Main Ingredients:
- 2 cups all-purpose flour
- 1/2 cup cocoa powder
- 1 cup granulated sugar
- 1 cup milk
- 1 large egg
Dry Ingredients:
- 1 1/2 teaspoons baking soda
- 1/2 teaspoon baking powder
- 1/2 teaspoon salt
Butter and Flavoring Ingredients:
- 1 stick (1/2 cup or 113 grams) unsalted butter, softened
- 1 teaspoon vanilla extract
Filling Ingredients:
- 2 sticks (1 cup or 226 grams) unsalted butter, softened
- 2 1/2 cups confectioners sugar
- 16 ounces (454 grams) marshmallow fluff
- 2 teaspoons vanilla extract
Instructions
- Prepare the oven environment by warming to 375F (190C). Meticulously sift cocoa powder, flour, baking soda, baking powder, and salt into a pristine mixing vessel. Reserve this dry mixture momentarily.
- In a spacious mixing bowl, cream butter and sugar until achieving a whipped, airy consistency. Incorporate egg and vanilla extract, blending thoroughly. Methodically fold dry ingredients and milk alternately into the butter mixture, ensuring seamless integration. Allow batter to rest and settle for 5-10 minutes.
- Deploy a tablespoon to carefully distribute batter onto parchment-lined baking sheets, maintaining uniform spacing. Position in preheated oven and bake approximately 8 minutes until surfaces appear set and edges slightly firm. Transfer cakes to wire cooling rack, allowing complete temperature reduction.
- Craft filling by vigorously whipping butter, confectioners sugar, marshmallow fluff, and vanilla extract until achieving a light, pillowy texture.
- Construct whoopie pies by positioning filling generously on flat cake surface, then gently pressing matching cake layer atop, creating delectable sandwich structures. Repeat process until all cakes are transformed into delightful handheld treats.
Notes
- Customize the cocoa powder type for richer or milder chocolate flavor, exploring different brands and intensities.
- Chill the batter briefly before scooping to prevent spreading and create more uniform, rounded cake shapes during baking.
- Use room temperature ingredients to ensure smoother mixing and better texture, especially for butter and eggs.
- Swap marshmallow fluff with cream cheese filling for a tangier, less sweet alternative that works well for adult palates.
- Prep Time: 25 minutes
- Cook Time: 8 minutes
- Category: Desserts, Snacks
- Method: Baking
- Cuisine: American
Nutrition
- Serving Size: 12
- Calories: 370 kcal
- Sugar: 37 g
- Sodium: 180 mg
- Fat: 20 g
- Saturated Fat: 12 g
- Unsaturated Fat: 7 g
- Trans Fat: 0.5 g
- Carbohydrates: 48 g
- Fiber: 3 g
- Protein: 4 g
- Cholesterol: 55 mg
Ethan Caldwell
Founder & Culinary Innovator
Expertise
Farm-to-table cooking, Seasonal recipe creation, Culinary storytelling, Food photography and styling
Education
The Chef’s Academy (Indianapolis, IN)
Ethan didn’t just fall in love with food, he grew into it, surrounded by fields, farmers’ markets, and family meals that told a story.
After sharpening his skills at The Chef’s Academy, he took his passion straight into the farm-to-table movement, working side-by-side with local growers and seasonal flavors.
He believes every recipe should feel like a walk through a summer market: colorful, fresh, and full of possibility.
Outside the kitchen, Ethan’s idea of a perfect day is hiking mountain trails, digging into heirloom vegetables, and hosting casual dinners where seconds are always encouraged.