
The Ultimate Strawberry Oreo Cheesecake Cups Recipe For Dessert Lovers
Sweet memories dance through my strawberry oreo cheesecake cups, blending childhood nostalgia with elegant dessert artistry.
Creamy layers promise delightful surprises in every bite.
Crushed cookies create a delectable foundation for smooth, rich filling.
Ripe strawberries add vibrant color and fresh brightness to each delicate cup.
Summer gatherings become magical moments when these individual treats appear.
Dessert enthusiasts will adore how simple ingredients combine into something extraordinary.
Each spoonful promises pure indulgence that beckons you to savor every delicious moment.
Strawberry Oreo Cheesecake Cups Sensation
Ingredients for Dreamy Strawberry Oreo Cups
For the Base:For the Cheesecake Filling:For the Fruit Topping:Crafting Perfect Cheesecake Cups at Home
Step 1: Crush Those Cookies
Grab your Oreo cookies and transform them into fine, sandy crumbs using a food processor or place them in a ziplock bag and crush with a rolling pin. Drizzle melted butter over the crumbs and mix until every single crumb gets a buttery hug.
This magical base will set the stage for your dessert masterpiece.
Step 2: Whip Up Creamy Cheesecake Magic
Grab your cream cheese and beat it until silky smooth.
Sprinkle in powdered sugar and vanilla extract, creating a dreamy mixture. In another bowl, whip the heavy cream until it forms gorgeous stiff peaks.
Gently fold the whipped cream into the cream cheese mixture, creating a cloud-like filling that’ll make taste buds dance.
Step 3: Prepare Juicy Strawberry Goodness
Dice fresh strawberries into tiny, ruby-red pieces.
Optional: Dust them with a light sprinkle of sugar to enhance their natural sweetness. Let the strawberries sit and release their luscious juices for about 5 minutes.
Step 4: Build Your Delicious Layers
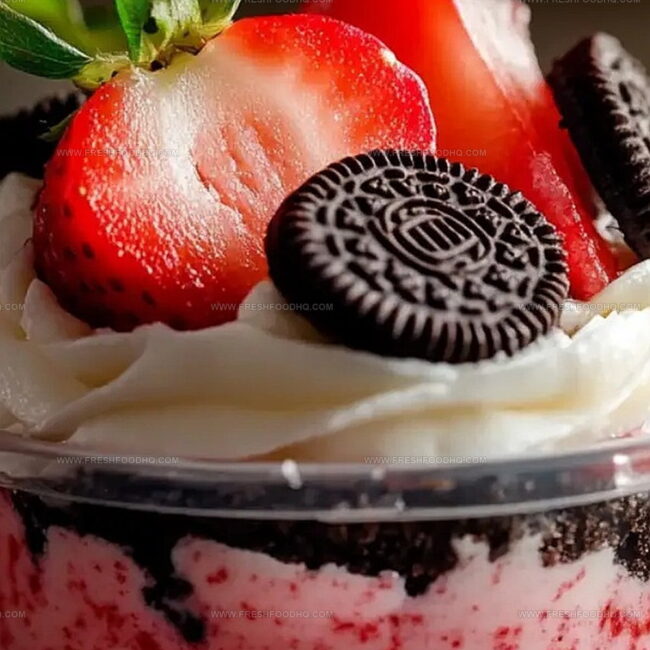
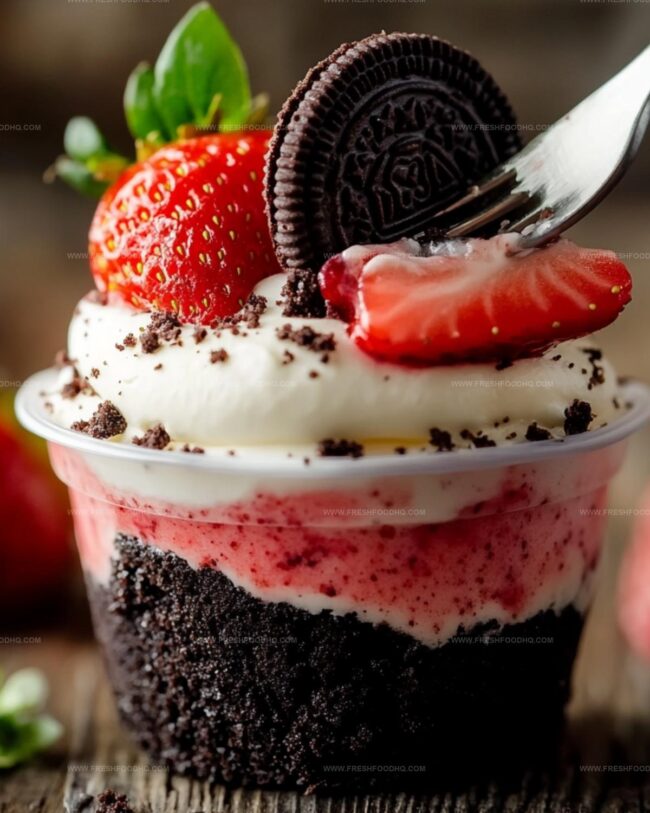
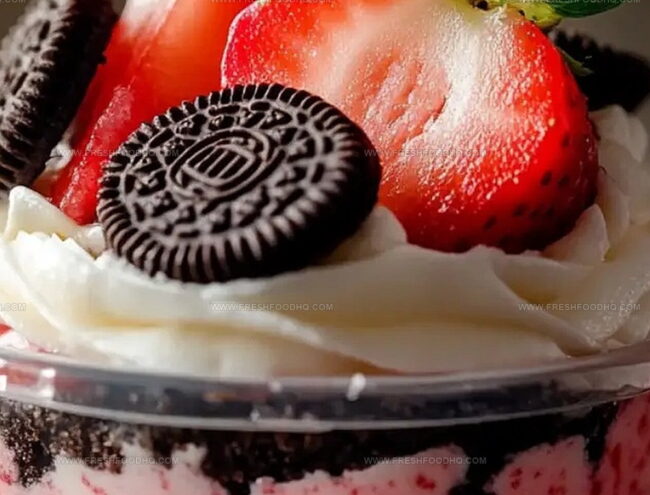
Start your dessert adventure by sprinkling a layer of Oreo crumbs at the bottom of each serving cup. Add a generous dollop of the creamy cheesecake filling.
Scatter fresh strawberry pieces on top. Repeat these layers, creating a beautiful dessert landscape.
Finish with a crown of Oreo crumbs and strawberry pieces.
Step 5: Chill and Indulge
Park your cups in the refrigerator for at least an hour, allowing flavors to mingle and develop.
When ready, grab a spoon and dive into your delectable creation. Pure dessert bliss awaits!
Pro Tips to Elevate Cheesecake Cups
Fun Variations for Strawberry Oreo Cups
What Goes Best with Oreo Cheesecake Cups
Storage Advice for Cheesecake Cups
FAQs
The Oreo crumble base provides a rich, chocolatey foundation that adds crunch and depth to the cheesecake cups, creating a delightful contrast with the creamy filling.
Fresh strawberries are recommended for the best texture and flavor. Frozen strawberries might release too much moisture and make the dessert watery.
Beat the cream cheese until completely smooth before adding other ingredients, and make sure all ingredients are at room temperature to prevent lumps.
Yes, you can prepare these cheesecake cups up to 2 days in advance and store them covered in the refrigerator, which actually allows the flavors to meld beautifully.
Print
Strawberry Oreo Cheesecake Cups Recipe
- Total Time: 1 hour 25 minutes
- Yield: 4 1x
Description
Creamy strawberry oreo cheesecake cups blend classic dessert magic with irresistible textures. Sweet cookie crumbles and luscious strawberry cream create a delightful treat you’ll crave again and again.
Ingredients
Oreo Crust Layer:
- 20 Oreo cookies (crushed)
- 4 tablespoons (4 tbsp) unsalted butter (melted)
Cheesecake Filling:
- 8 ounces (1 block) cream cheese (softened)
- 1/2 cup powdered sugar
- 1 teaspoon (1 tsp) vanilla extract
- 1 cup heavy whipping cream (cold)
Strawberry Layer:
- 1 1/2 cups fresh strawberries (diced)
- 1 tablespoon (1 tbsp) granulated sugar (optional, for extra sweetness)
Instructions
- Pulverize Oreo cookies into fine, uniform crumbs using a food processor or rolling pin, ensuring complete breakdown of the cookies.
- Incorporate melted butter into the Oreo crumbs, mixing thoroughly to create a cohesive, moist base that will hold together when pressed.
- Whip cream cheese in a mixing bowl until silky and free of lumps, creating a smooth foundation for the cheesecake filling.
- Blend powdered sugar and vanilla extract into the cream cheese, stirring until the mixture achieves a consistent, creamy texture.
- Separately whip heavy cream until it develops stiff, peaks that hold their shape, indicating proper aeration.
- Delicately fold the whipped cream into the cream cheese mixture, maintaining the airiness while creating a light, fluffy filling.
- Dice fresh strawberries into small, uniform pieces, optionally sprinkling with a light dusting of sugar to enhance natural sweetness.
- Allow strawberries to rest for 5 minutes, enabling them to release their vibrant juices and intensify their flavor profile.
- Construct layered cups by first adding a compact layer of Oreo crumbs as the base.
- Spread a generous portion of the creamy cheesecake filling over the crumb foundation.
- Distribute fresh strawberry pieces across the filling, creating a colorful and flavorful layer.
- Repeat the layering process, alternating Oreo crumbs, cheesecake filling, and strawberries until the cup is filled.
- Chill the assembled cups in the refrigerator for a minimum of 1 hour, allowing flavors to meld and texture to set.
- Serve directly from the refrigerator, garnishing with additional strawberries or Oreo crumbs if desired.
Notes
- Crushing Oreos with a food processor ensures a fine, even texture that creates a perfect base for the cheesecake cups.
- Using room temperature cream cheese prevents lumps and helps achieve a smoother, creamier filling that blends effortlessly.
- Letting strawberries sit with sugar helps release their natural juices, intensifying the fruity flavor and creating a delightful syrup.
- Chilling the dessert allows flavors to meld together, resulting in a more harmonious and rich taste experience.
- Prep Time: 25 minutes
- Cook Time: 1 hour
- Category: Desserts, Snacks
- Method: Blending
- Cuisine: American
Nutrition
- Serving Size: 4
- Calories: 460 kcal
- Sugar: 37 g
- Sodium: 170 mg
- Fat: 31 g
- Saturated Fat: 19 g
- Unsaturated Fat: 10 g
- Trans Fat: 0.5 g
- Carbohydrates: 38 g
- Fiber: 1 g
- Protein: 5 g
- Cholesterol: 95 mg
Ethan Caldwell
Founder & Culinary Innovator
Expertise
Farm-to-table cooking, Seasonal recipe creation, Culinary storytelling, Food photography and styling
Education
The Chef’s Academy (Indianapolis, IN)
Ethan didn’t just fall in love with food, he grew into it, surrounded by fields, farmers’ markets, and family meals that told a story.
After sharpening his skills at The Chef’s Academy, he took his passion straight into the farm-to-table movement, working side-by-side with local growers and seasonal flavors.
He believes every recipe should feel like a walk through a summer market: colorful, fresh, and full of possibility.
Outside the kitchen, Ethan’s idea of a perfect day is hiking mountain trails, digging into heirloom vegetables, and hosting casual dinners where seconds are always encouraged.