
Heavenly Peanut Butter Balls With Chocolate Rice Krispies Recipe
Sweet memories of childhood snacking dance around these delightful peanut butter balls with chocolate rice krispies that promise pure delight.
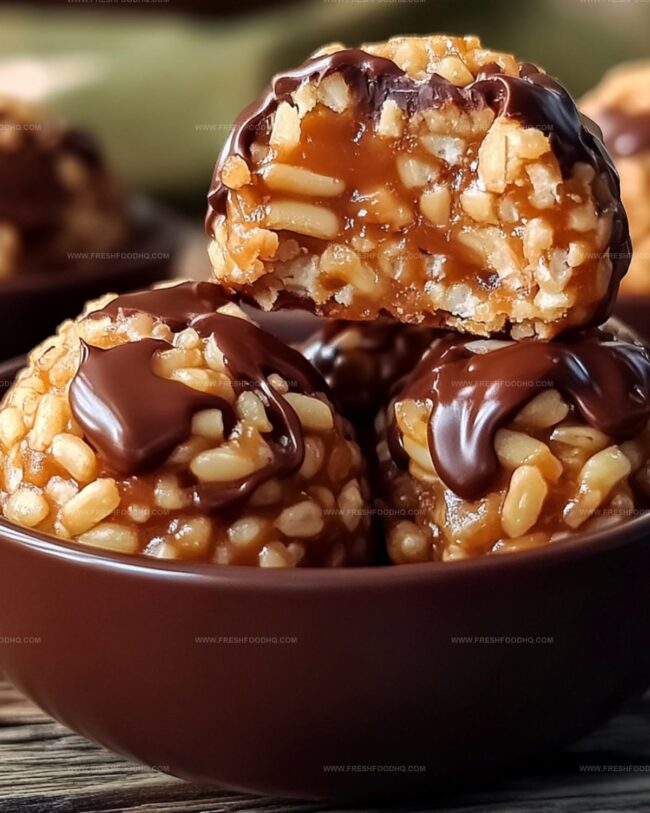
Crunchy cereal meets creamy nut spread in a magical combination.
Childhood treats often spark nostalgic moments of pure joy.
Each bite delivers a perfect balance between smooth and crisp textures.
Chocolate coating adds an irresistible layer of decadence to these simple yet incredible morsels.
No fancy kitchen skills required – just basic ingredients and a playful spirit.
Whip up these irresistible bites and watch everyone’s faces light up with excitement.
Peanut Butter Balls with Chocolate Rice Krispies: Fun and Tasty

Ingredients for Peanut Butter Balls with Chocolate Rice Krispies
For the Core Ingredients:For the Chocolate:For the Seasoning and Preparation:How to Make Peanut Butter Balls with Chocolate Rice Krispies
Step 1: Prepare Workspace
Get a muffin tin ready by lining it with paper or silicone liners. This will help you easily remove the treats later and keep your workspace clean.
Step 2: Create Peanut Butter Base
In a saucepan over low heat, blend together:Stir the mixture until it becomes smooth and well-combined. Remove from heat once everything is melted and mixed.
Step 3: Fold in Crispy Crunch
Gently add Rice Krispies cereal to the peanut butter mixture. Fold carefully to ensure every cereal piece gets coated evenly without breaking the crispy texture.
Step 4: Shape Delightful Cups
Spoon the peanut butter and cereal mixture into each muffin liner. Press down gently to create a solid base for your cups.
Step 5: Melt Chocolate Magic
In a separate saucepan, melt chocolate chips over low heat. Stir until the chocolate becomes completely smooth and has a glossy appearance.
Step 6: Top with Chocolate Goodness
Pour the melted chocolate over each peanut butter cup. Use a spoon to spread the chocolate evenly, covering the entire surface of the peanut butter base.
Step 7: Chill and Set
Place the muffin tin in the refrigerator. Let the cups cool and set for at least one hour.
The chocolate should become firm and solid.
Step 8: Serve and Enjoy
Remove the cups from the refrigerator.
Peel away the liners and serve these irresistible treats. Perfect for satisfying your sweet tooth or sharing with friends!
Tips for Peanut Butter Balls with Chocolate Rice Krispies

Variations on Peanut Butter Balls with Chocolate Rice Krispies
Pairing Suggestions for Peanut Butter Balls
How to Store Peanut Butter Balls with Chocolate Rice Krispies
Place peanut butter balls in an airtight container, separating layers with parchment paper. Keep chilled for up to 5 days, maintaining their crisp texture and rich flavor.
Wrap individual balls tightly in plastic wrap, then store in a freezer-safe container. Freeze for up to 3 months, ensuring maximum freshness and taste.
Avoid leaving these treats out for more than 2 hours, as the chocolate can melt and the peanut butter mixture can become soft and less appealing.
Thaw frozen treats in the refrigerator overnight. For a quick revival, let them sit at room temperature for 10-15 minutes before serving to restore their delightful texture.
FAQs
Yes, you can substitute Rice Krispies with similar crispy cereals like corn flakes or graham cereal for a similar texture and crunch.
Not automatically. Check that your Rice Krispies and chocolate chips are certified gluten-free before using to ensure the entire recipe meets gluten-free requirements.
Reduce the honey amount or use unsweetened dark chocolate instead of regular chocolate chips to lower the overall sweetness of the recipe.
Absolutely! Kids can help measure ingredients, mix the peanut butter and cereal, and watch the chocolate melting process under adult supervision.
Print
Peanut Butter Balls With Chocolate Rice Krispies Recipe
- Total Time: 20 minutes
- Yield: 24 1x
Description
Irresistible peanut butter balls dance with chocolate-coated rice krispies in this delightful no-bake treat. Sweet and crunchy morsels promise a quick dessert that delivers pure indulgence with minimal effort.
Ingredients
Main Ingredients:
- 1 cup chunky peanut butter
- 3 cups Rice Krispies cereal
- 1 1/2 cups chocolate chips (vegan chocolate chips for plant-based option)
Binding Ingredients:
- 6 tablespoons honey
Seasoning:
- 1/8 teaspoon salt
Instructions
- Prepare a muffin tin by lining with paper or silicone liners to ensure easy removal of the treats.
- Create a smooth peanut butter base by gently heating peanut butter, honey, and salt in a saucepan over low heat until fully combined and glossy.
- Carefully fold Rice Krispies cereal into the warm peanut butter mixture, ensuring each crisp is evenly coated with the sweet blend.
- Distribute the peanut butter-cereal mixture into the prepared muffin tin, delicately pressing to form uniform cups with slightly raised edges.
- Melt chocolate chips in a separate saucepan over low heat, stirring continuously until the chocolate transforms into a silky, liquid consistency.
- Generously drizzle the melted chocolate over each peanut butter cup, using a spoon to spread the chocolate evenly and create a smooth top layer.
- Chill the completed treats in the refrigerator for approximately 60 minutes, or until the chocolate sets completely and becomes firm to the touch.
- Gently remove the liners from the chilled cups, revealing the glossy chocolate-topped peanut butter and Rice Krispies treats ready to be savored.
Notes
- Swap out traditional peanut butter for almond or sunflower seed butter to accommodate nut allergies and create a safer treat.
- Use dark chocolate chips for a richer flavor profile and potential antioxidant benefits that boost the nutritional value.
- Sprinkle sea salt or crushed nuts on top before chilling to add extra texture and enhance the overall taste complexity.
- Store these treats in an airtight container in the refrigerator for up to a week, making them perfect for meal prep and quick snacking.
- Prep Time: 15 minutes
- Cook Time: 5 minutes
- Category: Snacks, Desserts
- Method: Melting
- Cuisine: American
Nutrition
- Serving Size: 24
- Calories: 146
- Sugar: 9 g
- Sodium: 51 mg
- Fat: 7 g
- Saturated Fat: 2 g
- Unsaturated Fat: 4 g
- Trans Fat: 0 g
- Carbohydrates: 18 g
- Fiber: 1 g
- Protein: 3 g
- Cholesterol: 0 mg
Ethan Caldwell
Founder & Culinary Innovator
Expertise
Farm-to-table cooking, Seasonal recipe creation, Culinary storytelling, Food photography and styling
Education
The Chef’s Academy (Indianapolis, IN)
Ethan didn’t just fall in love with food, he grew into it, surrounded by fields, farmers’ markets, and family meals that told a story.
After sharpening his skills at The Chef’s Academy, he took his passion straight into the farm-to-table movement, working side-by-side with local growers and seasonal flavors.
He believes every recipe should feel like a walk through a summer market: colorful, fresh, and full of possibility.
Outside the kitchen, Ethan’s idea of a perfect day is hiking mountain trails, digging into heirloom vegetables, and hosting casual dinners where seconds are always encouraged.