
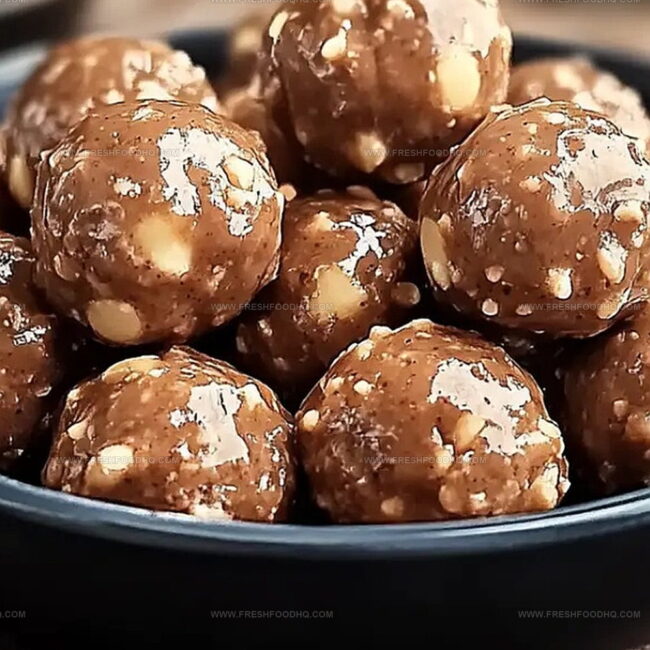
Try Our Sweet No-Bake Peanut Butter Balls Recipe Today
Crafting delightful no-bake peanut butter balls brings pure joy to snack time.
Sweet treats like these always spark excitement in the kitchen.
Minimal ingredients combine effortlessly for a creamy, irresistible bite-sized delight.
Chocolate chips add an extra layer of decadence to these simple confections.
Chilling helps these little spheres develop incredible texture and rich flavor.
Kids and adults alike will find themselves reaching for seconds of these protein-packed morsels.
Let’s whip up a batch that promises to become your new favorite quick dessert.
Why No-Bake Peanut Butter Balls Are a Quick Treat
Ingredients for No-Bake Peanut Butter Balls
For the Base:For the Sweetener:For the Coating:How to Make No-Bake Peanut Butter Balls Easily
Step 1: Whip Up Creamy Peanut Butter Base
Mix together in a large bowl:Blend until the mixture becomes silky smooth and completely combined.
Step 2: Fold In Sweet Powdery Magic
Gradually add powdered sugar to the peanut butter mixture.
Stir continuously until the ingredients form a thick, moldable dough that holds its shape perfectly.
Step 3: Shape Delightful Bite-Sized Spheres
Use your hands to roll the mixture into small, uniform balls.
Gently place each ball on a parchment-lined baking sheet, ensuring they’re not touching each other.
Step 4: Prepare Luxurious Chocolate Coating
Melt chocolate chips in a microwave-safe bowl.
Heat in 30-second intervals, stirring between each session to prevent burning. Continue until the chocolate becomes completely smooth and glossy.
Step 5: Dunk and Decorate
Carefully dip each peanut butter ball into the melted chocolate. Use a fork to lift and tap off excess chocolate, creating a thin, even coating.
Return the chocolate-covered treats to the parchment-lined sheet.
Step 6: Chill and Set
Place the baking sheet in the refrigerator.
Allow the chocolate-covered balls to firm up for approximately 15-20 minutes until the chocolate becomes completely solid and shiny.
Step 7: Store and Enjoy
Transfer the finished treats to an airtight container.
Store in the refrigerator for up to one week, though they’ll likely be devoured much sooner!
Tips for Perfect No-Bake Peanut Butter Balls
Fun Variations on No-Bake Peanut Butter Balls
Pairing Ideas with Peanut Butter Balls
Storing No-Bake Peanut Butter Balls Safely
Place peanut butter balls in an airtight container, separating layers with parchment paper to prevent sticking. Keep chilled for up to 1 week.
Wrap each ball individually in plastic wrap, then store in a freezer-safe container for maximum 3 months. Seal tightly to prevent freezer burn.
Remove desired number of balls from freezer and let sit at room temperature for 15-20 minutes before enjoying. No need to microwave or reheat.
Bring refrigerated or frozen balls to room temperature for best texture and flavor, allowing chocolate coating to soften slightly.
FAQs
While delicious, they are a treat high in sugar and calories. They contain protein from peanut butter but should be enjoyed in moderation as a dessert.
Yes, crunchy peanut butter works perfectly and adds extra texture to the balls. Just ensure it’s well mixed with other ingredients.
When stored in an airtight container in the refrigerator, they will stay fresh for about 1-2 weeks. Always check for any signs of spoilage before consuming.
No special equipment is required. You’ll just need a mixing bowl, baking sheet, and basic kitchen tools like a spoon and microwave or double boiler for melting chocolate.
Print
No-Bake Peanut Butter Balls Recipe
- Total Time: 35 minutes
- Yield: 24 1x
Description
Irresistible no-bake peanut butter balls dance with sweet chocolate and creamy goodness, offering a quick dessert that delights chocolate and peanut butter fans. Minimal ingredients and simple steps make this treat perfect for quick cravings and casual gatherings.
Ingredients
Primary Ingredients:
- 3 cups powdered sugar
- 1 cup creamy peanut butter
- 1/2 cup unsalted butter, softened
Coating/Binding Ingredients:
- 2 cups chocolate chips (milk or semi-sweet)
Flavor Enhancer:
- 1 teaspoon vanilla extract
Instructions
- Blend peanut butter, softened butter, and vanilla extract in a large mixing bowl until the mixture achieves a creamy, uniform consistency.
- Gradually fold in powdered sugar, mixing thoroughly to create a moldable dough that holds its shape.
- Using clean hands, roll the mixture into uniform bite-sized spheres, placing them carefully on a parchment-lined tray.
- Prepare a microwave-safe bowl and melt chocolate chips in 30-second intervals, stirring between each heating cycle until smooth and glossy.
- Carefully immerse each peanut butter ball into the melted chocolate, using a fork to ensure complete and even coating.
- Gently transfer the chocolate-covered balls back to the parchment-lined tray, allowing excess chocolate to drip off.
- Refrigerate for approximately 15-20 minutes at 40°F until the chocolate hardens and creates a crisp shell around the peanut butter centers.
- Once set, remove from refrigerator and serve chilled, storing any remaining treats in an airtight container for up to one week.
Notes
- Prevent sticky hands by lightly coating your palms with cooking spray or butter when rolling the peanut butter mixture into balls.
- Customize the recipe by using dark, milk, or white chocolate for coating to suit different taste preferences.
- For a gluten-free version, ensure all ingredients are certified gluten-free, especially the powdered sugar and chocolate chips.
- Create a protein-packed snack by adding a scoop of protein powder to the peanut butter mixture for an extra nutritional boost.
- Prep Time: 15 minutes
- Cook Time: 20 minutes
- Category: Snacks, Desserts
- Method: Blending
- Cuisine: American
Nutrition
- Serving Size: 24
- Calories: 236
- Sugar: 19 g
- Sodium: 57 mg
- Fat: 16 g
- Saturated Fat: 5 g
- Unsaturated Fat: 10 g
- Trans Fat: 0 g
- Carbohydrates: 21 g
- Fiber: 1 g
- Protein: 5 g
- Cholesterol: 12 mg
Ethan Caldwell
Founder & Culinary Innovator
Expertise
Farm-to-table cooking, Seasonal recipe creation, Culinary storytelling, Food photography and styling
Education
The Chef’s Academy (Indianapolis, IN)
Ethan didn’t just fall in love with food, he grew into it, surrounded by fields, farmers’ markets, and family meals that told a story.
After sharpening his skills at The Chef’s Academy, he took his passion straight into the farm-to-table movement, working side-by-side with local growers and seasonal flavors.
He believes every recipe should feel like a walk through a summer market: colorful, fresh, and full of possibility.
Outside the kitchen, Ethan’s idea of a perfect day is hiking mountain trails, digging into heirloom vegetables, and hosting casual dinners where seconds are always encouraged.