
Fluffy No-Bake Coconut Cream Balls Recipe for Sweet Lovers
Sweet memories of childhood snacks spark joy when crafting these delightful no-bake coconut cream balls that promise pure bliss.
Creamy textures and rich flavors dance together in a simple treat.
Minimal ingredients mean maximum satisfaction for anyone seeking a quick dessert.
Coconut lovers will absolutely adore this effortless recipe that requires zero baking skills.
Soft, sweet morsels melt perfectly in your mouth with each delectable bite.
Kitchen novices and experienced bakers alike can whip up these delicious spheres in minutes.
You’ll fall in love with how easily these delectable treats come together, making them the perfect spontaneous indulgence.
What Makes No-Bake Coconut Cream Balls Special
Ingredients for No-Bake Coconut Cream Balls
For the Coconut Base:For the Coating and Optional Decoration:How to Prepare Coconut Cream Balls Without Baking
Step 1: Create Coconut Magic
Grab a spacious mixing bowl and toss in these delightful ingredients:Stir everything together with enthusiasm until the mixture becomes wonderfully sticky and well-combined. The blend will look like a tropical dream ready to become something magical.
Step 2: Shape Your Tasty Treasures
Scoop small portions of the coconut mixture using a spoon or cookie scoop. Roll each portion gently between your palms to form perfect little spheres.
Place each coconut ball onto a parchment-lined baking sheet. Continue shaping until you’ve used every bit of the delicious mixture.
Step 3: Add Sparkly Coconut Coating
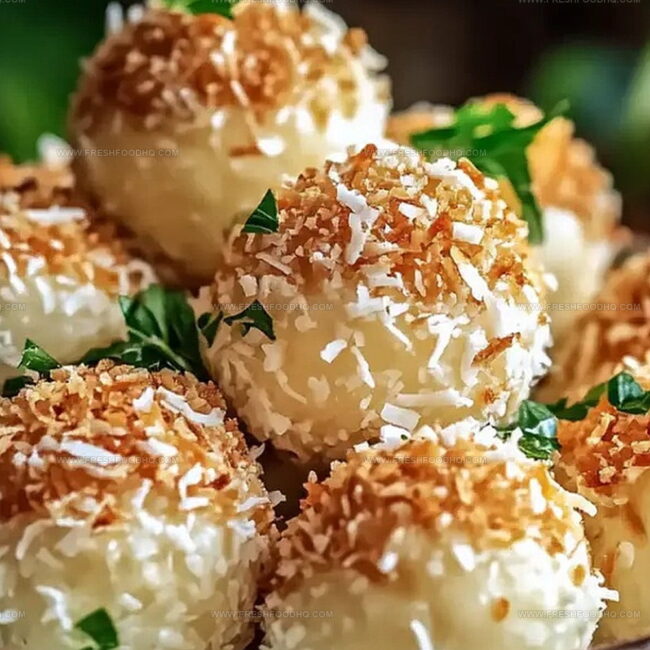
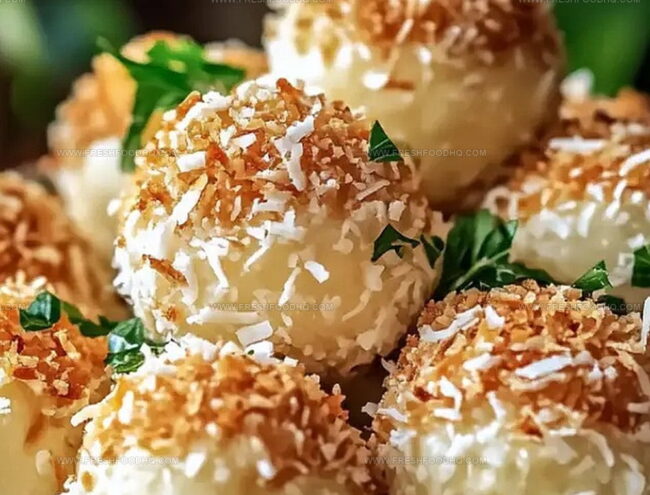
Pour some extra shredded coconut onto a separate plate. Gently roll each coconut ball in the fresh coconut, ensuring a beautiful, snowy exterior.
For an indulgent twist, melt some white chocolate and dip each ball halfway, creating a luxurious half-dipped look.
Step 4: Chill and Delight
Transfer your coconut balls to the refrigerator.
Let them rest and firm up for 1-2 hours. The chilling process will help them hold their shape and intensify their scrumptious flavor.
Once set, these heavenly bites are ready to be devoured and shared with friends and family.
Tips for Perfect Coconut Cream Ball Texture
Fun Add-Ins for Coconut Cream Ball Recipes
Great Pairings for No-Bake Coconut Treats
Storage Tips for Coconut Cream Balls
Seal coconut cream balls in an airtight container, placing parchment paper between layers to prevent sticking. Keep refrigerated for up to 5 days, maintaining their fresh texture and flavor.
Arrange balls on a baking sheet, freeze until solid, then transfer to a freezer-safe container. Store frozen for 2-3 months, ensuring they remain tasty and intact.
Remove desired number of balls from freezer, let sit at room temperature for 15-20 minutes before serving. They’ll regain their soft, creamy consistency without losing quality.
These no-bake treats are best enjoyed chilled, so avoid microwaving or warming them, which could alter their delightful texture and taste.
FAQs
While delicious, they’re a sweet treat high in sugar and calories. They contain condensed milk and powdered sugar, making them more of an indulgent dessert than a health food.
Absolutely! You can prepare these coconut cream balls up to 5 days in advance. Keep them stored in an airtight container in the refrigerator, and they’ll stay fresh and delicious.
No special equipment is required. You’ll just need a mixing bowl, baking sheet, parchment paper, and your hands to roll the balls. A basic kitchen setup works perfectly.
Print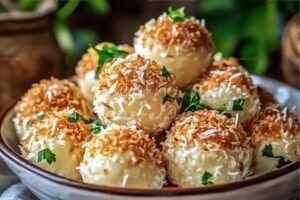
No-Bake Coconut Cream Balls Recipe
- Total Time: 2 hours 20 minutes
- Yield: 20 1x
Description
Coconut cream balls bring tropical bliss to dessert lovers seeking quick, indulgent treats. Sweet, creamy spheres roll with coconut’s rich essence, offering pure delight that melts effortlessly on your palate.
Ingredients
Main Ingredients:
- 2 cups (480 ml) shredded sweetened coconut
- 1/2 cup (120 ml) sweetened condensed milk
Secondary Ingredients:
- 1/4 cup (30 g) powdered sugar
- 1/2 teaspoon (2.5 ml) vanilla extract
Optional Ingredients:
- 1/4 cup (60 ml) melted white chocolate
- Extra shredded sweetened coconut (for coating)
Instructions
- In a spacious mixing vessel, thoroughly amalgamate shredded coconut, sweetened condensed milk, powdered sugar, and vanilla extract until the mixture achieves a cohesive, slightly tacky consistency.
- Using clean hands, carefully portion out small rounds of the mixture, gently rolling each into uniform spherical shapes with smooth, even pressure.
- Arrange the delicate coconut orbs onto a parchment-lined tray, ensuring they are not touching each other to prevent sticking.
- Generously enrobe each ball with additional fine coconut shavings, creating a delicate exterior coating that adds texture and visual appeal.
- Optional: For an indulgent variation, delicately immerse half of each ball into melted white chocolate, allowing excess to drip away before placement.
- Transfer the prepared coconut confections to the refrigerator, allowing them to firm and chill for approximately 90-120 minutes until they achieve a solid, compact structure.
- Once thoroughly cooled and set, serve these tropical-inspired treats directly from the refrigerator for optimal flavor and texture preservation.
Notes
- Customize sweetness by adjusting powdered sugar, ensuring a balanced flavor that’s not overpowering.
- Use unsweetened shredded coconut for a less sugary version, perfect for those watching sugar intake.
- Keep hands slightly damp while rolling balls to prevent mixture from sticking and create smoother, more uniform shapes.
- Store in an airtight container in the refrigerator for up to a week, making them a convenient make-ahead dessert or snack.
- Prep Time: 20 minutes
- Cook Time: 2 hours
- Category: Snacks, Desserts
- Method: Chilling
- Cuisine: American
Nutrition
- Serving Size: 20
- Calories: 134
- Sugar: 15 g
- Sodium: 15 mg
- Fat: 7 g
- Saturated Fat: 6 g
- Unsaturated Fat: 1 g
- Trans Fat: 0 g
- Carbohydrates: 17 g
- Fiber: 2 g
- Protein: 1 g
- Cholesterol: 5 mg
Ethan Caldwell
Founder & Culinary Innovator
Expertise
Farm-to-table cooking, Seasonal recipe creation, Culinary storytelling, Food photography and styling
Education
The Chef’s Academy (Indianapolis, IN)
Ethan didn’t just fall in love with food, he grew into it, surrounded by fields, farmers’ markets, and family meals that told a story.
After sharpening his skills at The Chef’s Academy, he took his passion straight into the farm-to-table movement, working side-by-side with local growers and seasonal flavors.
He believes every recipe should feel like a walk through a summer market: colorful, fresh, and full of possibility.
Outside the kitchen, Ethan’s idea of a perfect day is hiking mountain trails, digging into heirloom vegetables, and hosting casual dinners where seconds are always encouraged.