The Ultimate No-Bake Butterfinger Bliss Pie Recipe for Sweet Lovers
Crafting a delectable no-bake butterfinger bliss pie can turn an ordinary dessert into a creamy, crunchy sensation that’ll make you the star of any gathering.
Chocolate lovers will swoon over this simple yet indulgent treat that requires zero oven time.
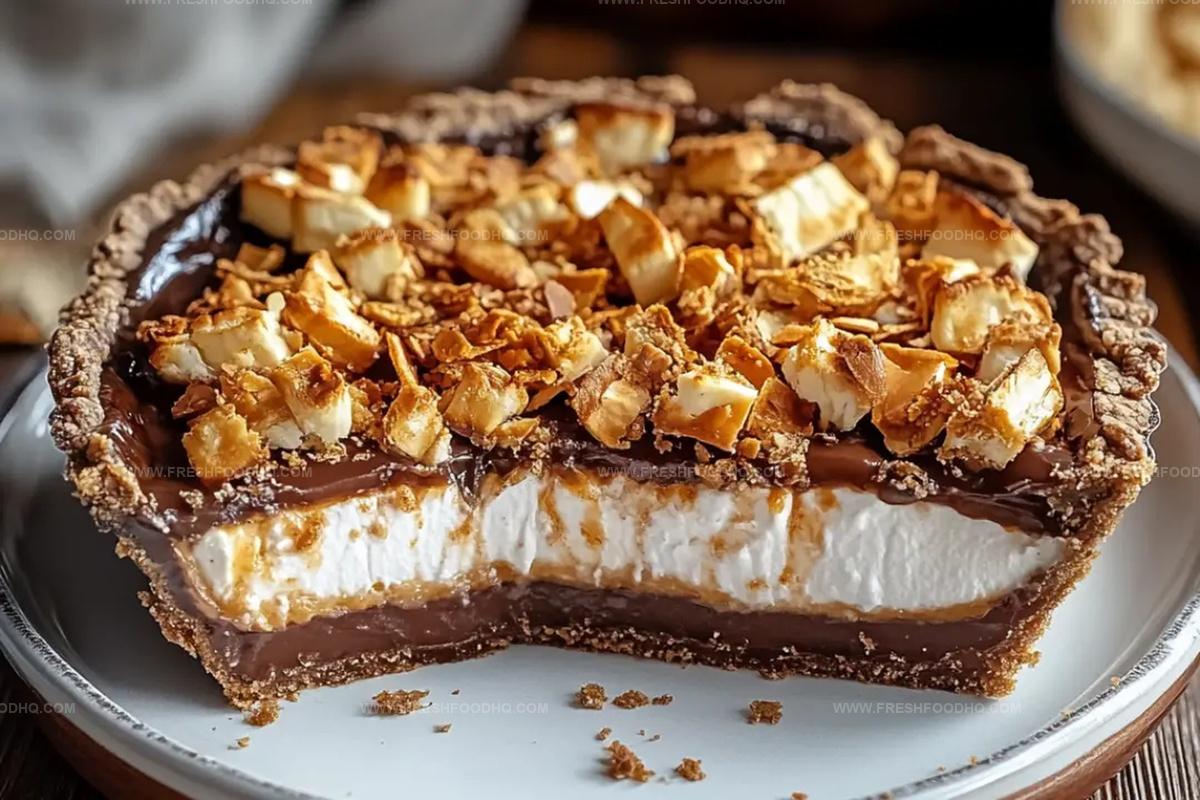
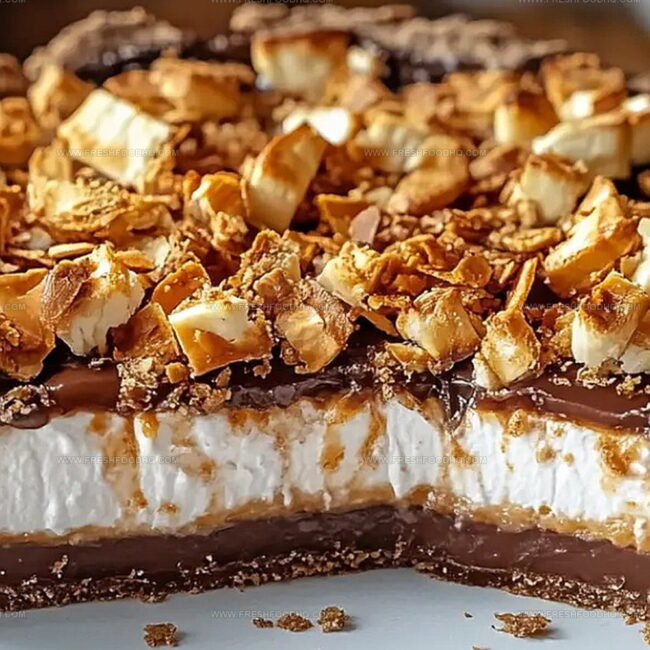
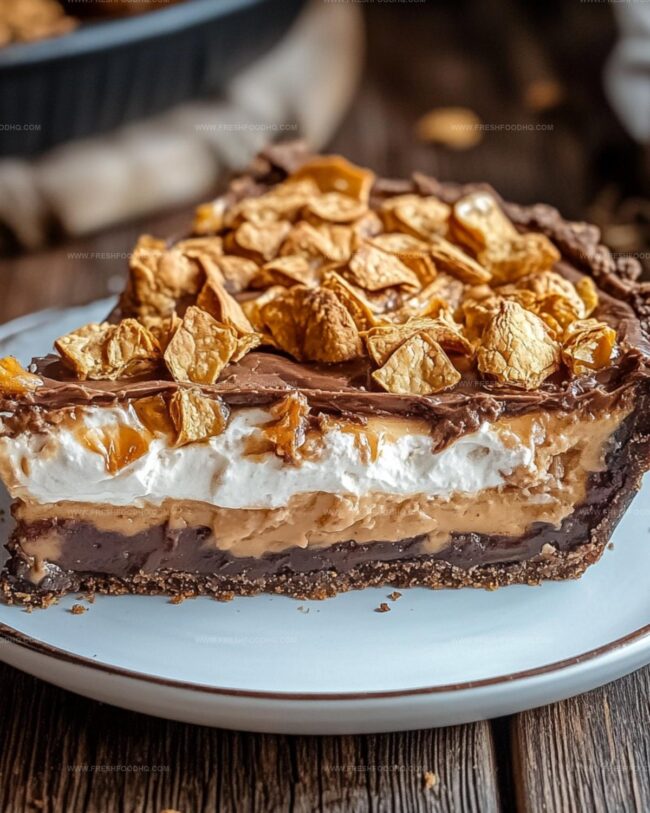
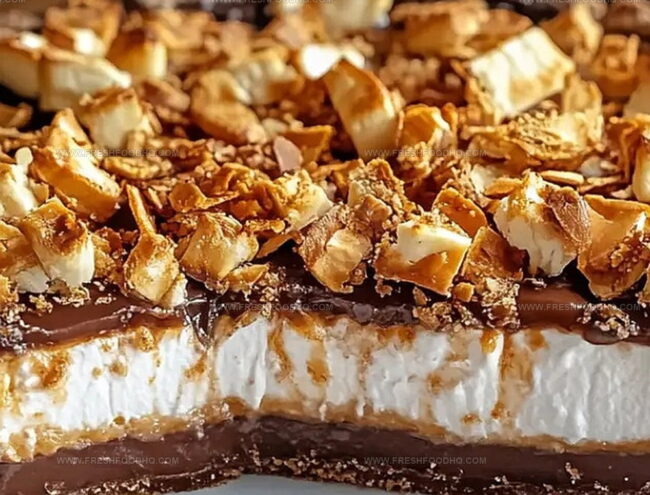
Crushed butterfinger bars add a delightful crunch to the silky smooth filling, creating a mouthwatering contrast of textures.
Rich cream cheese blends seamlessly with whipped topping, forming a luxurious base that melts in your mouth.
Graham cracker crust provides the perfect foundation for this heavenly dessert that comes together in minutes.
Cool and set the pie in the refrigerator, letting the flavors meld into a dreamy masterpiece.
Impress everyone with this effortless, show-stopping dessert that promises pure bliss in every single bite.
No-Bake Butterfinger Bliss Pie: Sweet and Simple
Ingredients for No-Bake Butterfinger Bliss Pie
For the Filling:For the Crust:For the Garnish:How to Assemble No-Bake Butterfinger Bliss Pie
Step 1: Whip Creamy Base
In a spacious mixing bowl, grab your electric mixer and blend cream cheese with peanut butter. Whip these ingredients until they transform into a silky, smooth consistency with no lumps.
Step 2: Fold Fluffy Layers
Gently incorporate half of the whipped topping into the creamy mixture. Use soft folding motions to maintain the light, airy texture without deflating the whipped topping.
Step 3: Add Crunchy Butterfingers
Mix in half of the chopped Butterfingers candy bars into the peanut butter blend. This will create delightful bursts of sweet, crispy goodness throughout the pie.
Step 4: Fill Graham Cracker Crust
Transfer the entire mixture into the prepared graham cracker crust. Use a spatula to spread the filling evenly, ensuring a smooth and level surface.
Step 5: Top and Decorate
Cover the pie filling with the remaining whipped topping, creating a soft, cloud-like layer. Sprinkle the remaining chopped Butterfingers across the top for a gorgeous, tempting garnish.
Step 6: Chill and Serve
Place the pie in the refrigerator for 2-4 hours or overnight. This allows the pie to set and the flavors to meld together.
When ready, slice and serve the chilled pie for a decadent dessert experience.
Tips to Nail No-Bake Butterfinger Bliss Pie
Flavor Variations for No-Bake Butterfinger Bliss Pie
Pairings for No-Bake Butterfinger Bliss Pie
How to Keep No-Bake Butterfinger Bliss Pie Fresh
Cover the pie tightly with plastic wrap or aluminum foil and store in the refrigerator for up to 5 days. Keep away from strong-smelling foods to prevent flavor absorption.
Wrap the entire pie or individual slices in plastic wrap, then place in a freezer-safe container. Freeze for up to 2 months. Thaw in the refrigerator overnight before serving.
Separate remaining slices and place in an airtight container with wax paper between each slice to prevent sticking. Refrigerate for easy grab-and-go treats.
Best enjoyed cold straight from the refrigerator. If slightly softened, let sit at room temperature for 5-10 minutes before serving to restore optimal texture.
FAQs
Yes, you can substitute Butterfingers with other chocolate or peanut butter candy bars like Reese’s Pieces or Crunch bars for a similar flavor profile.
No, this recipe contains peanut butter, which is not safe for those with nut allergies. You would need to modify the recipe significantly to make it nut-free.
You’ll need an electric mixer, a large mixing bowl, a spatula, and a refrigerator. A graham cracker crust can be store-bought or homemade.
Print
No-Bake Butterfinger Bliss Pie Recipe
- Total Time: 10 minutes
- Yield: 8 1x
Description
Indulgent no-bake butterfinger bliss pie promises a heavenly chocolate and peanut butter experience that delights dessert enthusiasts. Crumbly cookie crust, silky filling, and crushed butterfinger candy create a quick, irresistible treat you’ll crave again and again.
Ingredients
Main Ingredients:
- 10.2 ounces (290 grams) fun-size Butterfingers, unwrapped and chopped
- 3/4 cup (180 milliliters) creamy peanut butter
- 8 ounces (225 grams) cream cheese, softened to room temperature
Topping and Binding Ingredients:
- 12 ounces (340 grams) whipped topping
Crust:
- 1 pre-made graham cracker pie crust
Instructions
- Whip cream cheese and peanut butter using an electric mixer until silky and uniform in texture, approximately 2-3 minutes.
- Incorporate half of the whipped topping, folding gently to maintain a light, airy consistency.
- Blend in half of the crushed Butterfingers, distributing evenly throughout the creamy mixture.
- Transfer the velvety filling into the prepared graham cracker crust, carefully smoothing the surface with a spatula for an even layer.
- Crown the pie with remaining whipped topping, creating a luscious cloud-like topping.
- Sprinkle the remaining crushed Butterfingers across the surface, adding a delightful crunch and visual appeal.
- Chill the pie in the refrigerator for 2-4 hours, or preferably overnight, allowing flavors to meld and texture to set perfectly.
- When ready to serve, slice with a sharp knife and present the chilled dessert, revealing its decadent layers and candy-studded surface.
Notes
- Soften cream cheese at room temperature for easier mixing and smoother texture.
- Crush Butterfingers finely for more even distribution throughout the pie, ensuring each bite has candy crunch.
- Use low-fat cream cheese and light whipped topping to create a lighter version of the dessert without sacrificing flavor.
- Freeze pie for a firmer, ice cream-like consistency that intensifies the chocolate and peanut butter flavors.
- Prep Time: 10 minutes
- Cook Time: 0 minutes
- Category: Desserts
- Method: Refrigerating
- Cuisine: American
Nutrition
- Serving Size: 8
- Calories: 416
- Sugar: 21 g
- Sodium: 205 mg
- Fat: 30 g
- Saturated Fat: 10 g
- Unsaturated Fat: 16 g
- Trans Fat: 0.5 g
- Carbohydrates: 26 g
- Fiber: 1 g
- Protein: 7 g
- Cholesterol: 37 mg
Ethan Caldwell
Founder & Culinary Innovator
Expertise
Farm-to-table cooking, Seasonal recipe creation, Culinary storytelling, Food photography and styling
Education
The Chef’s Academy (Indianapolis, IN)
Ethan didn’t just fall in love with food, he grew into it, surrounded by fields, farmers’ markets, and family meals that told a story.
After sharpening his skills at The Chef’s Academy, he took his passion straight into the farm-to-table movement, working side-by-side with local growers and seasonal flavors.
He believes every recipe should feel like a walk through a summer market: colorful, fresh, and full of possibility.
Outside the kitchen, Ethan’s idea of a perfect day is hiking mountain trails, digging into heirloom vegetables, and hosting casual dinners where seconds are always encouraged.