
Super Easy Homemade Wendys Frosty Recipe: Tasty Cold Treat
Crafting a delightful wendys frosty at home can transport you straight to childhood memories.
Nostalgic cravings often strike when least expected, bringing back sweet moments of drive-thru indulgence.
Cool and creamy, this frozen treat mimics the classic fast-food favorite with minimal ingredients.
Simple pantry staples become magic in your kitchen, blending into a smooth, irresistible dessert.
Chocolate lovers will appreciate how closely this recipe captures the original’s essence.
Minimal effort yields maximum satisfaction, promising a refreshing escape from ordinary desserts.
Come experience a taste that brings pure joy to your day.
Cool and Creamy: Homemade Wendy’s Frosty Recipe
Ingredients for Homemade Wendy’s Frosty
For the Base:For the Flavor Enhancers:For the Optional Additions:How to Whip Up a Delicious Wendy’s Frosty
Step 1: Gather Blending Equipment
Set up your blender and get ready to create a delicious frozen treat. Make sure your blender is clean and ready for action.
Step 2: Combine Creamy Ingredients
Toss these yummy ingredients into the blender:Blend everything until super smooth and you get a thick, dreamy milkshake-like mixture.
Step 3: Prepare Freezing Container
Select a loaf pan or shallow freezer-safe container.
Pour your chocolate mixture into the container, making sure it’s evenly spread.
Step 4: Initial Freezing Stage
Place the container in the freezer.
Set a timer for 30 minutes to start the first texture-building process.
Step 5: Break Up Ice Crystals
When the timer goes off, pull out the container and grab a whisk.
Vigorously stir the mixture to prevent large ice crystals from forming. This helps create that classic Frosty texture.
Step 6: Repeat Freezing and Whisking
Continue the freeze-and-whisk cycle every 30 minutes. Each time you whisk, you’ll see the mixture getting closer to the perfect Frosty consistency.
Step 7: Final Freezing
After about 3 hours of periodic whisking, your homemade Frosty will reach the ideal texture. Scoop into a glass, grab a spoon, and enjoy your creation!
Pro Tips for the Perfect Frosty Texture

Variations on Homemade Frosty Flavors

Pairing Ideas for Frosty Treats
How to Store Homemade Frosty Safely
Store leftovers in an airtight container with a tight-fitting lid, keeping it in the coldest part of the refrigerator for up to 3 days. Cover the surface with plastic wrap to prevent freezer burn.
Transfer the Frosty to a freezer-safe container, seal tightly, and store for up to 2 months. Place a layer of plastic wrap directly on the surface to minimize ice crystals.
Remove from the freezer and let it sit at room temperature for 10-15 minutes. Gently stir with a spoon to restore the creamy texture before serving.
Use a hand mixer or whisk to blend the slightly thawed Frosty, helping break down ice crystals and return it to its original smooth consistency.
FAQs
Whisking prevents large ice crystals from forming and ensures a smooth, creamy texture similar to the original Wendy’s Frosty.
While chocolate milk provides the best flavor, you can substitute with regular milk and increase the cocoa powder for a similar chocolate taste.
Dutch-processed cocoa powder is recommended for a richer, more authentic chocolate flavor compared to natural cocoa powder.
Yes, it’s an easy no-bake dessert that kids can help prepare and will definitely enjoy eating, making it a fun family activity.
Print
Homemade Wendys Frosty Recipe
- Total Time: 3 hours 40 minutes
- Yield: 4 1x
Description
Chilled Wendy’s Frosty brings nostalgic milkshake memories straight to home kitchens. Cool chocolate bliss meets simple ingredients, creating a creamy dessert that delights without complicated techniques.
Ingredients
Main Ingredients:
- 4 cups (946 milliliters) chocolate milk
- 1/4 cup (30 grams) cocoa powder
Dairy Components:
- 8 ounces (226 grams) frozen whipped topping
- 7 ounces (198 grams) sweetened condensed milk
Instructions
- Gather all ingredients and a blender for a seamless preparation of the homemade Wendy’s Frosty.
- Combine chocolate milk, frozen whipped topping, sweetened condensed milk, and cocoa powder in the blender, processing until the mixture transforms into a velvety, uniform liquid with no visible lumps.
- Transfer the silky chocolate blend into a loaf pan, ensuring an even distribution for consistent freezing.
- Place the pan in the freezer at 0°F, allowing the mixture to begin its initial solidification phase.
- After 30 minutes, retrieve the pan and vigorously whisk the developing frosty to disrupt emerging ice crystals, maintaining a smooth texture.
- Repeat the whisking process every half hour for approximately 3 hours, monitoring the consistency and preventing large ice formations.
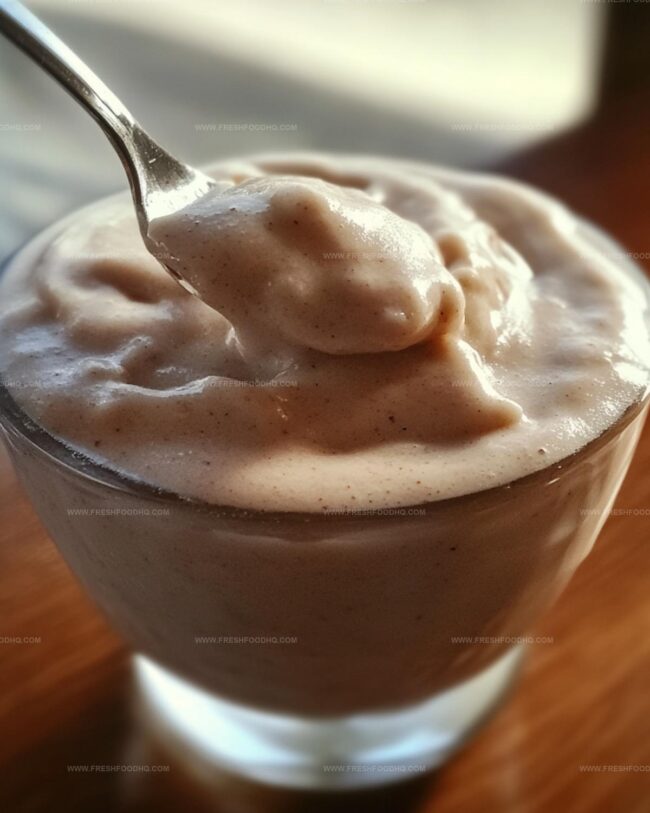
- When the mixture reaches a thick, creamy state resembling soft-serve ice cream, it’s ready to be scooped into serving glasses.
- Serve immediately for the most authentic Wendy’s Frosty experience, enjoying the rich chocolate flavor and luxurious, semi-frozen texture.
Notes
- Use full-fat chocolate milk for a richer, creamier texture that mimics the original Wendy’s Frosty experience.
- Experiment with different cocoa powder brands to find the deepest chocolate flavor that matches your preference.
- Whisking frequently prevents large ice crystals from forming, ensuring a smooth, soft-serve like consistency.
- For a lighter version, substitute low-fat milk and sugar-free whipped topping to reduce calories without compromising taste.
- Prep Time: 10 minutes
- Cook Time: 3 hours 30 minutes
- Category: Desserts, Milkshake
- Method: Blending
- Cuisine: American
Nutrition
- Serving Size: 4
- Calories: 310
- Sugar: 44g
- Sodium: 140mg
- Fat: 9g
- Saturated Fat: 6g
- Unsaturated Fat: 2g
- Trans Fat: 0.5g
- Carbohydrates: 51g
- Fiber: 3g
- Protein: 7g
- Cholesterol: 25mg
Ethan Caldwell
Founder & Culinary Innovator
Expertise
Farm-to-table cooking, Seasonal recipe creation, Culinary storytelling, Food photography and styling
Education
The Chef’s Academy (Indianapolis, IN)
Ethan didn’t just fall in love with food, he grew into it, surrounded by fields, farmers’ markets, and family meals that told a story.
After sharpening his skills at The Chef’s Academy, he took his passion straight into the farm-to-table movement, working side-by-side with local growers and seasonal flavors.
He believes every recipe should feel like a walk through a summer market: colorful, fresh, and full of possibility.
Outside the kitchen, Ethan’s idea of a perfect day is hiking mountain trails, digging into heirloom vegetables, and hosting casual dinners where seconds are always encouraged.