
Crunchy Homemade Peanut Butter Dog Treats Recipe for Your Pup
Crafting delectable homemade peanut butter dog treats brings joy to every furry companion’s mealtime.
Canine friends wag their tails with excitement over these wholesome snacks.
Simple ingredients make these goodies both nutritious and delightful.
No store-bought treat matches the love baked into each morsel.
Homemade means controlling exactly what goes into your pup’s special reward.
Small batch preparation ensures maximum freshness and tail-wagging satisfaction.
You’ll see those adorable eyes light up with pure canine happiness when these treats emerge from the kitchen.
Peanut Butter Dog Treats They’ll Love
Ingredients for Homemade Dog Treats
For the Main Ingredients:For the Binding and Liquid Ingredients:For the Preparation Ingredients:How to Bake Peanut Butter Dog Snacks
Step 1: Warm Up the Oven
Set your oven to a cozy 350F (175C). Grab a baking sheet and line it with parchment paper for easy cleanup.
This prepares the perfect baking environment for your furry friend’s special treats.
Step 2: Create the Magic Mixture
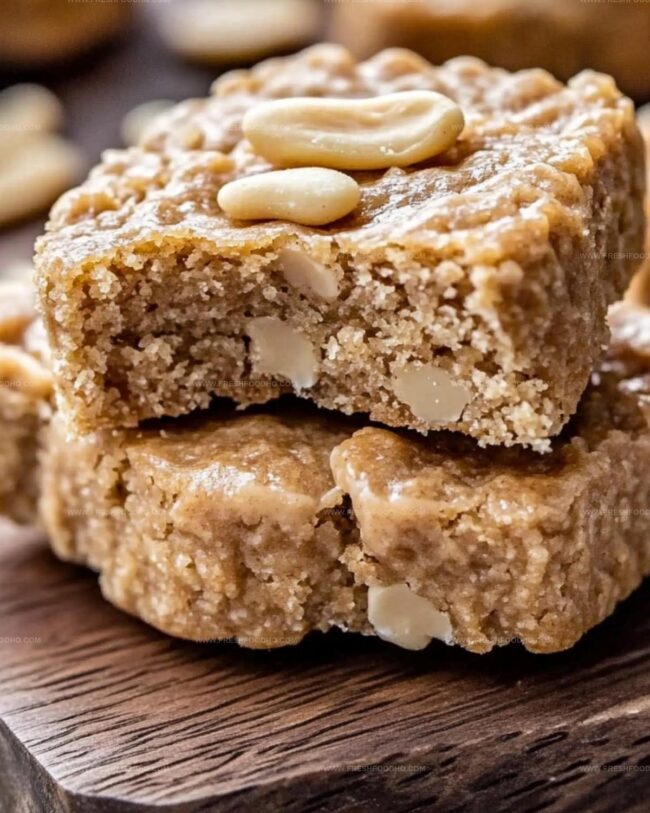
Grab your mixing bowl and toss in these yummy ingredients:Whip everything together until smooth and well-blended.
Slowly fold in whole wheat flour, mixing until the dough becomes slightly crumbly. If the mixture seems too dry, splash in a few drops of water to help it come together.
Step 3: Shape the Treats
Dust your countertop with a light sprinkle of flour. Roll out the dough to about a quarter-inch thickness.
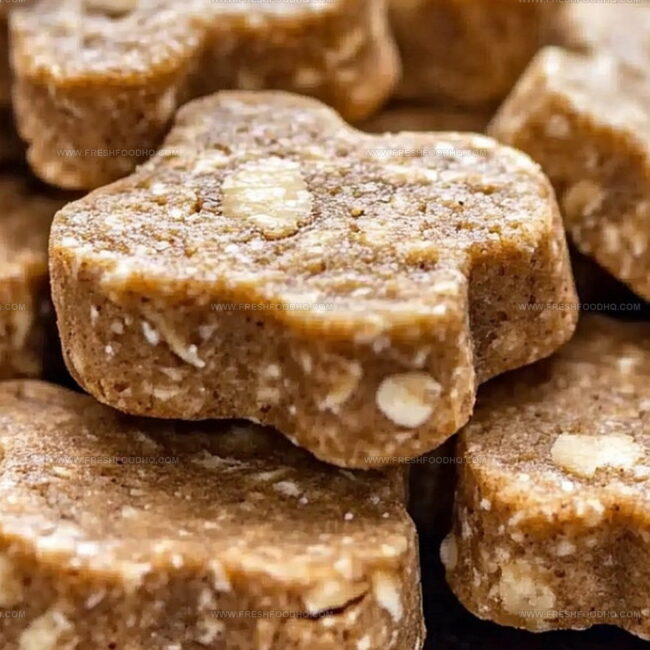
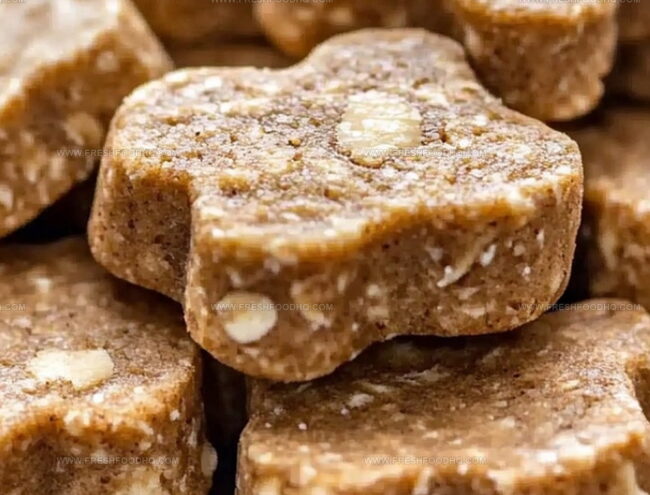
Use adorable bone-shaped or paw-print cookie cutters to create fun shapes that will make your pup’s tail wag with excitement.
Step 4: Bake to Perfection
Carefully transfer the cut-out treats to your prepared baking sheet.
Slide them into the preheated oven and bake for 15-25 minutes. Keep an eye out for a beautiful golden-brown color.
Want softer treats? Bake for less time.
Craving crunchier snacks? Let them bake a bit longer.
Step 5: Cool and Celebrate
Remove the treats from the oven and let them cool completely on a wire rack. Once cooled, serve up these homemade goodies to your four-legged friend and watch their eyes light up with joy!
Tips for Making Dog Treats Safely
Fun Variations of Dog Treat Flavors
What to Pair with Dog Treat Snacks
Perfectly Pair Pet Treats with:How to Store These Dog Treats
Seal cooled treats in an airtight container and store in the refrigerator for up to 1 week, keeping them fresh and preventing moisture buildup.
Pack treats in freezer-safe bags or containers, removing excess air to prevent freezer burn. Frozen treats will last 2-3 months and maintain their nutritional quality.
Keep treats in a sealed container at room temperature for 3-4 days, ensuring they remain dry and away from direct sunlight or heat sources.
Warm refrigerated or thawed treats in the oven at 250F for 5-7 minutes to restore crispness and enhance their texture before serving to your furry friend.
FAQs
These treats are generally safe for most dogs, but always consult your veterinarian first, especially if your dog has specific dietary restrictions or allergies.
Yes, you can swap whole wheat flour with oat flour, use honey instead of maple syrup, or replace banana with unsweetened applesauce if needed.
When stored in an airtight container at room temperature, these treats will stay fresh for about 1-2 weeks. For longer storage, keep them in the refrigerator for up to 3 weeks.
Print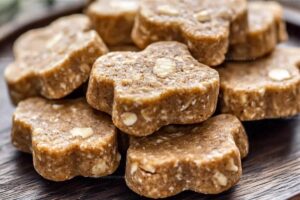
Homemade Peanut Butter Dog Treats Recipe
- Total Time: 42 minutes
- Yield: 12 1x
Description
Pawsome homemade peanut butter dog treats bring tail-wagging joy to canine companions. Simple ingredients and love combine to create delicious rewards that dogs adore, making treat time a special bonding moment for you and your furry friend.
Ingredients
Proteins and Binding Agents:
- 1 cup creamy peanut butter
- 1 egg
- 1/2 ripe banana, mashed
Sweeteners:
- 1 tablespoon maple syrup
Dry Ingredients:
- 1 cup whole wheat flour
Instructions
- Prepare the workspace by preheating the oven to 350F (175C) and lining a baking sheet with parchment paper for easy removal of treats.
- Create a smooth mixture by whisking peanut butter, egg, mashed banana, and maple syrup in a large mixing bowl until fully incorporated and creamy.
- Gradually fold in whole wheat flour, stirring continuously to prevent lumps and create a consistent dough texture that holds together without crumbling.
- If the mixture appears too dry, carefully add water, one tablespoon at a time, until the dough reaches a moldable consistency that can be rolled out.
- Dust the countertop with flour and gently roll the dough to approximately 1/2 inch thickness, ensuring an even surface for cutting.
- Use dog-themed cookie cutters to stamp out playful shapes, pressing firmly to create clean edges and maximum treat potential.
- Arrange the cut treats on the prepared baking sheet, spacing them slightly apart to allow for even heat distribution and crisp edges.
- Bake for 18-22 minutes, monitoring the color and watching for a golden-brown finish that indicates perfect crunchiness.
- Remove from the oven and allow treats to cool completely on a wire rack, ensuring they reach room temperature before serving to your canine companion.
Notes
- Ensure the peanut butter is xylitol-free, as this artificial sweetener is toxic to dogs.
- Experiment with alternative flour options like oat or rice flour for dogs with wheat sensitivities.
- 15 minutes for softer treats, 25 minutes for extra crunch.
- Store these homemade treats in an airtight container for up to a week, keeping them fresh and delicious for your furry friend.
- Prep Time: 20 minutes
- Cook Time: 22 minutes
- Category: Snacks
- Method: Baking
- Cuisine: American
Nutrition
- Serving Size: 12
- Calories: 182
- Sugar: 4 g
- Sodium: 75 mg
- Fat: 10 g
- Saturated Fat: 2 g
- Unsaturated Fat: 7 g
- Trans Fat: 0 g
- Carbohydrates: 17 g
- Fiber: 3 g
- Protein: 6 g
- Cholesterol: 18 mg
Ethan Caldwell
Founder & Culinary Innovator
Expertise
Farm-to-table cooking, Seasonal recipe creation, Culinary storytelling, Food photography and styling
Education
The Chef’s Academy (Indianapolis, IN)
Ethan didn’t just fall in love with food, he grew into it, surrounded by fields, farmers’ markets, and family meals that told a story.
After sharpening his skills at The Chef’s Academy, he took his passion straight into the farm-to-table movement, working side-by-side with local growers and seasonal flavors.
He believes every recipe should feel like a walk through a summer market: colorful, fresh, and full of possibility.
Outside the kitchen, Ethan’s idea of a perfect day is hiking mountain trails, digging into heirloom vegetables, and hosting casual dinners where seconds are always encouraged.