
The Best Homemade Peanut Butter Cup Cookies Recipe Ever Created
Crafting delectable homemade peanut butter cup cookies becomes a delightful adventure in sweet indulgence.
Chocolate lovers will swoon over this irresistible treat that combines creamy peanut butter with rich cocoa notes.
Decadent morsels emerge from your kitchen, promising pure bliss with every bite.
Simple ingredients blend seamlessly to create magic on your baking sheet.
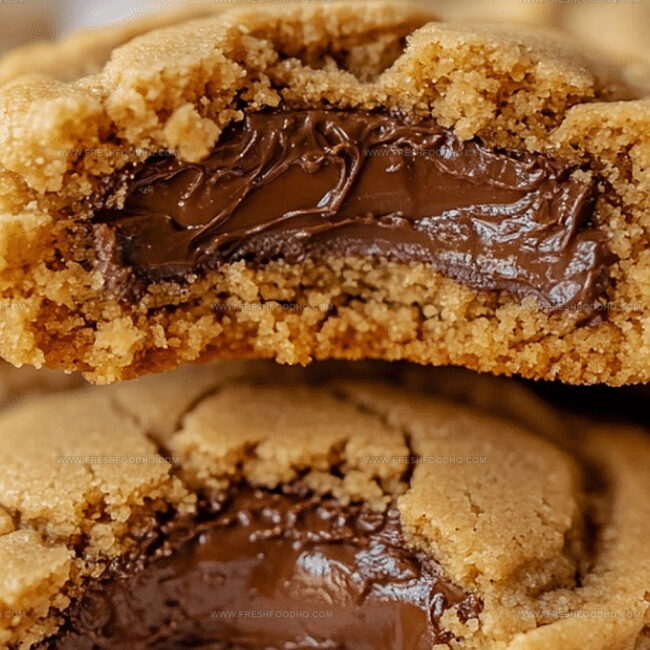
Soft centers nestled with chunks of chocolate-peanut butter goodness make these cookies impossible to resist.
Each crumbly, melt-in-your-mouth cookie delivers a perfect balance of nutty and sweet flavors.
Satisfaction awaits you in this mouthwatering recipe that will become an instant family favorite.
Whip up a batch and watch them disappear in moments of pure cookie joy.
Why Homemade Peanut Butter Cup Cookies Bursting With Chocolate Flavor Are Irresistible
Ingredients For Homemade Peanut Butter Cup Cookies Bursting With Chocolate Flavor
Peanut Butter Base:Chocolate Topping:Baking Essentials:How To Make Homemade Peanut Butter Cup Cookies Bursting With Chocolate Flavor

Step 1: Prepare Baking Station
Get your oven ready by heating it to 350F (180C). Line a baking sheet with parchment paper to prevent sticking and make cleanup a breeze.
Step 2: Create Cookie Dough Magic
Grab a mixing bowl and combine these delightful ingredients:Whisk and stir everything together until the mixture becomes smooth and perfectly blended.
Step 3: Shape Delectable Cookie Balls
Roll the dough into 24 adorable, equally sized balls. Gently place them on the prepared baking sheet, leaving some space between each cookie.
Step 4: First Baking Round
Pop the baking sheet into the oven and bake the cookies for 10 minutes. They’ll start to look slightly golden and smell absolutely amazing.
Step 5: Chocolate Peanut Butter Cup Surprise
Remove the cookies from the oven and immediately press a mini peanut butter cup into the center of each warm cookie. The heat will help the chocolate begin to melt softly.
Step 6: Final Baking Touch
Return the cookies to the oven for an additional 2-3 minutes. This will help the peanut butter cups become wonderfully soft and gooey.
Step 7: Cool and Enjoy
Let the cookies rest on the baking sheet until they cool completely. This allows them to set and become perfectly delicious. Serve and watch everyone’s eyes light up with joy!
Best Tips For Homemade Peanut Butter Cup Cookies Bursting With Chocolate Flavor
Flavor Twists For Homemade Peanut Butter Cup Cookies Bursting With Chocolate Flavor
Top Pairings For Homemade Peanut Butter Cup Cookies Bursting With Chocolate Flavor
Storage Guidelines For Homemade Peanut Butter Cup Cookies Bursting With Chocolate Flavor
Your Questions About Homemade Peanut Butter Cup Cookies Bursting With Chocolate Flavor Answered
Yes, but stir it well and drain excess oil to maintain the right cookie consistency.
Mini cups work best as they fit perfectly in the cookie center, but you can chop regular cups into smaller pieces.
Chill the dough for 15-20 minutes before rolling into balls, which helps maintain their shape and prevents excessive spreading.
Yes, use a gluten-free all-purpose flour blend to replace regular flour, ensuring the rest of the ingredients remain the same.
Print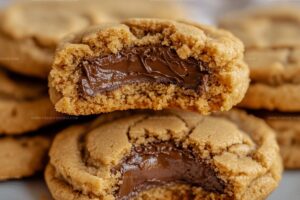
Homemade Peanut Butter Cup Cookies Bursting with Chocolate Flavor Recipe
- Total Time: 23 minutes
- Yield: 24 1x
Description
Indulgent Homemade Peanut Butter Cup Cookies blend rich chocolate and creamy peanut butter in a delightful dessert. Chocolate lovers will savor each bite of these irresistible treats that promise pure culinary bliss.
Ingredients
Main Ingredients:
- 1 cup creamy peanut butter
- 1 cup granulated sugar
- 1 egg
Flavor Enhancers:
- 1 teaspoon vanilla extract
Toppings:
- 24 mini peanut butter cups, unwrapped
Instructions
- Prepare the oven by heating to 350F (180C) and cover a baking sheet with parchment paper.
- Create a smooth mixture by blending peanut butter, sugar, egg, and vanilla extract in a mixing bowl until fully incorporated.
- Shape the dough into 24 uniform spheres, ensuring consistent size and placement on the prepared baking sheet.
- Bake the cookie balls for 10 minutes, creating a slightly golden base.
- Immediately after removing from the oven, gently press a mini peanut butter cup into the center of each warm cookie, allowing the chocolate to slightly melt.
- Return the cookie sheet to the oven and bake for an additional 2-3 minutes to soften the chocolate cups and complete the baking process.
- Transfer the cookies to a cooling rack, allowing them to set and reach room temperature before serving, which helps the peanut butter cups maintain their shape and texture.
Notes
- Ensure your peanut butter is at room temperature for smoother mixing and easier dough formation.
- Experiment with different nut butters like almond or cashew for alternative flavor profiles and dietary needs.
- Use natural or organic peanut butter for a less processed, healthier cookie option.
- Freeze mini peanut butter cups briefly before pressing into warm cookies to help them maintain shape and prevent complete melting.
- Prep Time: 10 minutes
- Cook Time: 13 minutes
- Category: Desserts, Snacks
- Method: Baking
- Cuisine: American
Nutrition
- Serving Size: 24
- Calories: 193
- Sugar: 11 g
- Sodium: 63 mg
- Fat: 13 g
- Saturated Fat: 4 g
- Unsaturated Fat: 8 g
- Trans Fat: 0 g
- Carbohydrates: 15 g
- Fiber: 1 g
- Protein: 5 g
- Cholesterol: 17 mg
Samantha Lee
Recipe Developer & Content Creator
Expertise
Plant-based and vegetarian recipes, Recipe testing and development, Food blogging and digital content creation, Culinary education and workshops
Education
Oregon Culinary Institute (Portland, OR)
Samantha sees cooking like painting, every fresh herb, every juicy tomato, a new splash of color on a canvas.
After graduating from Oregon Culinary Institute, she blended her love of global cuisines and plant-based cooking into recipes that feel fresh, fearless, and full of heart.
Samantha’s kitchen is a place where comfort food gets a modern remix and every meal feels like a little adventure. When she’s not cooking, she’s out exploring farmers’ markets, sketching new recipe ideas, or getting her hands dirty in a community garden.