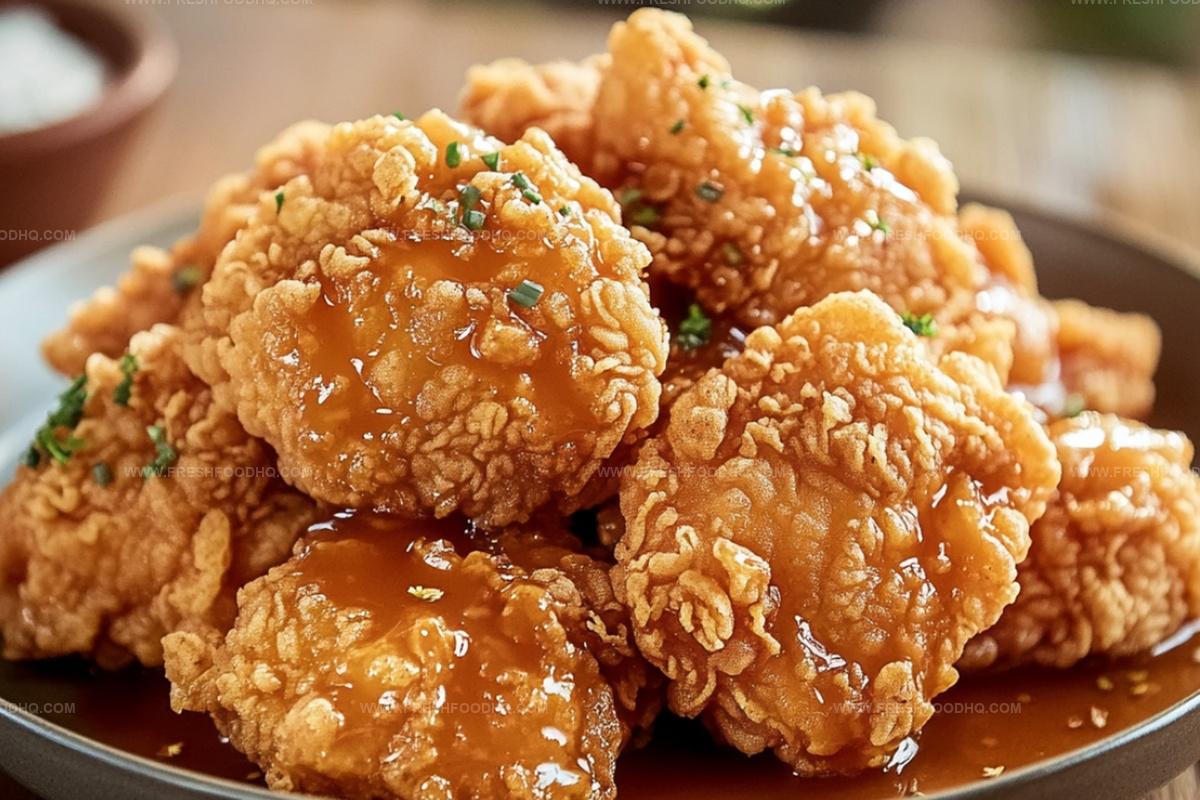
Easy Homemade KFC Chicken Recipe for Crispy Comfort Joy
Colonel sanders’ legendary crispy kfc chicken has sparked culinary curiosity among home cooks everywhere.
Passionate food enthusiasts often dream about recreating that iconic golden-brown crunch.
Secret spice blends might seem intimidating at first glance.
Our simplified approach breaks down complex techniques into manageable steps.
Authentic flavors combine perfectly with straightforward cooking methods.
Crispy, juicy chicken awaits with minimal kitchen expertise.
You can master this beloved classic and impress everyone around the dinner table.
Why Homemade KFC Chicken Is So Satisfying
Ingredients for Crispy Homemade KFC Chicken
For the Chicken:For the Dry Coating:For the Wet Coating:For the Cooking Medium:For the Seasoning Basics:Step-by-Step Instructions for KFC-Style Chicken
Step 1: Clean and Season Chicken
Rinse chicken pieces under cool water and pat completely dry with paper towels. Sprinkle chicken with salt and black pepper to enhance natural flavors.
Step 2: Gentle Pre-Cook Chicken
Place chicken in a large pot with water that covers about half the meat. Simmer on low heat with a tight lid for 10 minutes.
Remove chicken and thoroughly dry with clean towels.
Step 3: Create Magical Coating Mixtures
Prepare two separate mixing bowls:
First Bowl (Dry Mixture):Second Bowl (Wet Mixture):Step 4: Master the Coating Technique
Dredge each chicken piece through dry mixture, then completely submerge in wet mixture, then return to dry mixture for thick, crunchy coating.
Let coated chicken rest in refrigerator for 10-15 minutes.
Step 5: Prepare Hot Oil Bath
Select a deep skillet or heavy-bottomed pot.
Pour vegetable or peanut oil to create a 2-3 inch deep pool. Heat oil to 350°F.
Step 6: Fry to Golden Perfection
Carefully lower chicken pieces into hot oil. Fry 2-3 pieces simultaneously to maintain consistent oil temperature.
Cook until exterior turns deep golden brown and internal temperature reaches 165°F.
Step 7: Drain and Serve
Transfer fried chicken onto wire rack or paper towels to remove excess oil.
Allow slight cooling. Serve immediately with favorite side dishes like mashed potatoes, coleslaw, or biscuits.
Pro Tips for Extra Crispy Homemade KFC Chicken
Flavor Twists on Classic KFC Chicken Recipe
Suggested Sides for Homemade KFC Chicken
Flavor Fusion Companions: Zesty Beverage Matches
Proper Storage for Leftover KFC Chicken
FAQs
The combination of flour, cornstarch, and double-dipping technique creates a super crunchy exterior that locks in moisture and provides that signature KFC-style crunch.
Absolutely! While the recipe works best with bone-in chicken pieces like thighs and drumsticks, you can also use boneless chicken breasts or wings with similar results.
Partially cooking helps ensure the chicken is fully cooked inside without burning the crispy coating, giving you perfectly cooked and golden chicken every time.
Yes, chilling helps the coating adhere better and creates a more even, crispier texture when you fry the chicken.
Print
Homemade Kfc Chicken Recipe
- Total Time: 40 minutes
- Yield: 10 1x
Description
Crispy Kentucky Fried Chicken brings southern comfort right to kitchen counters with secret spice blends that dance across golden-brown breading. Finger-licking goodness awaits when you embrace this classic American comfort classic that promises restaurant-quality crunch without leaving home.
Ingredients
Main Proteins:
- 10 pieces chicken (thighs and legs with skin)
- 2 eggs
Coating and Seasoning Ingredients:
- 2 cups wheat flour
- 5 tablespoons cornstarch
- 1 tablespoon chicken or meat seasoning
- 1 tablespoon minced garlic
- Salt to taste
- Pepper to taste
Liquid and Binding Ingredients:
- 1 cup evaporated milk
- 1 tablespoon mustard
- Oil for deep frying
Instructions
- Prepare a clean workspace and gather all necessary tools for chicken preparation. Meticulously cleanse chicken pieces, ensuring they are completely moisture-free using paper towels. Season with a delicate blend of salt and ground pepper.
- Gently poach chicken in a large pot with minimal water, maintaining low heat for approximately 10 minutes. Cover during cooking process. Once completed, carefully remove and thoroughly pat dry using clean kitchen towels.
- Craft two distinct coating stations: First station combines flour, cornstarch, finely minced garlic, specialized chicken seasoning, salt, and pepper. Second station requires whisking eggs, evaporated milk, tangy mustard, salt, and additional pepper until smoothly integrated.
- Execute precise coating technique by first dredging each chicken piece through flour mixture, then immersing in egg blend, and finally returning to flour mixture for complete coverage. Rest coated pieces in refrigerator for 5-7 minutes to enable coating adherence.
- Prepare deep skillet with sufficient oil, heating to consistent 350°F temperature. Verify oil readiness through gentle sizzling test.
- Carefully submerge chicken pieces in hot oil, frying 2-3 pieces simultaneously to maintain optimal temperature. Cook until exterior achieves rich golden-brown coloration and interior reaches safe internal temperature of 165°F, approximately 12-15 minutes.
- Transfer fried chicken onto absorbent paper to eliminate excess oil. Allow brief resting period before serving alongside complementary side dishes like creamy mashed potatoes or crisp coleslaw.
Notes
- Always pat chicken completely dry before seasoning to ensure crispy exterior and better coating adhesion.
- Refrigerating coated chicken for 15-20 minutes helps create a more stable, crunchier breading that won’t fall off during frying.
- Use a deep-fry thermometer to maintain consistent oil temperature around 350°F, preventing greasy or undercooked chicken.
- For gluten-free version, substitute wheat flour with almond or rice flour and use gluten-free chicken seasoning.
- Prep Time: 25 minutes
- Cook Time: 15 minutes
- Category: Lunch, Dinner, Snacks
- Method: Boiling
- Cuisine: American
Nutrition
- Serving Size: 10
- Calories: 410 kcal
- Sugar: 1 g
- Sodium: 580 mg
- Fat: 24 g
- Saturated Fat: 6 g
- Unsaturated Fat: 14 g
- Trans Fat: 0.5 g
- Carbohydrates: 25 g
- Fiber: 2 g
- Protein: 32 g
- Cholesterol: 140 mg
Ethan Caldwell
Founder & Culinary Innovator
Expertise
Farm-to-table cooking, Seasonal recipe creation, Culinary storytelling, Food photography and styling
Education
The Chef’s Academy (Indianapolis, IN)
Ethan didn’t just fall in love with food, he grew into it, surrounded by fields, farmers’ markets, and family meals that told a story.
After sharpening his skills at The Chef’s Academy, he took his passion straight into the farm-to-table movement, working side-by-side with local growers and seasonal flavors.
He believes every recipe should feel like a walk through a summer market: colorful, fresh, and full of possibility.
Outside the kitchen, Ethan’s idea of a perfect day is hiking mountain trails, digging into heirloom vegetables, and hosting casual dinners where seconds are always encouraged.