
Crispy Homemade Crunch Bars Recipe: Sweet Treats Made Fresh
Crafting delectable homemade crunch bars offers a delightful twist on classic candy-making adventures.
Sweet memories flood back when chocolate meets crispy textures.
Chocolate lovers appreciate simple ingredients that spark joy in every bite.
Small kitchen experiments can produce extraordinary results with minimal effort.
Nobody needs fancy equipment to create these irresistible treats.
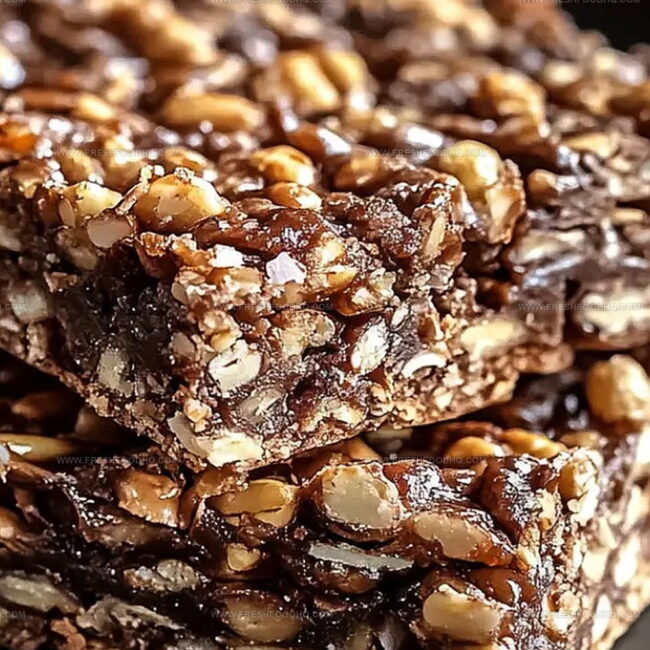
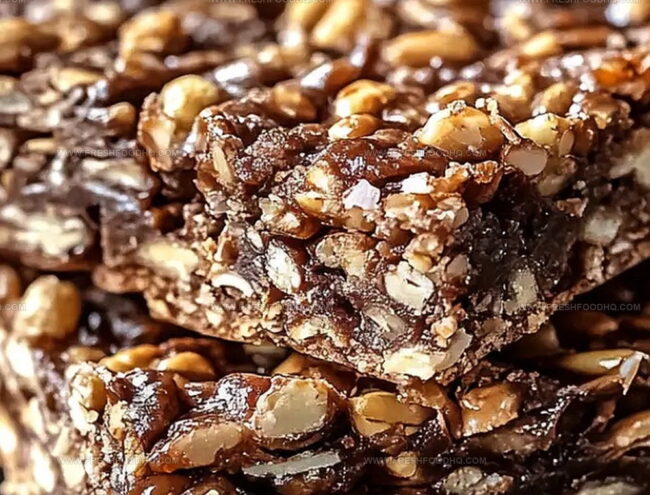
Chocolate and rice crisp elements combine effortlessly for a mouthwatering experience.
Indulge your inner confectioner and whip up a batch that will make taste buds dance with pure delight.
Homemade Delight: Crunch Bars Recipe
Ingredients for Homemade Crunch Bars
For the Base:For the Optional Topping:For the Preparation:How to Make Delicious Homemade Crunch Bars
Step 1: Line Baking Surface
Grab a square baking pan and create a smooth parchment paper base, ensuring the paper hangs slightly over the edges for easy lifting later.
Step 2: Create Chocolate Mixture
In a microwave-safe bowl, combine:Heat in short bursts, stirring between each interval until the mixture transforms into a silky, glossy texture.
Step 3: Fold Crispy Goodness
Gently mix rice krispies into the warm chocolate blend, ensuring every crunchy piece gets fully coated with the decadent mixture.
Step 4: Spread and Smooth
Pour the chocolate-krispies mixture into the prepared pan, using a spatula to create an even, tempting layer.
Optional: Sprinkle a touch of flaky sea salt across the top for a flavor burst.
Step 5: Chill and Set
Slide the pan into the freezer and let the bars firm up for about 15 minutes, allowing the chocolate to solidify and create that perfect crisp texture.
Step 6: Slice and Serve
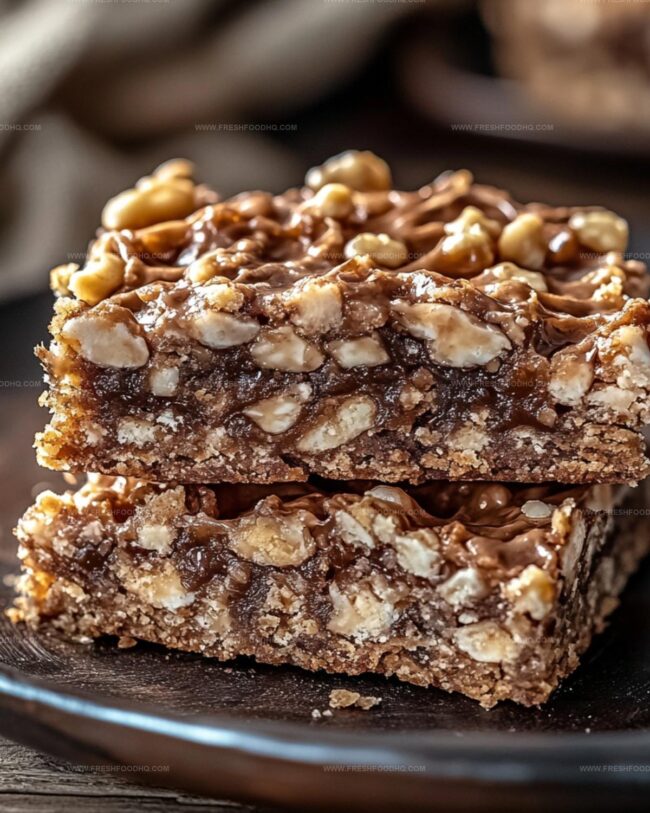
Remove the pan, lift out the parchment, and slice into eight delightful bars. Enjoy your homemade crunch sensation immediately or store for later snacking.
Pro Tips for Crunchy and Sweet Homemade Bars
Variations to Customize Crunch Bars
Pairing Ideas for Crunch Bars
Storage Advice for Homemade Crunch Bars
Store leftovers in an airtight container with parchment paper between layers to prevent sticking. Keep chilled for up to 5 days.
Wrap individual bars tightly in plastic wrap, then place in a freezer-safe bag. Freeze for 2-3 months without losing flavor or texture.
Remove frozen bars from freezer and let sit at room temperature for 5-10 minutes before enjoying. No microwave needed to preserve crunchiness.
Always serve slightly chilled for optimal texture and to maintain the crisp rice krispies crunch.
FAQs
Yes, you can swap milk chocolate for dark chocolate. Dark chocolate will give a richer, less sweet flavor to the crunch bars.
Almond butter or sunflower seed butter work great as alternatives if you have nut allergies or prefer different flavors.
When stored in an airtight container in the refrigerator, these homemade crunch bars will stay fresh for up to 1 week.
You only need a microwave-safe bowl, an 8×8-inch baking dish, parchment paper, and basic measuring tools to make these simple crunch bars.
Print
Homemade Crunch Bars Recipe
- Total Time: 25 minutes
- Yield: 12 1x
Description
Indulgent homemade crunch bars blend rich chocolate with crispy rice cereal, creating a nostalgic treat that whisks you back to childhood snack times. Crunchy, sweet, and impossibly simple, these bars satisfy chocolate cravings with minimal effort and maximum deliciousness.
Ingredients
Main Ingredients:
- 1.5 cups chocolate chips (milk, dark, or semi-sweet)
- 1/3 cup peanut butter
- 1 cup rice krispies
Additional Ingredients:
- Flaked sea salt (optional)
Instructions
- Prepare a square baking dish by lining it with parchment paper, ensuring complete coverage and easy bar removal.
- Select a microwave-safe bowl and combine chocolate chips with peanut butter, creating a smooth base for the crunch bars.
- Microwave the chocolate-peanut butter mixture in short 30-second intervals, stirring thoroughly between each heating cycle until completely melted and glossy.
- Gently fold rice krispies into the liquid chocolate mixture, ensuring each cereal piece is evenly coated and distributed throughout.
- Transfer the chocolatey mixture into the prepared parchment-lined pan, using a spatula to spread the contents uniformly and create an even surface.
- Optional: Sprinkle a delicate layer of flaked sea salt across the top for enhanced flavor complexity.
- Place the pan in the freezer for approximately 15 minutes, allowing the bars to solidify and develop a crisp texture.
- Once completely set, lift the parchment paper and remove the entire block from the pan.
- Using a sharp knife, slice the block into 8 equal-sized rectangular bars, creating clean and precise edges.
- Serve immediately or store in an airtight container in the refrigerator for future enjoyment.
Notes
- Parchment paper ensures clean, effortless bar removal without sticky residue.
- Microwave melting requires gentle, patient intervals to prevent chocolate scorching and maintain smooth texture.
- Stirring consistently helps distribute rice krispies evenly, creating perfect crunch in every bite.
- Sea salt optional topping adds delightful flavor complexity and gourmet touch to homemade treat.
- For gluten-free version, confirm rice krispies are certified gluten-free.
- Store bars in airtight container in freezer up to two weeks for convenient snacking.
- Experiment with dark chocolate or white chocolate variations for different flavor profiles.
- Use natural peanut butter for cleaner ingredient list and reduced added sugars.
- Prep Time: 10 minutes
- Cook Time: 15 minutes
- Category: Snacks, Desserts
- Method: Melting
- Cuisine: American
Nutrition
- Serving Size: 12
- Calories: 146 kcal
- Sugar: 11 g
- Sodium: 35 mg
- Fat: 9 g
- Saturated Fat: 3.5 g
- Unsaturated Fat: 5 g
- Trans Fat: 0 g
- Carbohydrates: 15 g
- Fiber: 1.2 g
- Protein: 3.2 g
- Cholesterol: 5 mg
Ethan Caldwell
Founder & Culinary Innovator
Expertise
Farm-to-table cooking, Seasonal recipe creation, Culinary storytelling, Food photography and styling
Education
The Chef’s Academy (Indianapolis, IN)
Ethan didn’t just fall in love with food, he grew into it, surrounded by fields, farmers’ markets, and family meals that told a story.
After sharpening his skills at The Chef’s Academy, he took his passion straight into the farm-to-table movement, working side-by-side with local growers and seasonal flavors.
He believes every recipe should feel like a walk through a summer market: colorful, fresh, and full of possibility.
Outside the kitchen, Ethan’s idea of a perfect day is hiking mountain trails, digging into heirloom vegetables, and hosting casual dinners where seconds are always encouraged.