
Try the Jolly Green Grinch Oreo Balls Recipe Today
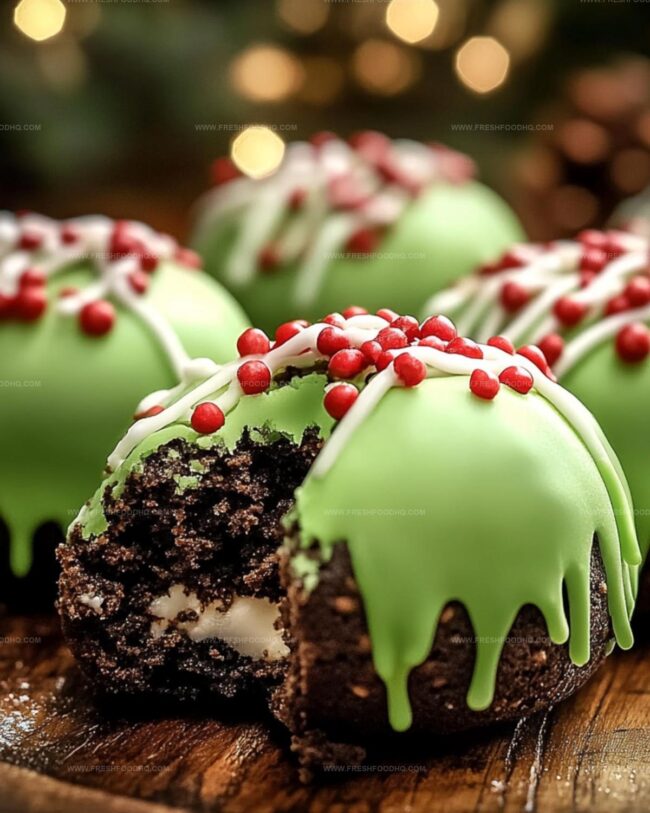
Crumbly oreo cookies blend magically in these grinch oreo balls that capture winter’s playful spirit.
Sweet cream cheese binds our festive treats with delightful green charm.
Christmas baking becomes pure joy when you mix simple ingredients together.
Whimsical desserts like these spark instant smiles across kitchen counters.
Green food coloring transforms ordinary snacks into something spectacular and fun.
Melted white chocolate creates a perfect finishing touch for these adorable spheres.
You won’t believe how easy it is to craft such delightful little bites that everyone will adore.
Why Grinch Oreo Balls Are the Perfect Holiday Treat

Ingredients for Festive Grinch Oreo Balls
For the Base:For the Binding:For the Coating and Decoration:For the Optional Drizzle:How to Make Grinch Oreo Balls with Ease
Step 1: Prepare the Workspace
Line a baking sheet with parchment paper to create a clean workspace for your festive treats.
Step 2: Transform Oreos into Crumbs
Crush Red Velvet Oreos into fine crumbs using either:Step 3: Whip the Cream Cheese
Beat softened cream cheese with an electric mixer until it becomes silky smooth and creamy.
Step 4: Create the Magical Mixture
Blend the Oreo crumbs into the cream cheese, stirring until completely combined and uniform.
Step 5: Form Festive Spheres
Use a cookie scoop to portion out the mixture and roll into perfect round balls.
Place each ball carefully on the prepared baking sheet.
Step 6: Chill and Set
Refrigerate the balls for a minimum of 2 hours to ensure they become firm and easy to handle.
Step 7: Melt the Coating
Gently melt candy melts in a double boiler, stirring until completely smooth. Set aside a portion for drizzling.
Step 8: Dunk and Coat
Carefully dip each chilled ball into the melted candy using a fork or toothpick, allowing excess coating to drip off.
Step 9: Add Whimsical Touches
Drizzle reserved melted candy over the balls and top with a red candy heart while the coating is still soft.
Step 10: Final Chill
Return the decorated Grinch Oreo balls to the refrigerator until the coating sets completely.
Tips to Perfect Your Grinch Oreo Balls Every Time

Variations to Change Up Grinch Oreo Balls
What Pairings Complement Grinch Oreo Balls Best
Best Storage Tips for Grinch Oreo Balls
Store Grinch Oreo Balls in an airtight container in the refrigerator for up to 5 days. Place parchment paper between layers to prevent sticking.
Wrap individual balls in plastic wrap, then place in a freezer-safe container. Freeze for up to 2 months. Thaw overnight in the refrigerator before serving.
Remove from the freezer and let sit at room temperature for 15-20 minutes to soften slightly. Do not microwave to prevent candy coating from melting.
Best enjoyed cold, straight from the refrigerator. The firm texture and cool temperature enhance the creamy Oreo filling and crisp candy coating.
FAQs
They’re festive no-bake dessert bites made with Red Velvet Oreos, cream cheese, and green candy melts, shaped into cute round treats perfect for holiday parties.
You’ll need a food processor or rolling pin to crush Oreos, an electric mixer to blend cream cheese, and a baking sheet with parchment paper for easy preparation.
While Red Velvet Oreos give a special holiday color and flavor, you can substitute with regular Oreos, though the taste and appearance will be slightly different.
Print
Grinch Oreo Balls Recipe
- Total Time: 2 hours 40 minutes
- Yield: 44 1x
Description
Grinch Oreo Balls bring holiday cheer with festive green treats that blend creamy cheesecake flavor and playful Christmas spirit. Whimsical dessert bites will delight guests and spark joy at winter gatherings, inviting you to savor seasonal magic.
Ingredients
Oreo Balls
Main Ingredients:
- 24.4 ounces (692 grams) Red Velvet Oreos
- 8 ounces (227 grams) cream cheese
Coating:
- 15 ounces (425 grams) light green candy melts
Decoration:
- Red candy hearts
Instructions
- Prepare a parchment-lined baking sheet to prevent sticking and ensure easy removal of the Grinch Oreo Balls.
- Transform Red Velvet Oreos into fine, uniform crumbs using a food processor or by crushing them in a sealed plastic bag with a rolling pin.
- Whip the cream cheese with an electric mixer until it reaches a silky, lump-free consistency that will blend seamlessly with the Oreo crumbs.
- Fold the pulverized Oreo crumbs into the cream cheese, stirring until the mixture becomes a homogeneous, moldable texture.
- Utilize a cookie scoop to portion out uniform balls, rolling them gently between palms to create smooth, round shapes on the prepared baking sheet.
- Chill the formed balls in the refrigerator for 2 hours, allowing them to firm up and maintain their structural integrity during coating.
- Gently melt candy melts using a double boiler, maintaining low heat and stirring continuously until achieving a glossy, smooth liquid. Reserve half a cup for drizzling.
- Carefully immerse each chilled ball into the melted candy, using a fork to ensure complete coverage and allowing excess to drip off before returning to the baking sheet.
- Create a festive finish by artfully drizzling the reserved candy melts and adorning each ball with a vibrant red candy heart while the coating remains soft.
- Return the decorated balls to the refrigerator, allowing the candy coating to solidify completely, typically 15-20 minutes at 40°F.
Notes
- Crush Oreos thoroughly to ensure a smooth, consistent texture without large cookie chunks.
- Use room temperature cream cheese for easier mixing and a creamier consistency.
- Chill the mixture before shaping to prevent sticky hands and help balls maintain their shape.
- Melt candy coating slowly to avoid burning and achieve a silky smooth finish.
- Drain excess coating by gently tapping the fork on the bowl’s edge to create a clean, professional look.
- Work quickly when decorating to prevent the candy coating from hardening before adding hearts.
- Store in an airtight container in the refrigerator for up to 5 days for maximum freshness.
- Experiment with different Oreo flavors for unique variations of the recipe.
- Use gluten-free Oreos and cream cheese for a gluten-free version of the treat.
- Prep Time: 20 minutes
- Cook Time: 2 hours 20 minutes
- Category: Snacks, Desserts
- Method: Blending
- Cuisine: American
Nutrition
- Serving Size: 44
- Calories: 153
- Sugar: 13 g
- Sodium: 60 mg
- Fat: 8 g
- Saturated Fat: 5 g
- Unsaturated Fat: 2 g
- Trans Fat: 0 g
- Carbohydrates: 18 g
- Fiber: 1 g
- Protein: 2 g
- Cholesterol: 17 mg
Ethan Caldwell
Founder & Culinary Innovator
Expertise
Farm-to-table cooking, Seasonal recipe creation, Culinary storytelling, Food photography and styling
Education
The Chef’s Academy (Indianapolis, IN)
Ethan didn’t just fall in love with food, he grew into it, surrounded by fields, farmers’ markets, and family meals that told a story.
After sharpening his skills at The Chef’s Academy, he took his passion straight into the farm-to-table movement, working side-by-side with local growers and seasonal flavors.
He believes every recipe should feel like a walk through a summer market: colorful, fresh, and full of possibility.
Outside the kitchen, Ethan’s idea of a perfect day is hiking mountain trails, digging into heirloom vegetables, and hosting casual dinners where seconds are always encouraged.