Sweet & Fluffy Gluten Free Red Velvet Waffles Recipe
Red velvet takes center stage in these incredible gluten free waffles that dance between decadent dessert and breakfast magic.
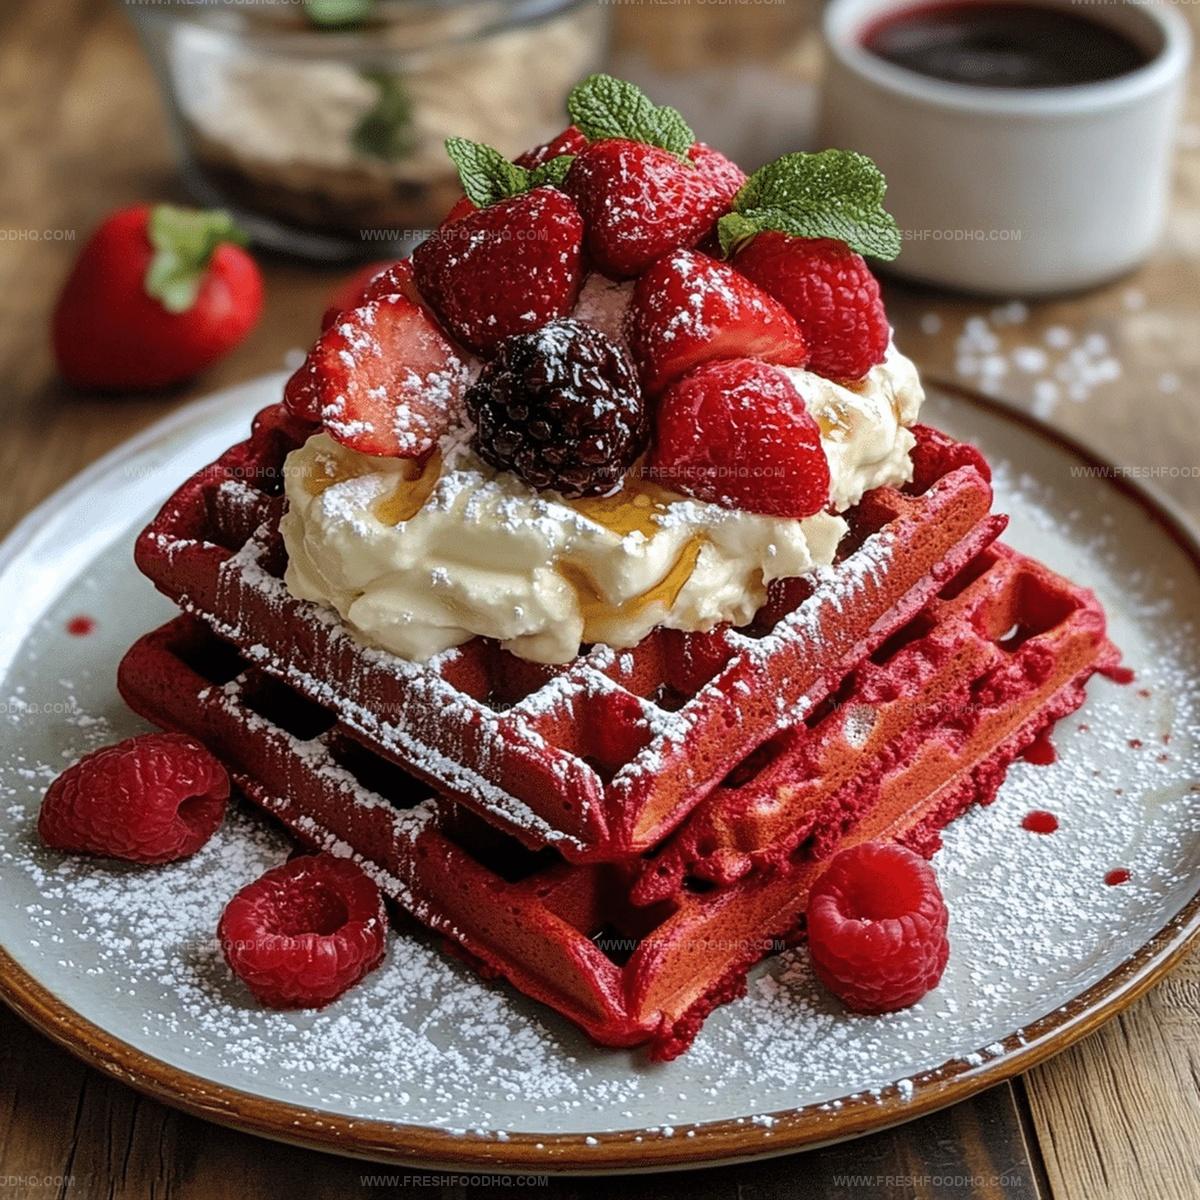
Crispy edges promise a delightful crunch waiting to surprise you.
Cocoa whispers its rich secrets through each golden square.
Smooth cream cheese potential lingers as an optional luxurious topping.
Delicate crimson hues peek through each waffle’s intricate grid pattern.
Weekend brunch just leveled up with this vibrant, indulgent creation.
Whip out your waffle iron and let deliciousness unfold.
Best Pairings With Gluten Free Red Velvet Waffles
How To Store Gluten Free Red Velvet Waffles Well
Common Questions About Gluten Free Red Velvet Waffles
These waffles use a specially formulated gluten-free flour blend and xanthan gum to replace traditional wheat flour, ensuring people with gluten sensitivities can enjoy a delicious waffle experience.
Yes, you can use natural alternatives like beetroot powder or skip the coloring altogether. The cocoa powder will still give the waffles a rich, reddish-brown color.
Apple cider vinegar helps activate the baking soda, creating a lighter, fluffier texture in the waffles and adding a subtle tangy flavor that complements the cocoa.
Why You’ll Want These Gluten Free Red Velvet Waffles
What’s Inside Gluten Free Red Velvet Waffles
Dry Ingredients:Wet Ingredients:Coloring Ingredient:Making Gluten Free Red Velvet Waffles Made Simple
Step 1: Prepare Waffle Iron
Heat your waffle iron to the recommended temperature. Make sure the surface is clean and ready for cooking.
Step 2: Mix Dry Ingredients
Combine in a large mixing bowl:Whisk these ingredients thoroughly to ensure even distribution.
Step 3: Blend Wet Ingredients
In a separate bowl, whisk together:Mix until all ingredients are fully incorporated and the mixture looks smooth and vibrant.
Step 4: Create Waffle Batter
Slowly pour the wet ingredients into the dry ingredients. Gently fold and mix until just combined. The batter should be thick but still able to pour easily.
Step 5: Grease Waffle Iron
Lightly spray the waffle iron with cooking spray or brush with a thin layer of oil to prevent sticking.
Step 6: Cook Waffles
Pour the batter onto the heated waffle iron. Use enough batter to cover the surface without overflowing. Close the iron and cook until the waffles are golden brown and crispy.
Step 7: Serve and Enjoy
Carefully remove the waffles from the iron. Top with your favorite garnishes like:Serve immediately while warm and crisp.
Helpful Ideas For Gluten Free Red Velvet Waffles
Tasty Twists On Gluten Free Red Velvet Waffles
Print
Gluten Free Red Velvet Waffles Recipe
- Total Time: 20-25 minutes
- Yield: 4 1x
Description
Indulgent gluten free red velvet waffles bring classic Southern charm to breakfast with rich cocoa and velvety crimson color. Crisp edges and tender centers make these waffles a delightful morning treat for chocolate lovers craving something special.
Ingredients
Main Ingredients:
- 2 cups gluten-free all-purpose flour blend
- 2 cups milk
- 2 eggs
- 1/3 cup cooking oil (canola, vegetable, coconut, or melted butter)
Dry Seasonings and Leavening Agents:
- 3 tablespoons sugar
- 1 tablespoon cocoa powder
- 2 teaspoons baking powder
- 1 teaspoon baking soda
- 1/2 teaspoon xanthan gum
- 1/2 teaspoon salt
Flavor and Color Enhancers:
- 2 tablespoons apple cider vinegar
- 1 teaspoon vanilla extract or paste
- 1 to 1.5 tablespoons red food coloring
Instructions
- Heat waffle iron to manufacturer’s recommended temperature.
- Combine all dry ingredients in a large mixing bowl, ensuring thorough blending of gluten-free flour, sugar, cocoa powder, baking powder, baking soda, xanthan gum, and salt.
- Whisk together milk, apple cider vinegar, oil, eggs, vanilla extract, and red food coloring in a separate container until smooth and uniform in color.
- Gently fold wet ingredients into dry ingredients, stirring until just incorporated. Avoid overmixing to maintain a thick, pourable consistency.
- Apply a light coating of cooking spray or oil to waffle iron surfaces to prevent sticking.
- Measure and pour appropriate amount of batter onto the center of the preheated waffle iron, distributing evenly.
- Close waffle iron and cook for 3-4 minutes or until edges appear golden brown and crispy.
- Carefully remove waffles using a heat-resistant spatula, ensuring they maintain structural integrity.
- Transfer to serving plate and garnish with preferred toppings like maple syrup, whipped cream, or fresh seasonal berries.
Notes
- Use a high-quality gluten-free flour blend to ensure smooth texture and prevent graininess in the waffles.
- Add xanthan gum helps bind ingredients together, mimicking gluten’s elasticity and improving overall waffle structure.
- Whisking wet and dry ingredients separately prevents lumps and ensures even distribution of flavors throughout the batter.
- Let the batter rest for 5-10 minutes before cooking to allow flour to absorb liquid and create a more tender waffle.
- Dairy-free option: Replace milk with almond or oat milk and use coconut oil instead of regular oil.
- For a lower-sugar version, substitute part of the sugar with stevia or monk fruit sweetener.
- Achieve crispy edges by not overfilling the waffle iron and cooking until deep golden brown.
- Prep Time: 10 minutes
- Cook Time: 10-15 minutes
- Category: Breakfast, Desserts
- Method: Baking
- Cuisine: American
Nutrition
- Serving Size: 4
- Calories: 314 kcal
- Sugar: 6 g
- Sodium: 364 mg
- Fat: 15 g
- Saturated Fat: 2.5 g
- Unsaturated Fat: 12 g
- Trans Fat: 0 g
- Carbohydrates: 38 g
- Fiber: 2 g
- Protein: 6 g
- Cholesterol: 37 mg
Samantha Lee
Recipe Developer & Content Creator
Expertise
Plant-based and vegetarian recipes, Recipe testing and development, Food blogging and digital content creation, Culinary education and workshops
Education
Oregon Culinary Institute (Portland, OR)
Samantha sees cooking like painting, every fresh herb, every juicy tomato, a new splash of color on a canvas.
After graduating from Oregon Culinary Institute, she blended her love of global cuisines and plant-based cooking into recipes that feel fresh, fearless, and full of heart.
Samantha’s kitchen is a place where comfort food gets a modern remix and every meal feels like a little adventure. When she’s not cooking, she’s out exploring farmers’ markets, sketching new recipe ideas, or getting her hands dirty in a community garden.