
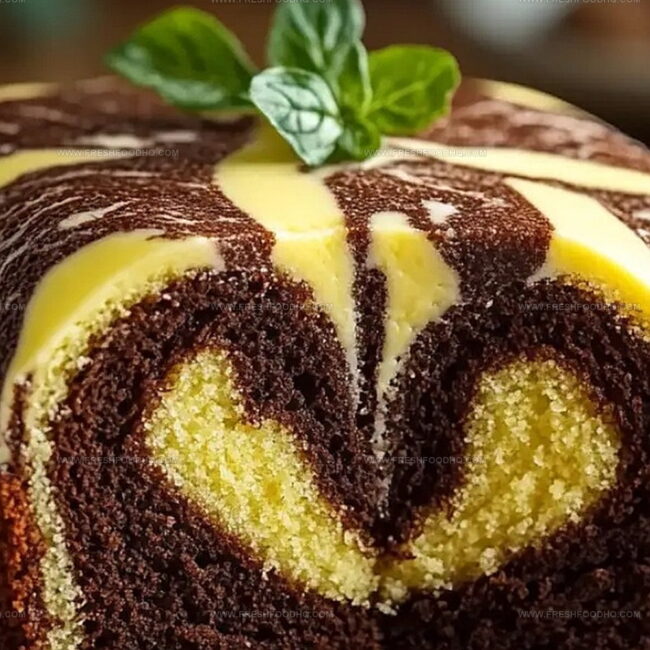
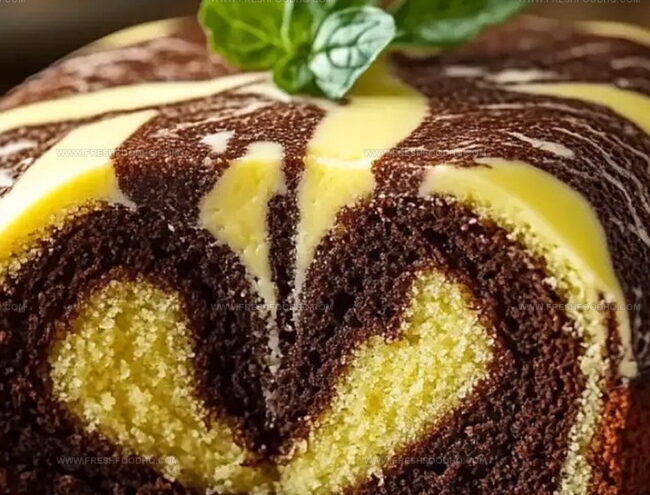
Fluffy Marble Cake Recipe: Swirls of Sweet Joy in Every Bite
Whipping up a marble cake with swirling chocolate and vanilla creates pure magic in your kitchen.
Soft layers blend together like artistic brushstrokes on a delectable canvas.
Home bakers adore this classic dessert for its stunning visual appeal and rich, tender crumb.
Each slice reveals a mesmerizing pattern that looks almost too beautiful to eat.
Mixing batters requires gentle technique and a playful spirit to achieve those perfect marbled swirls.
Delightful aromas will drift through your home as this cake bakes to golden perfection.
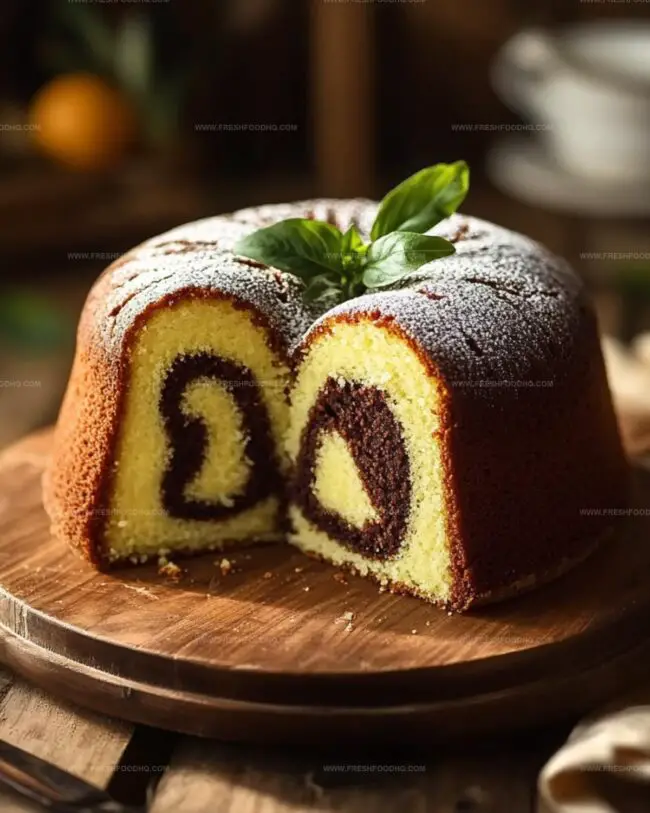
Delicious Marble Cake with Swirls of Flavor
Ingredients Needed for Delicious Marble Cake
For the Cake Base:For the Flavor and Color Variation:For the Leavening and Seasoning:How to Bake Delicious Marble Cake Perfectly
Step 1: Cream Butter and Sugar
Create a fluffy base by beating softened butter with granulated sugar until the mixture becomes light, airy, and pale yellow. The key is to whip until the texture looks smooth and creamy.
Step 2: Incorporate Eggs
Gently add eggs one at a time, mixing thoroughly after each addition. Ensure each egg is completely blended before adding the next, creating a silky smooth batter.
Step 3: Prepare Dry Ingredients
In a separate mixing bowl, combine:Whisk these ingredients together to eliminate any lumps and create a uniform dry mixture.
Step 4: Blend Wet and Dry Ingredients
Slowly incorporate the dry ingredients and whole milk into the butter mixture.
Alternate between adding dry ingredients and milk, mixing gently to create a consistent, velvety batter.
Step 5: Divide and Conquer Chocolate Twist
Separate approximately one-third of the batter into a different bowl.
Stir cocoa powder into this portion until the chocolate batter looks rich and uniform.
Step 6: Create Marble Magic
Pour the vanilla batter into a greased baking pan.
Strategically add dollops of chocolate batter on top. Use a knife to create elegant swirls, blending the batters without completely mixing them.
Step 7: Bake to Perfection
Place the pan in a preheated oven at 350°F. Bake for 50-60 minutes, checking doneness by inserting a toothpick into the center.
The cake is ready when the toothpick comes out clean.
Step 8: Cool and Celebrate
Allow the cake to cool completely in the pan.
Once cooled, slice and serve this stunning marble cake that’s sure to impress family and friends.
Tips to Get Marble Cake Texture Just Right
Variations to Change Up Marble Cake Flavors
Pairings That Match Delicious Marble Cake
Storing Delicious Marble Cake with Care
Wrap the marble cake tightly in plastic wrap or store in an airtight container for up to 5 days in the refrigerator, keeping it fresh and moist.
Slice the cake, wrap individual pieces in plastic wrap, then place in a freezer-safe bag. Freeze for up to 3 months, maintaining its delicious flavor and texture.
Keep the cake at room temperature in a sealed container for 2-3 days, ideal for short-term enjoyment and easy access.
Warm individual slices in the microwave for 15-20 seconds or in the oven at 300F for 5-7 minutes, restoring the cake’s soft and tender consistency.
FAQs
The swirling technique creates the distinctive marble pattern, blending chocolate and vanilla batters to produce a visually appealing and delicious cake with intertwined flavors.
Yes, a hand mixer works perfectly for creaming butter and sugar, and mixing the cake batter. Just ensure you mix at medium speed to avoid overbeating.
The mixture should look light, fluffy, and pale yellow, with a significantly increased volume compared to the original ingredients. It should almost double in size and look smooth.
Adding eggs individually helps them incorporate more evenly into the batter, preventing lumps and ensuring a smoother, more consistent cake texture.
Print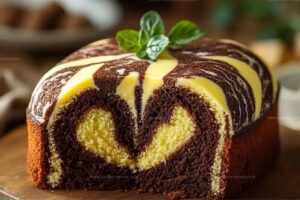
Delicious Marble Cake Recipe
- Total Time: 1 hour 20 minutes
- Yield: 8 1x
Description
Marble cake lovers rejoice! Swirling chocolate and vanilla create a mesmerizing masterpiece that delights taste buds with each perfectly balanced slice. Rich, moist layers offer pure indulgence you cannot resist.
Ingredients
Main Ingredients:
- 1 cup (226 grams) unsalted butter, softened
- 1 3/4 cups (350 grams) granulated sugar
- 4 large eggs
- 1 cup (240 milliliters) whole milk
- 2 1/2 cups (313 grams) all-purpose flour
Leavening and Seasoning:
- 2 1/2 teaspoons baking powder
- 1/2 teaspoon salt
- 1/4 cup (25 grams) cocoa powder
- 1 teaspoon vanilla extract
Instructions
- Prepare the butter and sugar mixture by vigorously whipping them together until the texture becomes airy and pale, creating a smooth, creamy foundation.
- Introduce eggs individually, thoroughly blending each one into the mixture to ensure a uniform, silky consistency.
- Sift together the flour, baking powder, and salt in a separate vessel, eliminating potential lumps and aerating the dry ingredients.
- Methodically incorporate the dry ingredient mixture and milk into the butter blend, alternating between the two to maintain a balanced, lump-free batter.
- Partition approximately one-third of the prepared batter into a secondary bowl, then fold in cocoa powder until the chocolate portion achieves a rich, even color.
- Transfer the vanilla batter into a prepared baking pan, strategically layering the chocolate batter on top, then artfully drag a knife through both batters to generate intricate, swirling patterns.
- Position the pan in a preheated oven at 350F (175C), allowing the cake to bake for 50-60 minutes until a test skewer emerges clean and the surface displays a golden-brown complexion.
- Remove from oven and permit the cake to cool completely on a wire rack, enabling it to set and stabilize before slicing into elegant servings.
Notes
- Softening butter is crucial for achieving a smooth, creamy texture that blends perfectly with sugar.
- Eggs should be at room temperature to ensure even mixing and prevent batter curdling.
- Alternating dry ingredients and milk helps create a silky, lump-free batter with consistent texture.
- Swirling technique requires a gentle hand to maintain distinct chocolate and vanilla patterns without over-mixing.
- Use a light-colored pan to prevent burning and ensure even baking throughout the cake.
- Cocoa powder quality dramatically impacts the chocolate batter’s depth and richness.
- Allow cake to cool completely to set the structure and prevent crumbling when slicing.
- Prep Time: 20 minutes
- Cook Time: 60 minutes
- Category: Desserts
- Method: Baking
- Cuisine: American
Nutrition
- Serving Size: 8
- Calories: 404
- Sugar: 35 g
- Sodium: 183 mg
- Fat: 22 g
- Saturated Fat: 13 g
- Unsaturated Fat: 8 g
- Trans Fat: 0.5 g
- Carbohydrates: 46 g
- Fiber: 2 g
- Protein: 5 g
- Cholesterol: 93 mg
Ethan Caldwell
Founder & Culinary Innovator
Expertise
Farm-to-table cooking, Seasonal recipe creation, Culinary storytelling, Food photography and styling
Education
The Chef’s Academy (Indianapolis, IN)
Ethan didn’t just fall in love with food, he grew into it, surrounded by fields, farmers’ markets, and family meals that told a story.
After sharpening his skills at The Chef’s Academy, he took his passion straight into the farm-to-table movement, working side-by-side with local growers and seasonal flavors.
He believes every recipe should feel like a walk through a summer market: colorful, fresh, and full of possibility.
Outside the kitchen, Ethan’s idea of a perfect day is hiking mountain trails, digging into heirloom vegetables, and hosting casual dinners where seconds are always encouraged.