
Sweet & Festive Christmas Peanut Butter Balls Recipe
Sweet memories of childhood holiday gatherings inspire these delightful christmas peanut butter balls that bring joy to every festive table.
Grandma’s secret recipe whispers nostalgic comfort through each creamy bite.
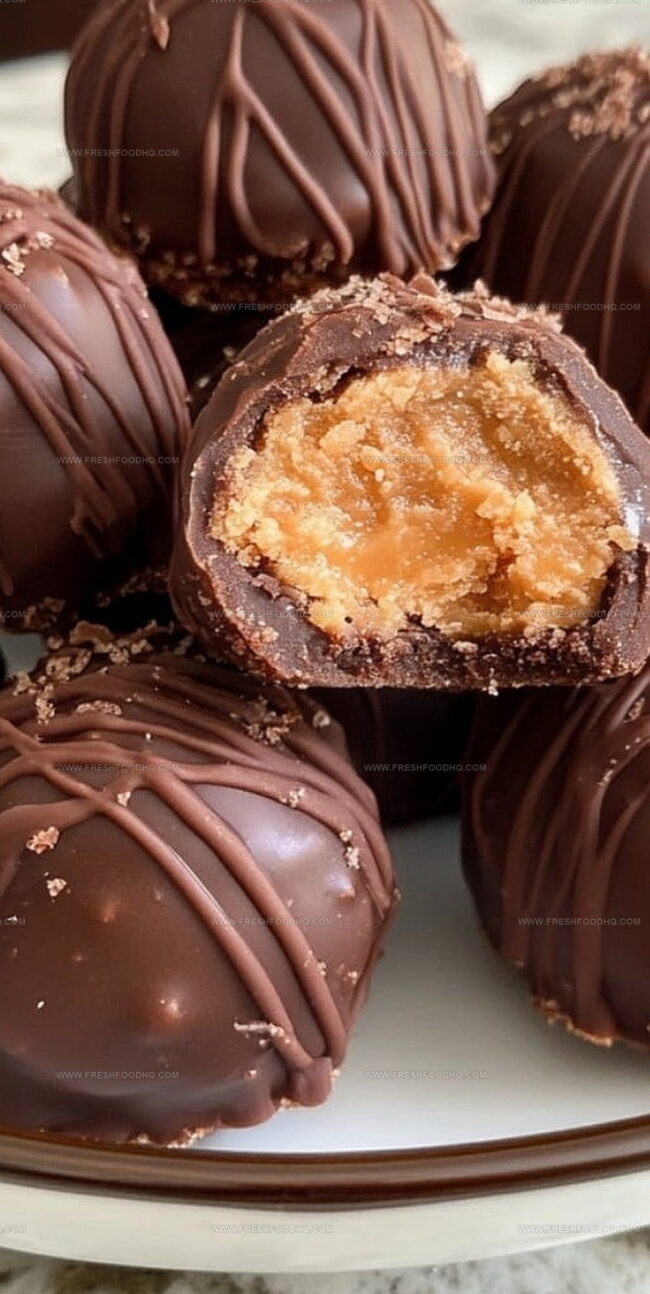
Decadent chocolate-coated morsels promise pure indulgence with minimal kitchen effort.
Minimal ingredients combine to create magic in just minutes.
Mixing becomes a playful experience you’ll treasure alongside loved ones.
Chocolate and peanut butter dance together in perfect harmony.
These irresistible treats will have everyone asking for seconds before the plate even touches the table.
What Makes Christmas Peanut Butter Balls a Festive Treat
Ingredients for Christmas Peanut Butter Balls
Peanut Butter Base:Coating:Optional Garnish:How to Prepare Festive Peanut Butter Balls

Step 1: Blend Creamy Mixture
In a spacious mixing bowl, combine smooth peanut butter, softened butter, powdered sugar, and crispy rice cereal. Use a sturdy spatula or electric mixer to thoroughly blend all ingredients until they form a consistent, moldable texture.
Step 2: Shape Delightful Spheres
Gently roll the mixed ingredients into small, bite-sized balls using your hands. Carefully place each round ball onto a baking sheet covered with wax paper, ensuring they are evenly spaced.
Step 3: Prepare Chocolate Coating
Select a microwave-safe bowl and combine chocolate chips with vegetable shortening. Microwave in short 30-second bursts, stirring between each interval until the mixture becomes completely smooth and glossy.
Step 4: Dunk and Coat Treats
Using a fork or dipping tool, carefully lower each peanut butter ball into the melted chocolate. Rotate and twirl to ensure complete and even chocolate coverage. Gently tap off excess chocolate.
Step 5: Let Chocolate Set
Return the chocolate-covered balls to the wax paper-lined baking sheet. Allow them to rest and solidify at room temperature or accelerate the process by placing them in the refrigerator until the chocolate hardens completely.
Step 6: Store and Serve
Transfer the finished Christmas peanut butter balls to an airtight container. Store in the refrigerator and enjoy within one week for maximum freshness and flavor.
Pro Tips for Perfect Holiday Peanut Butter Balls
Variations to Personalize Peanut Butter Balls
Pairing Ideas for Christmas Peanut Butter Balls
Storage Advice for Peanut Butter Balls
FAQs About Christmas Peanut Butter Balls
No, they’re super easy! Just mix, roll, and dip. Even beginners can make these delicious treats quickly.
Absolutely! You can use milk, dark, or white chocolate. Just make sure to melt it gently and smoothly.
They’ll keep well in an airtight container for about a week at room temperature or up to two weeks in the refrigerator.
Not really. You just need a mixing bowl, baking sheet, wax paper, and a microwave-safe bowl for melting chocolate.
Print
Christmas Peanut Butter Balls Recipe
- Total Time: 20 minutes
- Yield: 36 1x
Description
Sweet holiday magic unfolds with Christmas Peanut Butter Balls, a delightful treat blending creamy peanut butter and rich chocolate. Festive gatherings shine brighter with these irresistible no-bake confections you’ll treasure and share with loved ones.
Ingredients
Main Ingredients:
- 3 cups crispy rice cereal
- 3 cups semisweet chocolate chips
- 1 cup creamy peanut butter
- 2 cups powdered sugar
Binding Ingredients:
- 1/2 cup butter, softened
Coating Ingredients:
- 1 tablespoon vegetable shortening
Instructions
- Thoroughly blend peanut butter, softened butter, powdered sugar, and crispy rice cereal in a spacious mixing bowl until the ingredients form a cohesive, uniform mixture.
- Carefully craft small, uniform spheres from the combined mixture, gently positioning each ball onto a wax paper-covered baking sheet.
- Utilize a microwave-safe container to gradually melt chocolate chips and vegetable shortening, stirring at 30-second intervals until achieving a silky, glossy consistency.
- Delicately immerse each peanut butter sphere into the liquefied chocolate, ensuring complete and even coverage.
- Return the chocolate-enrobed spheres to the wax paper, allowing them to solidify naturally at room temperature or expedite the process by chilling in the refrigerator until the chocolate sets completely.
Notes
- Chill the mixture before shaping to prevent sticky hands and ensure easier ball formation.
- Use a cookie scoop or melon baller for uniform, perfectly sized peanut butter balls.
- Opt for natural peanut butter with less sugar to control sweetness and create a healthier version.
- Sprinkle crushed candy canes or festive sprinkles on melted chocolate for a Christmas touch and extra crunch.
- Prep Time: 15 minutes
- Cook Time: 5 minutes
- Category: Snacks, Desserts
- Method: Blending
- Cuisine: American
Nutrition
- Serving Size: 36
- Calories: 152
- Sugar: 9 g
- Sodium: 35 mg
- Fat: 11 g
- Saturated Fat: 3 g
- Unsaturated Fat: 7 g
- Trans Fat: 0.1 g
- Carbohydrates: 14 g
- Fiber: 1 g
- Protein: 3 g
- Cholesterol: 8 mg
Samantha Lee
Recipe Developer & Content Creator
Expertise
Plant-based and vegetarian recipes, Recipe testing and development, Food blogging and digital content creation, Culinary education and workshops
Education
Oregon Culinary Institute (Portland, OR)
Samantha sees cooking like painting, every fresh herb, every juicy tomato, a new splash of color on a canvas.
After graduating from Oregon Culinary Institute, she blended her love of global cuisines and plant-based cooking into recipes that feel fresh, fearless, and full of heart.
Samantha’s kitchen is a place where comfort food gets a modern remix and every meal feels like a little adventure. When she’s not cooking, she’s out exploring farmers’ markets, sketching new recipe ideas, or getting her hands dirty in a community garden.