Quick & Heavenly Chocolate Hand Pies Recipe for Sweet Moments
Sweet memories often spark when you bite into a delightful chocolate hand pie, creating miniature parcels of pure joy.
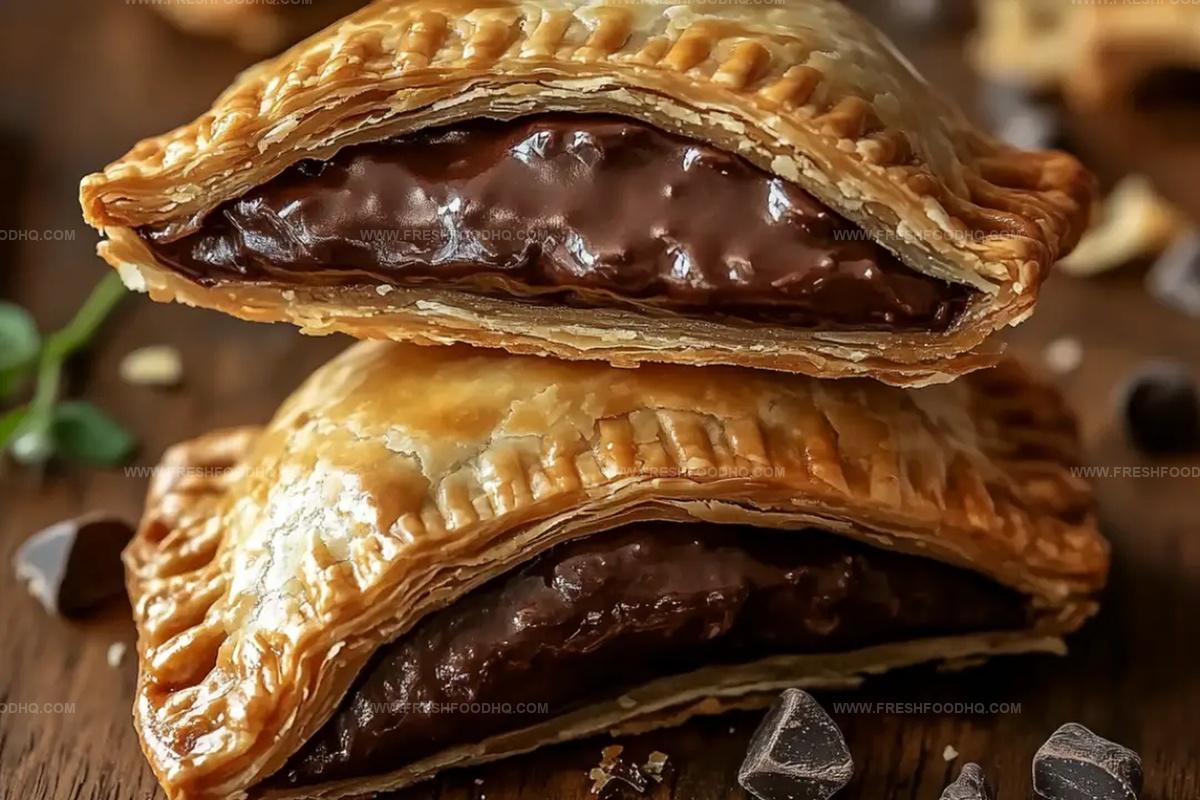
Crisp pastry edges hold molten chocolate centers that melt perfectly with each delicate nibble.
Homemade treats like these connect us to childhood comfort and elegant simplicity.
Crafting these little handheld desserts requires minimal ingredients and basic kitchen skills.
Small pockets of rich chocolate nestle inside buttery, flaky crusts that crunch softly when you take a bite.
Baking becomes an adventure with these charming individual pies that promise decadent satisfaction in every single morsel.
Whip up a batch and watch smiles spread across eager faces.
Flavorful Variations on Heavenly Chocolate Hand Pies
Pairings That Go Well with Heavenly Chocolate Hand Pies
How to Store Heavenly Chocolate Hand Pies Properly
Store leftover hand pies in an airtight container for up to 3 days. Place parchment paper between layers to prevent sticking and maintain their delicate texture.
Wrap individual hand pies tightly in plastic wrap, then place in a freezer-safe bag. Freeze for up to 2 months. Label with the date to track freshness.
Preheat oven to 350°F. Place frozen or refrigerated hand pies on a baking sheet. Warm for 8-10 minutes until crispy and heated through. Avoid microwaving to preserve the crust’s flakiness.
Let refrigerated hand pies sit at room temperature for 15-20 minutes before serving to restore their original texture and prevent sogginess.
FAQs
You’ll need chocolate chips and heavy cream. Melt them together in a saucepan over low heat until smooth and creamy.
Yes, you can prepare the hand pies in advance and refrigerate them before baking. Just add a few extra minutes to the baking time when you’re ready to cook.
Make sure to leave a small border around the edges when adding the chocolate filling and seal the edges firmly with a fork to prevent leaks.
You’ll just need a rolling pin, cookie cutter or knife, baking sheet, and parchment paper. Basic kitchen tools work perfectly for this recipe.
Why Heavenly Chocolate Hand Pies Are Your Next Favorite Treat
Ingredients to Make Heavenly Chocolate Hand Pies
For the Base:For the Filling:For the Finishing Touches:How to Bake Heavenly Chocolate Hand Pies with Ease
Step 1: Warm Up the Oven
Fire up your oven to 375F (190C). This will ensure a perfectly golden and crispy crust for your hand pies.
Step 2: Prepare the Baking Surface
Line a baking sheet with parchment paper to prevent sticking and make cleanup a breeze.
Step 3: Roll Out the Pie Dough
Sprinkle a clean surface with flour and gently roll out your pie crusts.
Work with a light touch to keep the dough tender.
Step 4: Shape the Pie Bases
Use a cookie cutter or sharp knife to create uniform circles or rectangles.
Consistency is key for beautiful hand pies.
Step 5: Create Luscious Chocolate Filling
In a small saucepan, combine:Melt over low heat, stirring constantly until the mixture becomes smooth and glossy.
Let it cool slightly to thicken.
Step 6: Assemble the Hand Pies
Place a small dollop of chocolate filling in the center of half of your pie crust shapes.
Leave a border around the edges to prevent leaking.
Step 7: Seal the Delicious Packages
Top the chocolate-filled crusts with the remaining pie crust shapes.
Gently press the edges together, using fork tines to create a decorative and secure seal.
Step 8: Prepare the Egg Wash
Whisk together egg and water to create a golden glaze that will make your hand pies shine.
Step 9: Glaze the Pies
Brush the tops of the hand pies with the egg wash, ensuring an even coating for a beautiful golden finish.
Step 10: Bake to Perfection
Arrange the hand pies on the prepared baking sheet.
Bake for 15-18 minutes until they turn a gorgeous golden brown and develop a flaky texture.
Step 11: Cool and Garnish
Allow the hand pies to cool slightly.
For an extra touch of decadence, sprinkle some chocolate chips on top while they’re still warm – watch them melt into irresistible pools of chocolate.
Step 12: Serve and Enjoy
Serve these heavenly chocolate hand pies warm and watch as everyone falls in love with your baking magic!
Tips for Perfect Heavenly Chocolate Hand Pies
Print
Chocolate Hand Pies Recipe
- Total Time: 43 minutes
- Yield: 6 1x
Description
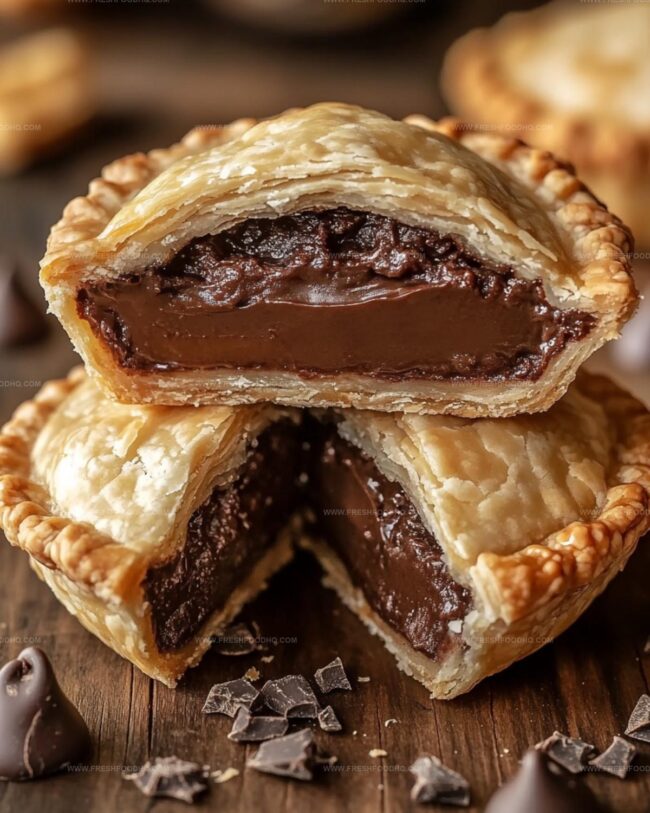
Irresistible chocolate hand pies deliver a sweet escape from ordinary desserts. Flaky pastry embraces rich chocolate, promising delightful moments that melt hearts and satisfy cravings with each delectable bite.
Ingredients
Chocolate Filling:
- 1 cup chocolate chips (semi-sweet or milk chocolate)
- 1/4 cup heavy cream
Pie Crust:
- 1 package pre-made pie crusts (or homemade pie dough)
Egg Wash and Topping:
- 1 egg
- 1 tablespoon water
- Optional: Additional chocolate chips for topping
Instructions
- Heat the oven to 375F (190C) and prepare a parchment-lined baking sheet.
- Dust a clean surface with flour and gently roll out the pie crusts to an even thickness.
- Create uniform pastry shapes using a cookie cutter or sharp knife, ensuring clean edges.
- Combine chocolate chips and heavy cream in a low-heat saucepan, stirring until the mixture transforms into a silky, uniform consistency.
- Allow the chocolate mixture to cool and slightly thicken, which helps prevent leakage during baking.
- Carefully deposit a modest dollop of chocolate filling at the center of half the pastry shapes, maintaining a clear border around the edges.
- Layer the remaining pastry shapes over the chocolate-filled bases, aligning edges precisely.
- Crimp the pie edges using fork tines, creating a decorative and secure seal.
- Whisk egg with water to create a glossy egg wash for enhancing the pies’ golden appearance.
- Delicately brush the egg wash across the pie surfaces, ensuring complete coverage.
- Arrange the hand pies on the prepared baking sheet, leaving slight spacing between each.
- Bake for 15-18 minutes until the pastry achieves a rich, golden-brown complexion and exhibits a delicate, flaky texture.
- Remove from oven and let cool briefly to allow filling to set.
- Optional: Sprinkle additional chocolate chips on top while pies remain warm for an indulgent, melted finish.
Notes
- Use high-quality dark or semi-sweet chocolate chips for rich, intense flavor that elevates the entire dessert.
- Leave enough space around the edges when adding chocolate filling and seal firmly to prevent delicious filling from escaping during baking.
- Allow chocolate mixture to cool and slightly thicken before filling to ensure easier handling and prevent runny centers.
- Swap traditional pie crust with gluten-free alternatives or use vegan chocolate chips and plant-based cream for allergy-friendly versions.
- Prep Time: 25 minutes
- Cook Time: 18 minutes
- Category: Desserts, Snacks
- Method: Baking
- Cuisine: American
Nutrition
- Serving Size: 6
- Calories: 256 kcal
- Sugar: 15 g
- Sodium: 150 mg
- Fat: 16 g
- Saturated Fat: 9 g
- Unsaturated Fat: 5 g
- Trans Fat: 0.2 g
- Carbohydrates: 26 g
- Fiber: 2 g
- Protein: 3 g
- Cholesterol: 45 mg
Ethan Caldwell
Founder & Culinary Innovator
Expertise
Farm-to-table cooking, Seasonal recipe creation, Culinary storytelling, Food photography and styling
Education
The Chef’s Academy (Indianapolis, IN)
Ethan didn’t just fall in love with food, he grew into it, surrounded by fields, farmers’ markets, and family meals that told a story.
After sharpening his skills at The Chef’s Academy, he took his passion straight into the farm-to-table movement, working side-by-side with local growers and seasonal flavors.
He believes every recipe should feel like a walk through a summer market: colorful, fresh, and full of possibility.
Outside the kitchen, Ethan’s idea of a perfect day is hiking mountain trails, digging into heirloom vegetables, and hosting casual dinners where seconds are always encouraged.