Cherry Bliss Bars Recipe: Sweet Summer Treats for Everyone
Sweet dreams come alive with these irresistible cherry bliss bars that promise pure indulgence.
Layers of creamy texture and fruity goodness await your taste buds.
Perfectly balanced between rich shortbread and vibrant cherry filling, this dessert feels like a culinary secret.
Homemade treats never looked so tempting or tasted so incredible.
Minimal ingredients and simple steps mean you can create magic in your kitchen.
Every bite whispers comfort and celebration.
Let’s make something deliciously unforgettable that will have everyone asking for seconds.
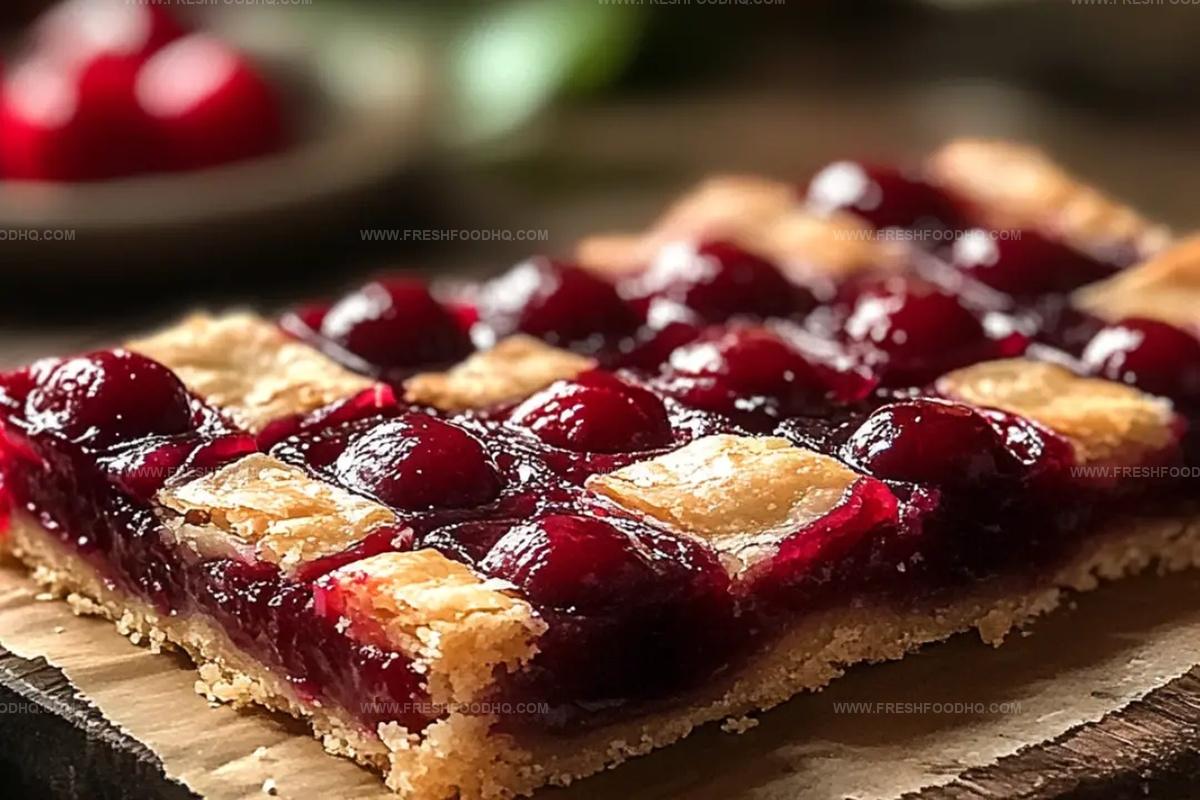
Cherry Bliss Bars A Slice Of Heaven In Every Bite

Ingredients For Cherry Bliss Bars That Wow The Crowd
For the Base:For the Dry Ingredients:For the Topping and Filling:How To Make Cherry Bliss Bars Simply And Quickly
Step 1: Warm Up the Oven
Crank up your oven to 350°F (175°C). Grab a 15x10x1-inch baking pan and give it a quick spritz of non-stick spray to ensure easy removal later.
Step 2: Create a Creamy Base
In a large mixing bowl, whip together butter and sugar until the mixture becomes light, fluffy, and looks like a cloud of sweet goodness.
Step 3: Add Richness and Flavor
Gently incorporate eggs one at a time, mixing thoroughly after each addition.
Splash in vanilla and almond extracts to create a depth of flavor that’ll make taste buds dance.
Step 4: Prepare the Dry Ingredients
In a separate bowl, combine:Slowly fold these dry ingredients into the creamy butter mixture, creating a smooth and consistent batter.
Step 5: Layer the Deliciousness
Spread 3 cups of batter evenly across the prepared pan. Generously dollop cherry pie filling over the first layer.
Drop spoonfuls of the remaining batter on top of the cherry filling, creating a beautiful marbled effect.
Step 6: Bake to Perfection
Slide the pan into the preheated oven and bake for 30-35 minutes.
Check doneness by inserting a toothpick into the center – it should come out clean. If using a 9×13-inch pan, you might need to adjust baking time slightly.
Step 7: Cool and Calm
Transfer the pan to a wire rack and let the bars cool completely. Patience is key to achieving the perfect texture.
Step 8: Drizzle with Decadence
Whip up a luscious glaze by whisking together:Stir until the mixture becomes silky smooth and glossy.
Step 9: Finish and Serve
Once the glaze has set, slice the bars into squares.
Serve and watch as everyone’s eyes light up with the first bite of these cherry-packed treats.
Tips For Perfect Cherry Bliss Bars Every Single Time
Variations To Try On Cherry Bliss Bars Recipe
Pairings That Go Well With Cherry Bliss Bars Dessert
Best Storage Tips For Cherry Bliss Bars Freshness
Store cooled bars in an airtight container in the refrigerator for up to 5 days. Place parchment paper between layers to prevent sticking.
Wrap individual bars tightly in plastic wrap, then place in a freezer-safe container. Freeze for up to 3 months. Thaw overnight in the refrigerator before serving.
Warm individual bars on a microwave-safe plate for 10-15 seconds. Check temperature to avoid overheating and maintain soft texture.
Let frozen or refrigerated bars sit at room temperature for 15-20 minutes before serving to restore their original softness and flavor.
FAQs
Use non-stick spray and spread the batter evenly as a base layer before adding cherry filling. This creates a protective barrier and ensures smooth removal.
Fresh cherries work, but they’re more watery. Drain excess liquid and toss with a little cornstarch to help them set properly during baking.
These extracts complement each other, creating a deeper, more complex flavor profile that enhances the cherry’s natural sweetness and adds a subtle nutty undertone.
Insert a toothpick in the center – it should come out clean with no wet batter. The edges will be slightly golden and the top will look set and slightly firm to touch.
Print
Cherry Bliss Bars Recipe
- Total Time: 55 minutes
- Yield: 12 1x
Description
Indulgent cherry bliss bars bring sweet nostalgia from family kitchens, offering a perfect balance of tart cherries and buttery crumble. Delicate layers melt together, creating an irresistible dessert that connects memories and comfort in one delightful bite.
Ingredients
Main Ingredients:
- 1 cup butter, softened
- 1 cup sugar
- 2 eggs
- 1 teaspoon vanilla extract
- 1/2 teaspoon almond extract
- 2 cups all-purpose flour
Flavor and Moisture:
- 1 can (21 ounces) cherry pie filling
- 1/4 teaspoon salt
Finishing Ingredients:
- 1 cup powdered sugar
- 2–3 tablespoons milk
Instructions
- Warm the oven to 350F (175C) and coat a 15x10x1-inch baking pan with non-stick cooking spray.
- Using an electric mixer, blend butter and sugar until achieving a whipped, airy consistency.
- Incorporate eggs individually, then mix in vanilla and almond extracts thoroughly.
- Sift together flour and salt in a separate mixing container, then gradually fold into the creamy butter mixture.
- Distribute 3 cups of batter evenly across the prepared pan, creating a smooth base layer.
- Gently spread cherry pie filling over the initial batter layer, ensuring uniform coverage.
- Delicately drop remaining batter spoonfuls across the cherry filling, creating a rustic, marbled appearance.
- Slide the pan into the preheated oven and bake for 30-35 minutes, checking for doneness with a toothpick that emerges clean.
- Remove from oven and allow bars to cool completely on a wire cooling rack.
- Prepare the glaze by whisking powdered sugar, vanilla extract, almond extract, and milk until achieving a silky, pourable consistency.
- Once bars have reached room temperature, drizzle the glaze elegantly across the surface.
- Allow glaze to set for 10-15 minutes, then slice into squares and serve.
Notes
- Precision matters when measuring ingredients, as baking requires exact proportions for perfect texture and flavor.
- Use room temperature butter and eggs to ensure smoother mixing and more consistent batter consistency.
- Fresh, high-quality cherry pie filling elevates the taste, so choose a premium brand or make homemade filling for enhanced flavor.
- For gluten-free adaptation, swap all-purpose flour with a 1:1 gluten-free baking blend to maintain the bar’s delicate structure.
- Prep Time: 20 minutes
- Cook Time: 35 minutes
- Category: Desserts, Snacks
- Method: Baking
- Cuisine: American
Nutrition
- Serving Size: 12
- Calories: 180 kcal
- Sugar: 15 g
- Sodium: 120 mg
- Fat: 8 g
- Saturated Fat: 5 g
- Unsaturated Fat: 2 g
- Trans Fat: 0.2 g
- Carbohydrates: 25 g
- Fiber: 1 g
- Protein: 2 g
- Cholesterol: 40 mg
Ethan Caldwell
Founder & Culinary Innovator
Expertise
Farm-to-table cooking, Seasonal recipe creation, Culinary storytelling, Food photography and styling
Education
The Chef’s Academy (Indianapolis, IN)
Ethan didn’t just fall in love with food, he grew into it, surrounded by fields, farmers’ markets, and family meals that told a story.
After sharpening his skills at The Chef’s Academy, he took his passion straight into the farm-to-table movement, working side-by-side with local growers and seasonal flavors.
He believes every recipe should feel like a walk through a summer market: colorful, fresh, and full of possibility.
Outside the kitchen, Ethan’s idea of a perfect day is hiking mountain trails, digging into heirloom vegetables, and hosting casual dinners where seconds are always encouraged.