Easy Homemade Cheesy Pepperoni Pizza Bombs Recipe for Kids
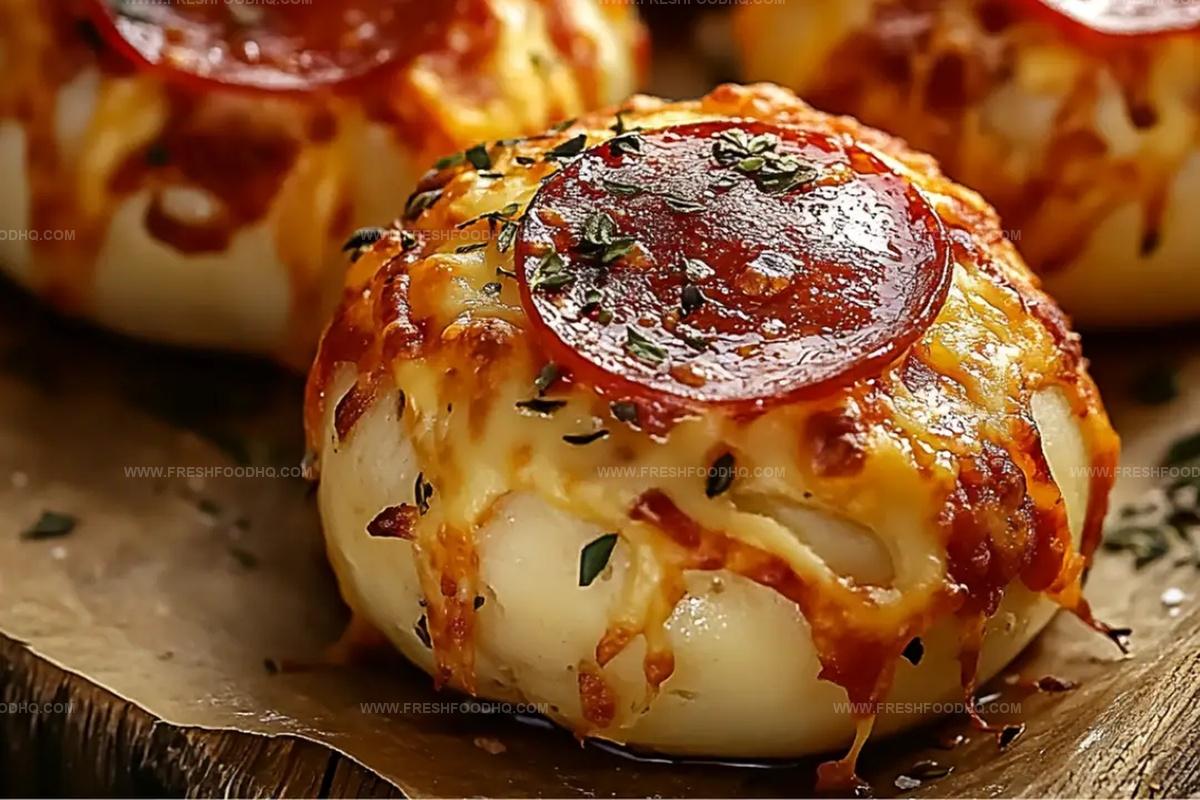
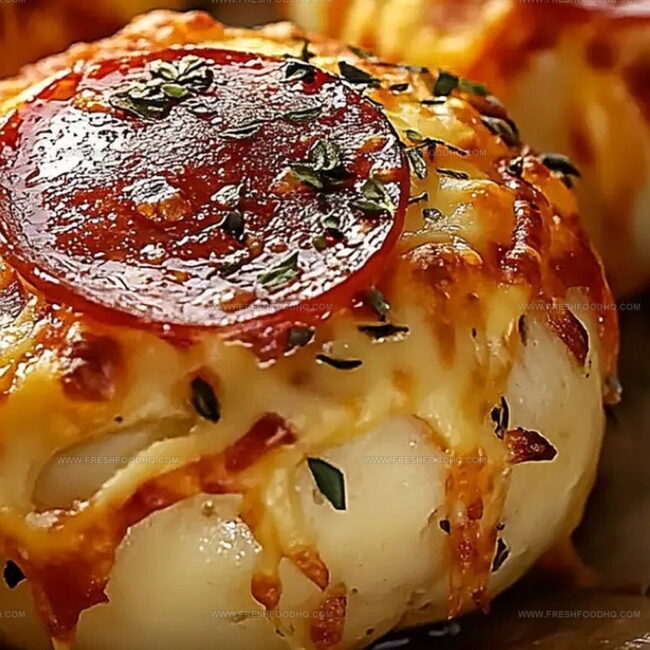
Crispy, golden cheesy pepperoni pizza bombs burst with flavor in every delightful bite.
Pockets of melted cheese and savory pepperoni hide inside soft, pillowy dough waiting to surprise you.
Small enough to pop in your mouth, these little morsels pack a serious punch of Italian-inspired goodness.
Perfectly seasoned and simple to assemble, they promise to become an instant crowd-pleaser at any gathering.
Unexpected twists of herbs and spices make these pizza bombs more than just another appetizer.
Quick preparation means you can whip up a batch faster than ordering takeout.
Invite friends over and watch these irresistible treats disappear in minutes.
Why Cheesy Pepperoni Pizza Bombs Are Crowd-Pleasers
Ingredients for Cheesy Pepperoni Pizza Bombs
For the Base:For the Filling:For the Seasonings and Toppings:For the Dipping Sauce:How to Make Cheesy Pepperoni Pizza Bombs at Home

Step 1: Warm Up the Oven
Crank your oven to 375F (190C). Prepare a baking sheet by lining it with parchment paper or giving it a light greasing.
Step 2: Flatten the Dough
Take each biscuit round and gently press it into a small, thin circle using your fingertips. Make sure the dough is soft and pliable.
Step 3: Load Up the Filling
Place your delicious fillings in the center of each dough circle:Step 4: Wrap and Seal the Goodness
Carefully fold the dough edges over the filling. Pinch the edges together tightly to create a secure seal.
Roll each piece between your palms to form a perfect round ball. Ensure no filling peeks out by smoothing the surface.
Position each pizza bomb with the sealed side facing down on the baking sheet.
Step 5: Add Flavor and Bake
Brush the tops of the pizza bombs with melted butter.
Sprinkle with:Slide the baking sheet into the oven and bake for 12-15 minutes. Look for a beautiful golden-brown color and a puffy texture.
Step 6: Serve and Enjoy
Scatter some fresh parsley on top for a pop of color. Serve these hot beauties alongside marinara sauce for dipping.
Watch them disappear in minutes!
Tips That Perfect Cheesy Pepperoni Pizza Bombs
Variations of Cheesy Pepperoni Pizza Bombs to Try
What Goes Best with Cheesy Pepperoni Pizza Bombs
How to Store Cheesy Pepperoni Pizza Bombs Properly
FAQs
Yes, you can make your own biscuit dough from scratch. Just ensure it’s a similar consistency to pre-made biscuit dough for the best results.
No problem! You can substitute pepperoni with cooked ham, salami, or even crumbled sausage. The key is using a similar-sized meat that won’t release too much grease.
Make sure to seal the dough edges completely and pinch them tightly. Roll the pizza bombs gently to create a smooth surface with no openings.
Print
Cheesy Pepperoni Pizza Bombs Recipe
- Total Time: 35 minutes
- Yield: 8 1x
Description
Pepperoni pizza bombs deliver explosive flavor in one irresistible bite. Crispy golden shells packed with melted cheese and zesty pepperoni guarantee a crowd-pleasing snack you’ll crave again and again.
Ingredients
Main Ingredients:
- 1 can (8 ounces) refrigerated biscuit dough
- 24 pepperoni slices
- 1 cup shredded mozzarella cheese
Cheese and Seasoning:
- 2 tablespoons grated Parmesan cheese
- 1 teaspoon garlic powder
- 1 teaspoon Italian seasoning
Sauce and Topping:
- 1 cup marinara sauce
- 2 tablespoons melted butter
- Fresh parsley, chopped (for garnish)
Instructions
- Prepare the oven by heating to 375°F (190°C) and lining a baking sheet with parchment paper or applying a light grease coating.
- Gently separate each biscuit round and transform into a flattened disc using light pressure.
- Center each dough circle with pepperoni slices and a compact mound of mozzarella cheese, ensuring even distribution.
- Gather the dough’s edges and carefully encase the filling, pressing firmly to create a complete seal without exposing ingredients.
- Tenderly shape each bundle into a uniform sphere, rotating between palms to smooth out any visible seams or potential openings.
- Position pizza bombs seam-side downward on the prepared baking sheet, maintaining slight separation between each.
- Enhance the exterior by generously brushing with melted butter and sprinkling a blend of garlic powder, Italian seasoning, and grated Parmesan cheese.
- Transfer to preheated oven and bake for 12-15 minutes until the surface achieves a rich golden-brown complexion and develops a puffy texture.
- Remove from oven and allow brief cooling before garnishing with freshly chopped parsley.
- Serve immediately alongside warm marinara sauce for a delightful dipping experience.
Notes
- Customize the pepperoni content by using turkey pepperoni for a leaner option or vegetarian pepperoni for meat-free diets.
- Experiment with different cheese varieties like cheddar or provolone to add unique flavor profiles to your pizza bombs.
- Prevent dough from tearing by keeping your fingers slightly damp when sealing the edges, ensuring a perfect pocket of cheesy goodness.
- Store leftover pizza bombs in an airtight container and reheat in the air fryer for crispy exterior and melty interior.
- Prep Time: 20 minutes
- Cook Time: 15 minutes
- Category: Lunch, Dinner, Appetizer, Snacks
- Method: Baking
- Cuisine: Italian-American
Nutrition
- Serving Size: 8
- Calories: 230 kcal
- Sugar: 2 g
- Sodium: 490 mg
- Fat: 14 g
- Saturated Fat: 6 g
- Unsaturated Fat: 7 g
- Trans Fat: 0.2 g
- Carbohydrates: 18 g
- Fiber: 1 g
- Protein: 10 g
- Cholesterol: 35 mg
Ethan Caldwell
Founder & Culinary Innovator
Expertise
Farm-to-table cooking, Seasonal recipe creation, Culinary storytelling, Food photography and styling
Education
The Chef’s Academy (Indianapolis, IN)
Ethan didn’t just fall in love with food, he grew into it, surrounded by fields, farmers’ markets, and family meals that told a story.
After sharpening his skills at The Chef’s Academy, he took his passion straight into the farm-to-table movement, working side-by-side with local growers and seasonal flavors.
He believes every recipe should feel like a walk through a summer market: colorful, fresh, and full of possibility.
Outside the kitchen, Ethan’s idea of a perfect day is hiking mountain trails, digging into heirloom vegetables, and hosting casual dinners where seconds are always encouraged.