
Easy Bread In A Bag Recipe: A Fun Hands-On Baking Adventure
Mixing bread dough becomes effortless with this convenient bread in a bag recipe that eliminates traditional kneading hassles.
Soft, pillowy loaves emerge from simple ingredients and minimal effort.
Kitchen novices will love how quickly everything comes together.
No fancy equipment required for these delightful homemade creations.
Warm, fragrant slices promise comfort and satisfaction with each bite.
You can whip up this foolproof recipe in less than an hour.
Grab your ingredients and let’s bake something magical that will make everyone ask for seconds.
Bread in a Bag: Easy, Fresh, and Fun
Ingredients for Bread in a Bag
For the Base Ingredients:For the Flavor Enhancers:For the Preparation Needs:How to Make Bread in a Bag
Step 1: Awaken the Yeast
In a large ziplock bag, combine flour, sugar, yeast, and warm water. Seal the bag and let it rest for 10 minutes, allowing the yeast to become active and start working its magic.
Step 2: Build the Dough Foundation
Add another portion of flour, olive oil, and salt to the bag. Seal carefully and massage the bag, kneading the ingredients until they form a smooth, cohesive mixture.
Step 3: Complete the Dough Preparation
Introduce the final portion of flour into the bag. Seal tightly and continue kneading until all ingredients are perfectly blended.
Gently shape the dough into a beautiful loaf inside the bag.
Step 4: Allow Dough to Rise
Let the dough sit and rise for approximately 30 minutes.
During this time, the yeast will help the bread develop its characteristic soft and airy texture.
Step 5: Prepare for Baking
Warm the oven to 375 degrees Fahrenheit.
Carefully transfer the dough from the bag onto a baking sheet, ensuring it maintains its shape.
Step 6: Transform Dough into Golden Bread
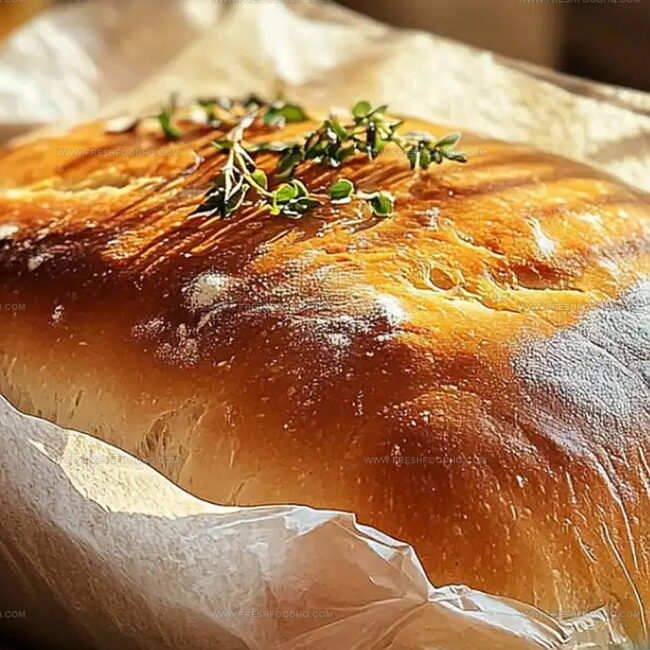
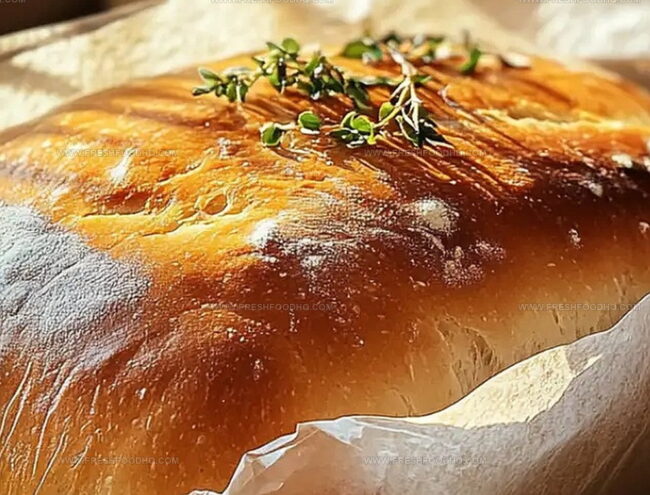
Bake the loaf for 25-30 minutes, watching for a beautiful golden-brown color that signals perfect doneness.
The aroma will fill your kitchen with warmth.
Step 7: Enjoy Your Homemade Creation
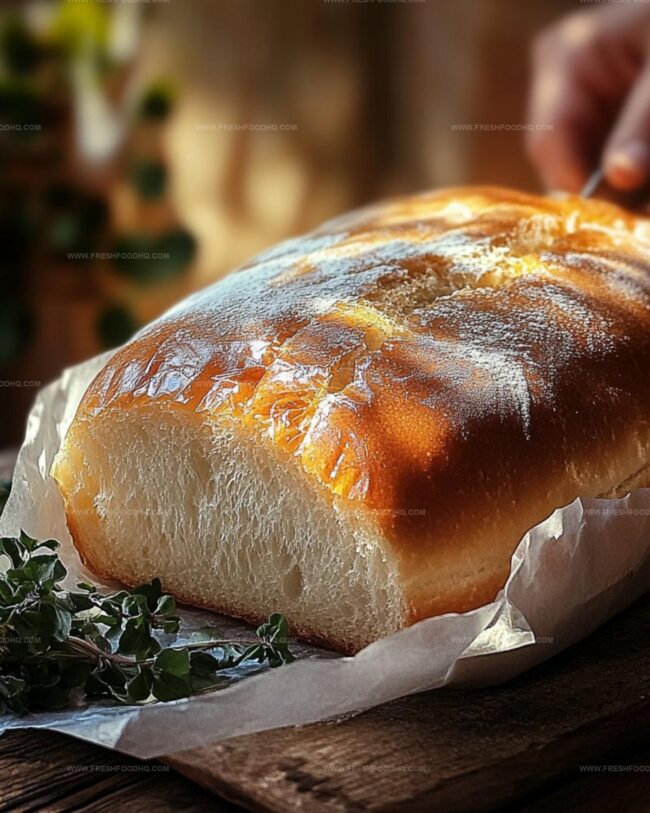
Remove the bread from the oven and allow it to cool slightly.
Slice and serve your freshly baked bag bread, savoring the delicious results of your culinary adventure.
Tips for Bread in a Bag Success
Variations on Bread in a Bag
Pairing Suggestions for Bread in a Bag
Savor Hearty Companions: Complementary Pairings for Fresh Bread
Storage Advice for Bread in a Bag
FAQs
Yes, you can substitute whole wheat flour, but the bread might be denser and slightly less fluffy. Start by replacing half the all-purpose flour with whole wheat flour to maintain a good texture.
You can use a clean, large mixing bowl instead. The bag method is just a fun, mess-free way to mix and knead the dough, but traditional mixing works perfectly fine.
The yeast is active when it becomes bubbly and foamy after mixing with warm water. If no bubbles form, your yeast might be old or the water was too hot or cold, which can kill the yeast.
Print
Bread In A Bag Recipe
- Total Time: 1 hour 15 minutes
- Yield: 8 1x
Description
Homemade bread in a bag delights with simple ingredients and effortless preparation. Mixing, kneading, and baking become a delightful kitchen adventure you’ll savor from first slice to last crumb.
Ingredients
Main Ingredients:
- 3 cups (710 ml) all-purpose flour
- 1 package rapid-rise yeast
- 1 cup (240 ml) warm water
Flavoring Ingredients:
- 3 teaspoons (15 ml) sugar
- 3 tablespoons (45 ml) olive oil
Seasoning Ingredients:
- 1 1/2 teaspoons (7.5 ml) salt
Instructions
- Initiate the fermentation process by combining flour, sugar, yeast, and warm water inside a large resealable plastic bag. Massage the contents gently and allow the mixture to rest for 10 minutes, enabling yeast activation.
- Introduce olive oil and salt to the bag, then seal and knead thoroughly until the ingredients merge into a cohesive texture.
- Gradually incorporate the remaining flour, continuing to knead inside the bag until a unified dough develops. Transfer the mixture onto a clean surface and shape into a rustic loaf.
- Return the dough to the bag, creating space for expansion, and let it rise in a warm environment for approximately 30 minutes until it doubles in volume.
- Preheat the oven to 375°F while preparing a baking sheet. Gently transfer the risen dough onto the sheet, ensuring even placement.
- Bake for 25-30 minutes, monitoring the bread’s surface until it transforms into a rich golden-brown color and develops a crisp exterior.
- Remove from the oven and allow the bread to cool for 10-15 minutes, permitting internal steam to stabilize before slicing and serving.
Notes
- Keep the water temperature between 110-115°F to perfectly activate the yeast without killing it.
- Use plastic or glass ziplock bags to avoid any metallic taste or chemical reactions during kneading.
- For gluten-free version, substitute all-purpose flour with a gluten-free blend and add xanthan gum for better texture.
- Kids will love this hands-on method of making bread without traditional messy mixing bowls.
- Prep Time: 45 minutes
- Cook Time: 30 minutes
- Category: Breakfast, Snacks
- Method: Baking
- Cuisine: American
Nutrition
- Serving Size: 8
- Calories: 172
- Sugar: 1.3 g
- Sodium: 262 mg
- Fat: 4.9 g
- Saturated Fat: 0.7 g
- Unsaturated Fat: 4.2 g
- Trans Fat: 0 g
- Carbohydrates: 29 g
- Fiber: 1 g
- Protein: 4.7 g
- Cholesterol: 0 mg
Ethan Caldwell
Founder & Culinary Innovator
Expertise
Farm-to-table cooking, Seasonal recipe creation, Culinary storytelling, Food photography and styling
Education
The Chef’s Academy (Indianapolis, IN)
Ethan didn’t just fall in love with food, he grew into it, surrounded by fields, farmers’ markets, and family meals that told a story.
After sharpening his skills at The Chef’s Academy, he took his passion straight into the farm-to-table movement, working side-by-side with local growers and seasonal flavors.
He believes every recipe should feel like a walk through a summer market: colorful, fresh, and full of possibility.
Outside the kitchen, Ethan’s idea of a perfect day is hiking mountain trails, digging into heirloom vegetables, and hosting casual dinners where seconds are always encouraged.