Homemade Banana Pudding From Scratch Recipe: Silky Sweet Comfort
Crafting a dreamy banana pudding from scratch brings pure culinary magic into your kitchen.
Sweet memories of childhood desserts dance through this classic southern treat.
Creamy layers whisper comfort and nostalgia with every delightful spoonful.
Homemade pudding transforms simple ingredients into something extraordinary and irresistible.
Silky custard and ripe bananas create a heavenly combination that feels like a warm embrace.
Soft vanilla wafers add delightful crunch to this luscious dessert.
Why Banana Pudding From Scratch Is Worth It
Everything Needed For Banana Pudding From Scratch
Main Ingredients:Fruity Layer:Crunchy Elements:Steps To Make Banana Pudding From Scratch
Step 1: Whip Cream Cheese
Use an electric mixer to blend cream cheese until it becomes silky and smooth, creating a creamy base for the pudding.
Step 2: Create Pudding Mixture
Combine the following ingredients and beat until the mixture reaches a thick consistency:Continue mixing for 3-5 minutes to ensure a perfect blend.
Step 3: Add Flavor Enhancer
Stir in vanilla extract, mixing thoroughly to distribute the rich vanilla flavor throughout the pudding.
Step 4: Fold in Whipped Topping
Gently incorporate thawed whipped topping, blending until the mixture becomes uniformly smooth and creamy.
Step 5: Build First Layer
In a 9×13-inch baking dish, create the first foundation layer:Step 6: Add Pudding Layer
Spread half of the prepared pudding mixture evenly over the wafers and bananas.
Step 7: Create Second Layer
Repeat the layering process:Step 8: Garnish and Chill
Top the pudding with any leftover vanilla wafers and banana slices. Refrigerate for at least 2 hours to allow the pudding to set completely.
Step 9: Serve and Enjoy
Remove from refrigerator and serve chilled, savoring the delightful layers of creamy pudding, fresh bananas, and crisp wafers.
Helpful Tips For Banana Pudding From Scratch
Tasty Options For Banana Pudding From Scratch
Perfect Pairings With Banana Pudding From Scratch
How To Store Banana Pudding From Scratch Properly
Questions On Banana Pudding From Scratch
Yes, you can replace the whipped topping with homemade whipped cream for a fresher taste. Just whip heavy cream until stiff peaks form before folding into the pudding mixture.
An electric mixer helps create a smoother, lump-free pudding, but you can use a whisk if you don’t have one. Just be prepared to mix vigorously to achieve a creamy consistency.
Choose bananas that are yellow with a few brown spots. They should be soft but not mushy, which provides the best flavor and texture for the pudding.
Print
Banana Pudding from Scratch Recipe
- Total Time: 2 hours 15 minutes
- Yield: 8 1x
Description
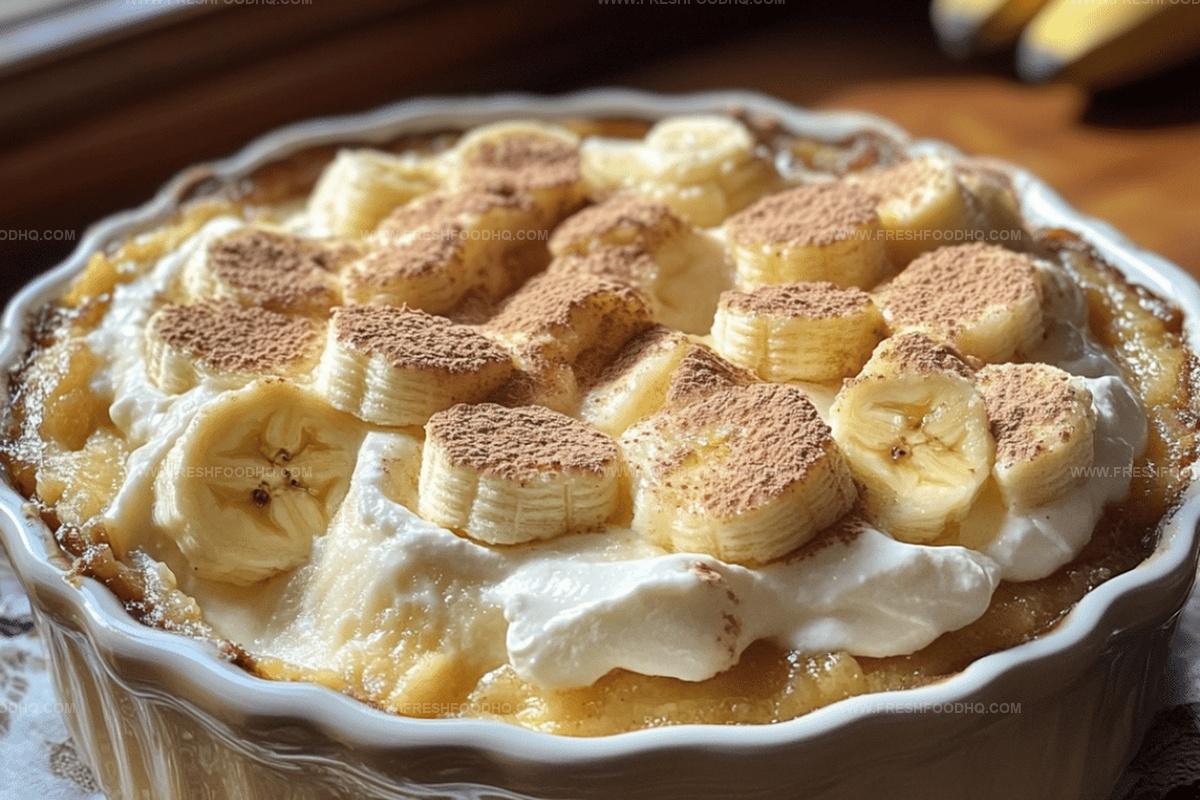
Creamy banana pudding embraces Southern comfort with layers of vanilla-soaked wafers and ripe bananas. Rich custard and fluffy whipped cream create a nostalgic dessert you’ll savor to the last delightful spoonful.
Ingredients
Main Ingredients:
- 4 bananas, sliced
- 1/2 (12 ounces) package vanilla wafers
Dairy and Pudding Ingredients:
- 1 (8 ounces) package cream cheese
- 1 (14 ounces) can sweetened condensed milk
- 3 cups (720 milliliters) cold milk
- 1 (8 ounces) container frozen whipped topping, thawed
Flavoring Ingredients:
- 1 (5 ounces) package instant vanilla pudding mix
- 1 teaspoon vanilla extract
Instructions
- Whip cream cheese with an electric mixer until silky and velvety, ensuring no lumps remain.
- Incorporate sweetened condensed milk, instant vanilla pudding mix, and cold milk, blending thoroughly until the mixture transforms into a thick, luxurious consistency, approximately 3-5 minutes.
- Infuse vanilla extract into the mixture, stirring until perfectly integrated.
- Delicately fold thawed whipped topping, creating a smooth, aerated texture.
- Construct the first foundation layer in a 9×13-inch dish by arranging vanilla wafers across the bottom, followed by a generous spread of banana slices.
- Generously distribute half of the pudding mixture over the wafers and bananas, creating an even landscape of creamy goodness.
- Replicate the layering process with remaining wafers, bananas, and pudding mixture, building delectable strata.
- Crown the dessert with scattered wafer fragments and banana garnishes.
- Refrigerate for a minimum of 2 hours, allowing flavors to meld and pudding to solidify into a perfectly set dessert.
- Serve thoroughly chilled, presenting a classic southern-style banana pudding that promises pure indulgence.
Notes
- Softening cream cheese beforehand ensures a smoother, lump-free texture that blends easily with other ingredients.
- Use ripe, slightly spotted bananas for maximum sweetness and deeper flavor profile in the pudding.
- Make gluten-free by substituting regular vanilla wafers with gluten-free alternatives or crushed gluten-free graham crackers.
- Prevent banana browning by tossing sliced bananas in a little lemon juice before layering, which maintains their fresh appearance and prevents oxidation.
- Prep Time: 15 minutes
- Cook Time: 0 minutes
- Category: Desserts
- Method: Blending
- Cuisine: American
Nutrition
- Serving Size: 8
- Calories: 338 kcal
- Sugar: 32 g
- Sodium: 238 mg
- Fat: 12 g
- Saturated Fat: 7 g
- Unsaturated Fat: 4 g
- Trans Fat: 0.3 g
- Carbohydrates: 52 g
- Fiber: 2 g
- Protein: 5 g
- Cholesterol: 30 mg
Samantha Lee
Recipe Developer & Content Creator
Expertise
Plant-based and vegetarian recipes, Recipe testing and development, Food blogging and digital content creation, Culinary education and workshops
Education
Oregon Culinary Institute (Portland, OR)
Samantha sees cooking like painting, every fresh herb, every juicy tomato, a new splash of color on a canvas.
After graduating from Oregon Culinary Institute, she blended her love of global cuisines and plant-based cooking into recipes that feel fresh, fearless, and full of heart.
Samantha’s kitchen is a place where comfort food gets a modern remix and every meal feels like a little adventure. When she’s not cooking, she’s out exploring farmers’ markets, sketching new recipe ideas, or getting her hands dirty in a community garden.