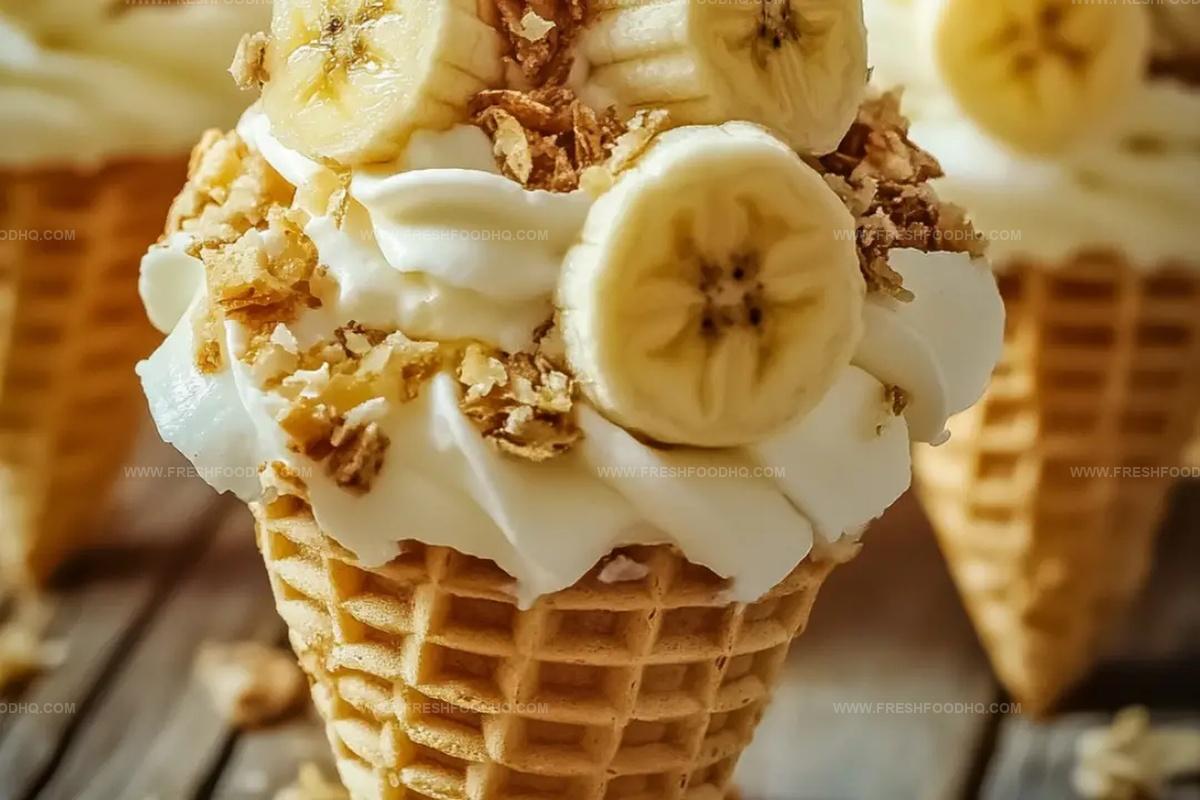
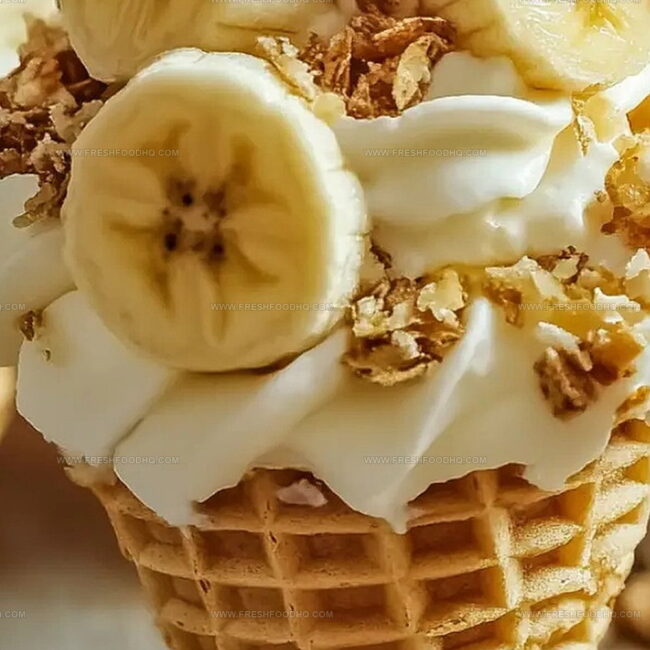
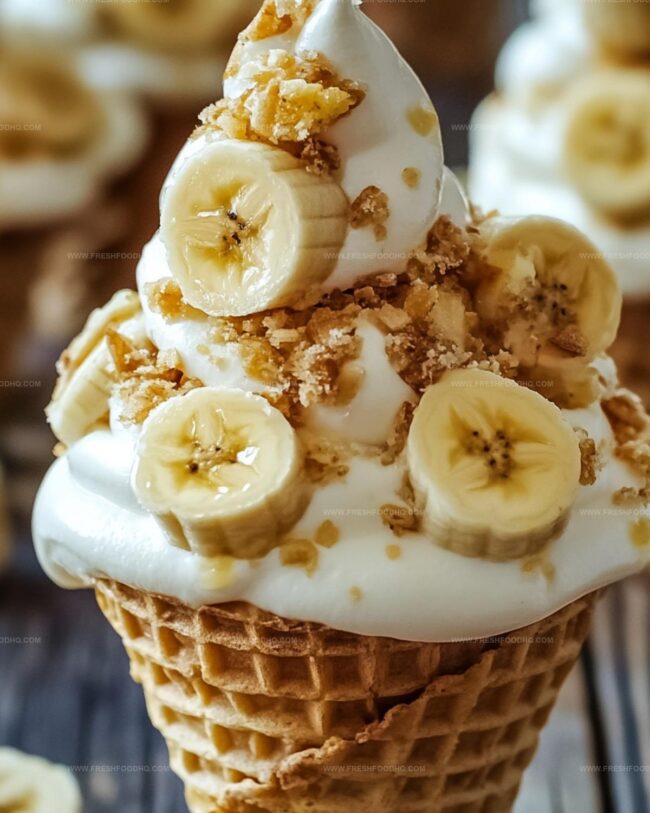
Dreamy Banana Pudding Cheesecake Cones Recipe for Sweet Bliss
Creamy banana pudding meets classic cheesecake in these delightful cones that’ll make you swoon.
Sweet bananas and smooth cream cheese blend into an irresistible dessert surprise.
Crisp waffle cones provide the perfect crunch against silky filling.
Rich layers promise a decadent treat that feels both nostalgic and innovative.
Guests will absolutely adore these handheld delights that combine classic Southern comfort with modern dessert creativity.
Summer parties or casual gatherings suddenly become extraordinary with these elegant yet playful treats.
One bite transports you to a world of pure dessert magic – trust me, you won’t be able to stop at just one.
What Makes Banana Pudding Cheesecake Cones Special
Ingredients for Banana Pudding Cheesecake Cones
For the Main Ingredients:For the Cone and Cookie Components:For the Garnish and Finishing Touches:How to Make Banana Pudding Cheesecake Cones
Step 1: Whip Up Creamy Cheesecake Base
Grab a spacious mixing bowl and blend softened cream cheese with powdered sugar until silky smooth. In a separate bowl, whip heavy cream until it forms fluffy peaks.
Gently fold the whipped cream into the cream cheese mixture. Next, grab another bowl and whisk banana pudding mix with cold milk until it thickens beautifully.
Carefully incorporate the pudding into the creamy mixture. Tuck the bowl into the refrigerator while you prep the cones.
Step 2: Create Crunchy Cone Edges
In a small bowl, mix crushed vanilla wafer cookies with melted butter until completely coated. Dip the cone tops into the buttery cookie mixture, rolling them to create a delightful crunchy rim.
Let the cones rest for a few minutes to set their magical cookie coating.
Step 3: Fill Cones with Dreamy Goodness
Carefully spoon or pipe the luscious banana pudding cheesecake filling into the prepared cones.
Make sure to fill them generously for maximum deliciousness.
Step 4: Add Final Fabulous Touches
Crown each cone with:Serve immediately and watch everyone’s eyes light up with joy!
Tips for Perfect Banana Pudding Cheesecake Cones

Creative Variations of Banana Pudding Cheesecake Cones
Pairings to Serve with Banana Pudding Cheesecake Cones
Pair Creamy Banana Bliss with Sweet Sips:How to Store Banana Pudding Cheesecake Cones
Store leftovers in an airtight container in the refrigerator for up to 2-3 days. Place parchment paper between layers to prevent sticking and maintain the cookie rim’s crispness.
Wrap individual cones tightly in plastic wrap, then place in a freezer-safe container. Freeze for up to 1 month. Thaw in the refrigerator overnight before serving.
Bring refrigerated cones to room temperature for 10-15 minutes before serving to soften the filling and restore texture.
If the cookie rim becomes soggy, briefly toast in a preheated oven at 300°F for 3-5 minutes to crisp up the edges before serving.
FAQs
Pat the inside of the cones dry with a paper towel before filling, and serve immediately after assembling to maintain the crispness of the cone.
Prepare the cheesecake filling and cookie-rimmed cones separately up to a day in advance. Fill the cones just before serving to keep them crisp and fresh.
Use vanilla pudding mix instead and add a mashed ripe banana to the mixture to achieve a similar banana flavor profile.
Ensure all ingredients are at room temperature before mixing, and use an electric mixer to beat the cream cheese until completely smooth before adding other ingredients.
Print
Banana Pudding Cheesecake Cones Recipe
- Total Time: 20 minutes
- Yield: 12 1x
Description
Delightful banana pudding cheesecake cones blend Southern comfort with playful dessert innovation. Sweet banana flavor and creamy cheesecake nestled in crisp waffle cones promise pure indulgence you’ll savor to the last delicious bite.
Ingredients
Main Ingredients:
- 16 ounces (454 grams) cream cheese, softened
- 1 package (3.4 ounces / 96 grams) instant banana pudding mix
- 1 1/2 cups (360 milliliters) cold milk
- 1 cup (120 grams) powdered sugar
Cone and Crust Ingredients:
- 10–12 waffle cones or sugar cones
- 1 cup (120 grams) crushed vanilla wafer cookies
- 2 tablespoons (30 milliliters) melted butter
Garnish Ingredients:
- Sliced bananas
- Whipped cream
- Crushed vanilla wafer cookies
- Caramel drizzle (optional)
- 1/2 cup (120 milliliters) heavy whipping cream
- 1 teaspoon (5 milliliters) vanilla extract
Instructions
- Craft the velvety cheesecake base by whipping softened cream cheese and powdered sugar until luxuriously smooth in a spacious mixing bowl.
- Separately whip heavy cream to soft, billowy peaks, then tenderly incorporate into the cream cheese mixture, creating a light, airy foundation.
- Vigorously whisk instant banana pudding mix with cold milk for 2-3 minutes until it thickens and develops a silky consistency.
- Delicately fold the prepared banana pudding into the cream cheese blend, ensuring a harmonious integration of flavors. Chill the mixture while preparing the cones.
- Pulverize vanilla wafer cookies and combine with melted butter, creating a crumbly, golden coating.
- Artfully dip cone edges into the buttery cookie crumbs, generating a crisp, textured rim. Allow cones to set for a few moments.
- Generously fill each prepared cone with the chilled banana pudding cheesecake mixture, using a piping bag or spoon for elegant presentation.
- Embellish each cone with a fresh banana slice, pillowy whipped cream, additional cookie crumbles, and an optional caramel drizzle for decadent finishing touches.
- Serve immediately to preserve the cone’s crispness and the filling’s creamy perfection.
Notes
- Swap cream cheese for dairy-free alternatives like cashew or tofu cream cheese to create a vegan-friendly version of this dessert.
- Crush gluten-free cookies for the cone rim to make the recipe suitable for those with gluten sensitivities.
- Chill the cream cheese mixture thoroughly to ensure a firmer, more stable filling that holds its shape inside the cones.
- Use ripe, spotty bananas for the most intense natural sweetness and deeper banana flavor in the pudding mixture.
- Prep Time: 20 minutes
- Cook Time: 0 minutes
- Category: Desserts, Snacks
- Method: Blending
- Cuisine: American
Nutrition
- Serving Size: 12
- Calories: 278 kcal
- Sugar: 17 g
- Sodium: 138 mg
- Fat: 18 g
- Saturated Fat: 11 g
- Unsaturated Fat: 6 g
- Trans Fat: 0.5 g
- Carbohydrates: 20 g
- Fiber: 0.5 g
- Protein: 4 g
- Cholesterol: 58 mg
Ethan Caldwell
Founder & Culinary Innovator
Expertise
Farm-to-table cooking, Seasonal recipe creation, Culinary storytelling, Food photography and styling
Education
The Chef’s Academy (Indianapolis, IN)
Ethan didn’t just fall in love with food, he grew into it, surrounded by fields, farmers’ markets, and family meals that told a story.
After sharpening his skills at The Chef’s Academy, he took his passion straight into the farm-to-table movement, working side-by-side with local growers and seasonal flavors.
He believes every recipe should feel like a walk through a summer market: colorful, fresh, and full of possibility.
Outside the kitchen, Ethan’s idea of a perfect day is hiking mountain trails, digging into heirloom vegetables, and hosting casual dinners where seconds are always encouraged.