Spooky Witch Hat Cupcakes Recipe: Magical Halloween Treats
Spooky and delightful witch hat cupcakes spark magical moments in every Halloween celebration.
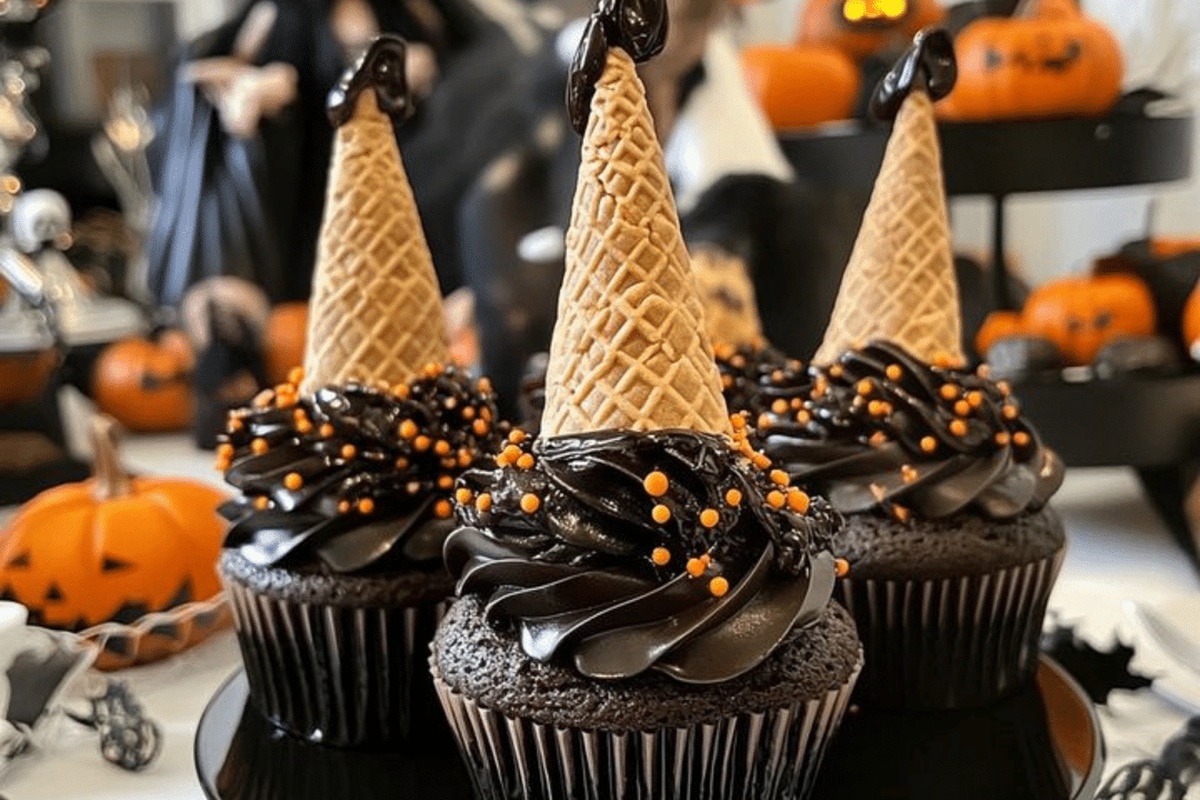
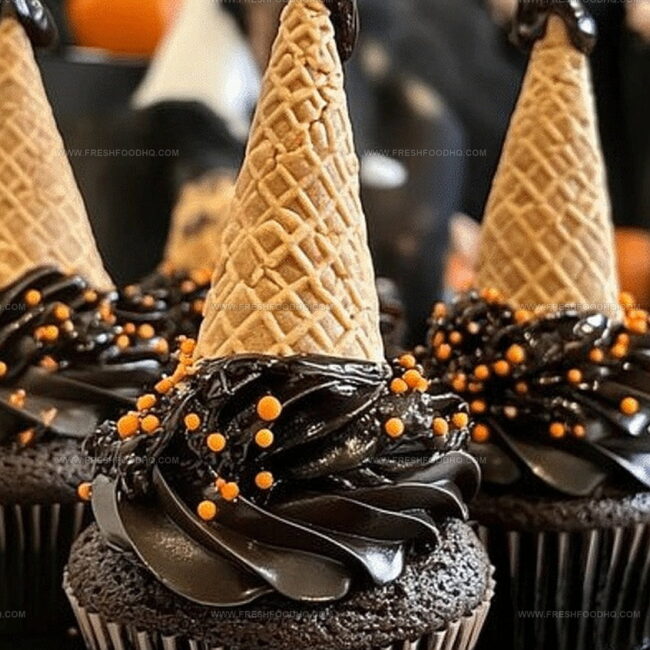
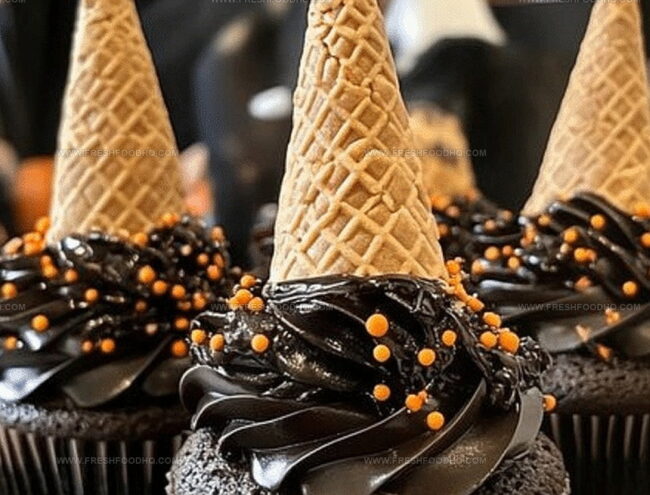
Sweet chocolate frosting covers rich vanilla bases like edible wizard accessories.
Decorative pointy hats emerge from delicate cupcake foundations with whimsical charm.
Dark chocolate kisses anchor each cone-shaped topping with playful precision.
Colorful sprinkles and crisp cookie brims complete these enchanting treats.
Kids and adults alike will marvel at these bewitching desserts.
You can’t resist creating such wickedly cute Halloween magic right in your kitchen.
Why Witch Hat Cupcakes Are a Spooky Delight
Ingredients for Witch Hat Cupcakes
Cake Base:Frosting and Decoration:Optional Decorative Touches:How to Make Witch Hat Cupcakes
Step 1: Prepare the Oven and Baking Space
Warm up your oven to a toasty 350F and line a muffin tin with spooky cupcake liners. Get ready to create some Halloween magic!
Step 2: Mix the Chocolate Cake Batter
Grab your chocolate cake mix and combine the ingredients:Stir everything together until the batter is smooth and free of lumps.
Step 3: Fill and Bake the Cupcakes
Pour the chocolatey batter into each cupcake liner, filling them about two-thirds full. Slide the tin into the oven and bake for 18-20 minutes. Check for doneness by inserting a toothpick – it should come out clean when the cupcakes are ready.
Step 4: Cool Down the Cupcakes
Let the cupcakes chill completely on a wire rack. Patience is key to creating the perfect witch hat treat!
Step 5: Create Spooky Orange Frosting
Transform your chocolate frosting into a Halloween-worthy orange by mixing in a few drops of orange food coloring. Stir until you achieve a vibrant, magical hue.
Step 6: Frost the Cupcake Base
Generously spread the orange frosting over each cupcake, creating a smooth and even surface that will serve as the base of your witch hat.
Step 7: Add the Witch Hat Cone
Carefully place a chocolate ice cream cone upside down on top of each frosted cupcake. This will create the distinctive pointed witch hat shape.
Step 8: Decorate with Haunting Touches
Bring your witch hats to life with spooky decorations:Let your creativity run wild and make each cupcake uniquely terrifying!
Pro Tips for Perfect Witch Hat Cupcakes
Variations to Customize Witch Hat Cupcakes
What to Serve with Witch Hat Cupcakes
Storage Tips for Witch Hat Cupcakes
FAQs About Witch Hat Cupcakes
Yes, vanilla or yellow cake mix works great too. Just follow the package instructions for mixing.
Frost the cupcake just before serving and place the cone right before eating to keep it crisp and crunchy.
Choose a flat-bottomed sugar cone for stability and a clean witch hat shape. Wafer cones might be too fragile.
No special tools needed. Just use a regular butter knife or offset spatula to frost, and place decorations by hand.
Print
Witch Hat Cupcakes Recipe
- Total Time: 33-35 minutes
- Yield: 12 1x
Description
Spooky witch hat cupcakes bring Halloween magic to dessert tables with chocolate-drenched charm. Dark chocolate cake bases topped with pointed frosting hats create a playful treat that delights guests and sparks festive Halloween spirit.
Ingredients
Main Ingredients:
- 1 box chocolate cake mix
- 1 cup (240 milliliters) water
- 1/3 cup (80 milliliters) vegetable oil
- 3 eggs
Frosting and Cone:
- 1 can chocolate frosting
- 12 chocolate ice cream cones
Decorative Ingredients:
- Orange food coloring
- Sprinkles or decorations of your choice
Instructions
- Preheat the oven to 350°F (175°C) and prepare a muffin tin with cupcake liners.
- Mix the chocolate cake batter following the package instructions, combining all specified wet and dry ingredients thoroughly.
- Carefully distribute the batter into each liner, filling approximately two-thirds full to allow room for rising.
- Bake for 18-20 minutes, checking doneness by inserting a toothpick into the center – it should emerge clean and dry.
- Remove cupcakes from the oven and let them cool completely on a wire rack to room temperature.
- Transform plain chocolate frosting by blending in orange food coloring until a vibrant Halloween-inspired hue is achieved.
- Apply the orange frosting evenly across each cupcake surface, creating a smooth and consistent layer.
- Invert chocolate ice cream cones onto the frosted cupcakes, positioning them to mimic a pointed witch’s hat silhouette.
- Embellish the witch hat cupcakes with black sprinkles, candy eyes, or additional Halloween-themed decorative elements for a playful and festive appearance.
Notes
- Opt for high-quality chocolate cake mix to ensure rich, moist cupcakes with deeper flavor complexity.
- Ensure cupcakes are completely cooled before frosting to prevent melting and maintain crisp decorative details.
- Experiment with different food coloring intensities to create unique orange shades that match Halloween mood.
- Use gel food coloring for more vibrant colors and prevent watering down the frosting’s consistency.
- Prep Time: 15 minutes
- Cook Time: 18-20 minutes
- Category: Desserts
- Method: Baking
- Cuisine: American
Nutrition
- Serving Size: 12
- Calories: 360
- Sugar: 30 g
- Sodium: 210 mg
- Fat: 15 g
- Saturated Fat: 4 g
- Unsaturated Fat: 10 g
- Trans Fat: 0.2 g
- Carbohydrates: 50 g
- Fiber: 2 g
- Protein: 5 g
- Cholesterol: 55 mg
Samantha Lee
Recipe Developer & Content Creator
Expertise
Plant-based and vegetarian recipes, Recipe testing and development, Food blogging and digital content creation, Culinary education and workshops
Education
Oregon Culinary Institute (Portland, OR)
Samantha sees cooking like painting, every fresh herb, every juicy tomato, a new splash of color on a canvas.
After graduating from Oregon Culinary Institute, she blended her love of global cuisines and plant-based cooking into recipes that feel fresh, fearless, and full of heart.
Samantha’s kitchen is a place where comfort food gets a modern remix and every meal feels like a little adventure. When she’s not cooking, she’s out exploring farmers’ markets, sketching new recipe ideas, or getting her hands dirty in a community garden.