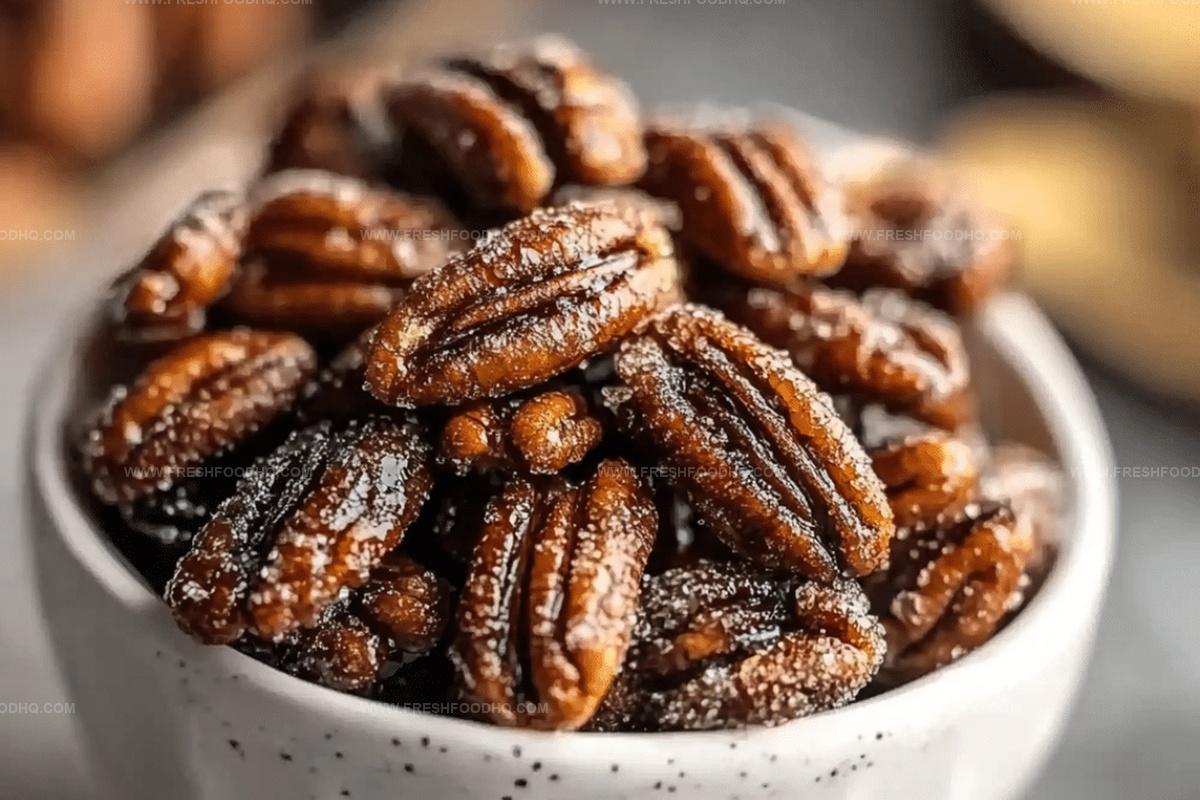
Irresistible Stovetop Maple Candied Pecans Recipe For Sweet Snacking
Sweet aromas of caramelized maple candied pecans will dance through your kitchen, promising a delightful treat.
Crisp autumn afternoons call for something special that transforms simple nuts into magical morsels.
Kitchen experiments often lead to unexpected deliciousness, and these pecans prove that point perfectly.
Warm sugar coating creates an irresistible crunch that makes snacking impossible to resist.
Minimal ingredients combine for maximum flavor, turning ordinary pecans into extraordinary bites.
Simple techniques guarantee success, even for novice cooks looking to impress.
Prepare to fall in love with this ridiculously easy recipe that guarantees smiles with every single bite.
Why Stovetop Maple Candied Pecans Are Sweet And Crunchy
What You’ll Need For Maple Candied Pecans
Nuts:Sweet Coating:Flavor Enhancers:How To Cook Maple Candied Pecans On The Stove
Step 1: Toast Nutty Delights
Grab a large skillet and warm it over medium heat. Toss in your pecans and gently stir them around. Watch as they transform, releasing their rich aroma and turning a beautiful golden brown. Keep a close eye to prevent burning – this should take about 2-3 minutes.
Step 2: Drench in Liquid Gold
Pour maple syrup over the toasted pecans, creating a magical coating. Stir enthusiastically to ensure every single nut gets drenched. Cook and stir continuously for 4-5 minutes, letting the syrup bubble and thicken into a gorgeous glaze.
Step 3: Sprinkle Flavor Boosters
Time to elevate your nuts with some amazing flavor enhancers:Stir these ingredients into the syrupy mixture, letting them mingle and dance for another 1-2 minutes until everything looks perfectly glossy.
Step 4: Create Crispy Clusters
Carefully transfer the sticky, sweet pecans onto parchment paper or a silicone mat. Spread them out so they don’t cuddle up and stick together while cooling. Let them rest and transform into crunchy, candied treasures.
Step 5: Enjoy Your Crunchy Treat
Once completely cooled, these pecans become irresistibly crisp with a candy-like shell. Munch them as a snack, sprinkle over salads, or crown your morning yogurt with these delectable morsels.
Tips For Shiny Maple Candied Pecans
Creative Mixes For Candied Pecans
Perfect Pairings With Maple Candied Pecans
How To Store Stovetop Maple Candied Pecans Without Clumping
FAQs About Stovetop Maple Candied Pecans
While delicious, they’re high in calories and sugar. They do offer some nutritional benefits like protein, healthy fats, and minerals from pecans, but should be enjoyed in moderation as a treat.
Absolutely! Walnuts, almonds, and cashews work great. Just follow the same cooking technique and adjust toasting time based on the nut’s size and texture.
When stored in an airtight container at room temperature, they’ll maintain their crispy texture for about 5-7 days. Keep them away from humidity to preserve their crunch.
Print
Stovetop Maple Candied Pecans Recipe
- Total Time: 8-10 minutes
- Yield: 4 1x
Description
Sweet Southern comfort emerges in these maple candied pecans, a delightful treat that blends rich maple syrup with toasted pecans. Golden-brown and glossy, these nuts offer a perfect balance of caramelized sweetness you’ll crave again and again.
Ingredients
Main Ingredients:
- 2 cups (480 ml) pecan halves
- 1/4 cup (60 ml) pure maple syrup
Spices and Seasonings:
- 1 teaspoon ground cinnamon
- 1/4 teaspoon sea salt
Flavor Enhancers:
- 1 teaspoon vanilla extract
Instructions
- Warm a large skillet over medium heat, spreading pecans across the surface to toast for 2-3 minutes, gently stirring until they release a rich, nutty aroma and achieve a light golden hue.
- Drizzle maple syrup into the skillet, thoroughly coating the toasted nuts while continuously stirring to ensure even distribution and prevent burning.
- Maintain medium heat, allowing the syrup to transform into a glossy, thickening glaze that clings tenaciously to each pecan, stirring consistently for 4-5 minutes.
- Incorporate vanilla extract, ground cinnamon, and sea salt, intensifying the flavor profile and continuing to cook for an additional 1-2 minutes until the syrup reaches a sticky, caramelized consistency.
- Immediately transfer the glazed pecans onto a parchment-lined surface, carefully spreading them in a single layer to prevent clumping and facilitate even cooling.
- Allow the candied pecans to cool completely, during which they will develop a crisp, brittle-like exterior perfect for snacking, salad garnishing, or topping yogurt and oatmeal.
Notes
- Toast nuts carefully to enhance their natural flavors and prevent burning, watching closely during the 2-3 minute process.
- Use pure maple syrup for the richest, most authentic sweet flavor that caramelizes beautifully with the pecans.
- Stir continuously while cooking to ensure even coating and prevent syrup from burning or sticking to the pan.
- Cool pecans completely on parchment paper to create a crispy, brittle-like texture that separates easily.
- Experiment with alternative sweeteners like honey or agave for different flavor profiles if maple syrup is unavailable.
- Swap pecans for other nuts like almonds or walnuts to create variety and suit personal preferences.
- Store in an airtight container at room temperature for up to a week to maintain crunchiness and flavor.
- Prep Time: 2-3 minutes
- Cook Time: 6-7 minutes
- Category: Snacks, Desserts
- Method: Sautéing
- Cuisine: American
Nutrition
- Serving Size: 4
- Calories: 260 kcal
- Sugar: 12 g
- Sodium: 90 mg
- Fat: 22 g
- Saturated Fat: 2 g
- Unsaturated Fat: 19 g
- Trans Fat: 0 g
- Carbohydrates: 16 g
- Fiber: 3 g
- Protein: 3 g
- Cholesterol: 0 mg
Samantha Lee
Recipe Developer & Content Creator
Expertise
Plant-based and vegetarian recipes, Recipe testing and development, Food blogging and digital content creation, Culinary education and workshops
Education
Oregon Culinary Institute (Portland, OR)
Samantha sees cooking like painting, every fresh herb, every juicy tomato, a new splash of color on a canvas.
After graduating from Oregon Culinary Institute, she blended her love of global cuisines and plant-based cooking into recipes that feel fresh, fearless, and full of heart.
Samantha’s kitchen is a place where comfort food gets a modern remix and every meal feels like a little adventure. When she’s not cooking, she’s out exploring farmers’ markets, sketching new recipe ideas, or getting her hands dirty in a community garden.