
Rich Red Velvet Cheesecake Brownies Recipe: A Heavenly Treat
Whipping up these decadent red velvet cheesecake brownies will make your kitchen smell like pure bliss.
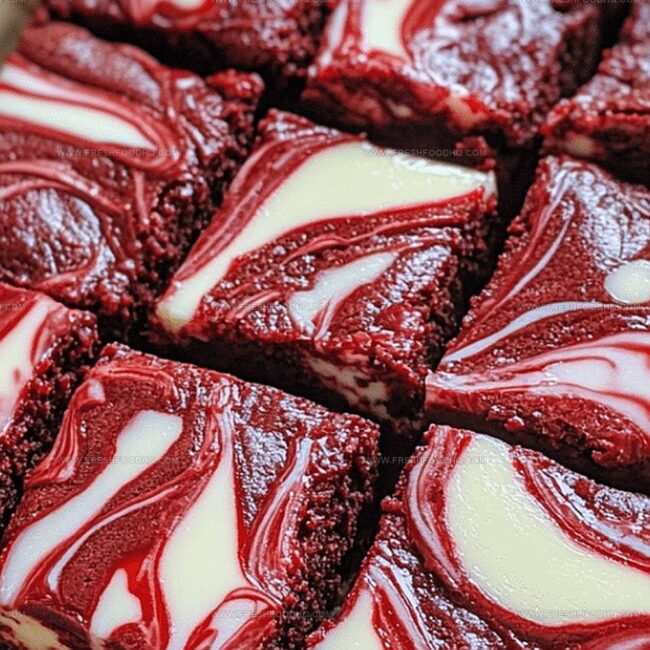
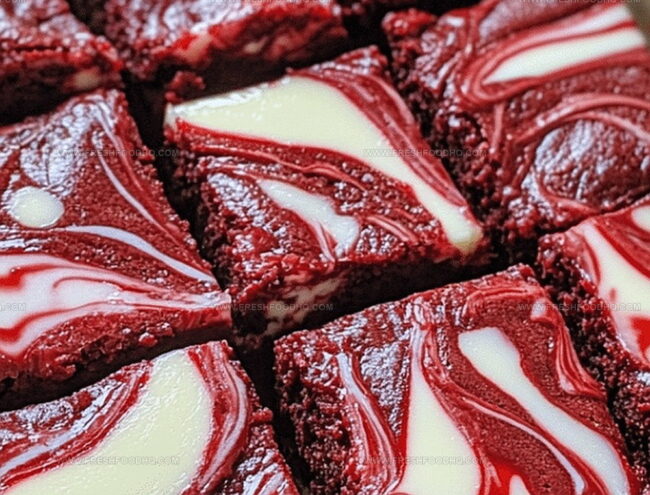
Chocolate and cream cheese create a magical dance of flavors in this irresistible dessert.
Rich layers promise an indulgent experience that melts smoothly across your palate.
Velvety textures contrast delightfully between the fudgy brownie base and silky cheesecake swirl.
Guests always marvel at how something so beautiful could be so simple to create.
Sweet imperfections in the marbled surface hint at homemade charm and carefully crafted love.
Why You’ll Love Red Velvet Cheesecake Brownies
What You’ll Need For Red Velvet Cheesecake Brownies
Main Ingredients:Cheesecake Layer:Steps To Make Red Velvet Cheesecake Brownies
Step 1: Prepare the Oven
Set your oven to 350°F (175°C) and get ready for a delightful baking adventure.
Step 2: Create the Red Velvet Base
In a mixing bowl, combine:Blend everything together until the mixture looks smooth and vibrant.
Step 3: Spread the First Layer
Pour and spread about two-thirds of the red velvet mixture into a greased 9×13 inch baking dish, creating an even base for your brownies.
Step 4: Whip Up the Creamy Filling
In a separate bowl, mix:Blend until the mixture becomes silky smooth and free of lumps.
Step 5: Layer the Cream Cheese
Carefully spread the cream cheese mixture evenly over the red velvet base, creating a beautiful contrast of colors.
Step 6: Add Decorative Swirls
Drop spoonfuls of the remaining red velvet batter on top of the cream cheese layer, creating a playful pattern.
Step 7: Create Swirling Patterns
Take a knife and gently swirl the red velvet batter into the cream cheese mixture, creating a marbled effect.
Step 8: Bake to Perfection
Place the baking dish in the preheated oven and bake for 25-30 minutes. The edges should look set and slightly firm.
Step 9: Cool and Serve
Allow the brownies to cool completely before cutting into delectable squares. Enjoy your stunning red velvet cheesecake brownies!
Helpful Tips For Red Velvet Cheesecake Brownies
Fun Swaps For Red Velvet Cheesecake Brownies
What To Serve With Red Velvet Cheesecake Brownies
How To Store Red Velvet Cheesecake Brownies
Red Velvet Cheesecake Brownies FAQs
While red velvet is traditional, you can experiment with chocolate or vanilla cake mix for a unique twist on the recipe.
Look for set edges and a slightly firm center. A toothpick inserted near the edge should come out with a few moist crumbs.
The vibrant red color comes from food coloring mixed into the cake batter, which is a signature characteristic of red velvet desserts.
Yes, use a gluten-free cake mix and ensure all other ingredients are gluten-free certified to create a similar dessert for those with gluten sensitivities.
Print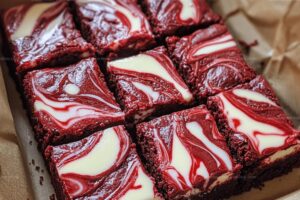
Red Velvet Cheesecake Brownies Recipe
- Total Time: 40-45 minutes
- Yield: 12 1x
Description
Red velvet cheesecake brownies blend rich chocolate depths with tangy cream cheese swirls, creating a luxurious dessert that promises pure indulgence. Chocolate lovers will savor each decadent layer of this irresistible Southern-inspired treat.
Ingredients
Main Ingredients:
- 1 box red velvet cake mix
- 1 package cream cheese, softened
- 1/2 cup (120 milliliters) vegetable oil
- 2 eggs
Additional Ingredients:
- 1/3 cup (67 grams) sugar
Flavoring:
- 1 teaspoon (5 milliliters) vanilla extract
Instructions
- Prepare the oven at 350°F (175°C) and line a 9×13 inch baking pan with parchment paper for easy removal.
- In a large mixing bowl, thoroughly combine red velvet cake mix with vegetable oil and eggs until a smooth, consistent batter forms.
- Pour approximately two-thirds of the red velvet batter into the prepared baking pan, creating an even base layer.
- In a separate bowl, whip cream cheese, sugar, and vanilla extract until the mixture becomes silky and well-integrated.
- Carefully spread the cream cheese mixture across the red velvet base, ensuring complete and uniform coverage.
- Dollop the remaining red velvet batter in random spoonfuls over the cream cheese layer.
- Using a knife, create artistic swirls by gently dragging the utensil through both batters, generating a marbled visual effect.
- Transfer the pan to the preheated oven and bake for 25-30 minutes, watching for set edges and a slightly firm center.
- Remove from oven and allow brownies to cool completely at room temperature for precise cutting.
- Once cooled, slice into square portions and serve.
Notes
- For a richer flavor, use melted butter instead of vegetable oil in the red velvet base.
- Ensure cream cheese is at room temperature to create a smoother, lump-free mixture.
- To prevent sticking, line the baking dish with parchment paper with overhanging edges for easy removal.
- Chill brownies completely before cutting for cleaner, more precise squares.
- Prep Time: 15 minutes
- Cook Time: 25-30 minutes
- Category: Desserts, Snacks
- Method: Baking
- Cuisine: American
Nutrition
- Serving Size: 12
- Calories: 285 kcal
- Sugar: 21 g
- Sodium: 220 mg
- Fat: 18 g
- Saturated Fat: 7 g
- Unsaturated Fat: 9 g
- Trans Fat: 0.5 g
- Carbohydrates: 27 g
- Fiber: 1 g
- Protein: 4 g
- Cholesterol: 55 mg
Samantha Lee
Recipe Developer & Content Creator
Expertise
Plant-based and vegetarian recipes, Recipe testing and development, Food blogging and digital content creation, Culinary education and workshops
Education
Oregon Culinary Institute (Portland, OR)
Samantha sees cooking like painting, every fresh herb, every juicy tomato, a new splash of color on a canvas.
After graduating from Oregon Culinary Institute, she blended her love of global cuisines and plant-based cooking into recipes that feel fresh, fearless, and full of heart.
Samantha’s kitchen is a place where comfort food gets a modern remix and every meal feels like a little adventure. When she’s not cooking, she’s out exploring farmers’ markets, sketching new recipe ideas, or getting her hands dirty in a community garden.