
The Best Red Velvet Cake Roll Recipe for Sweet Moments
Crafting a delectable red velvet cake roll requires passion and precision that will make your dessert dreams come true.
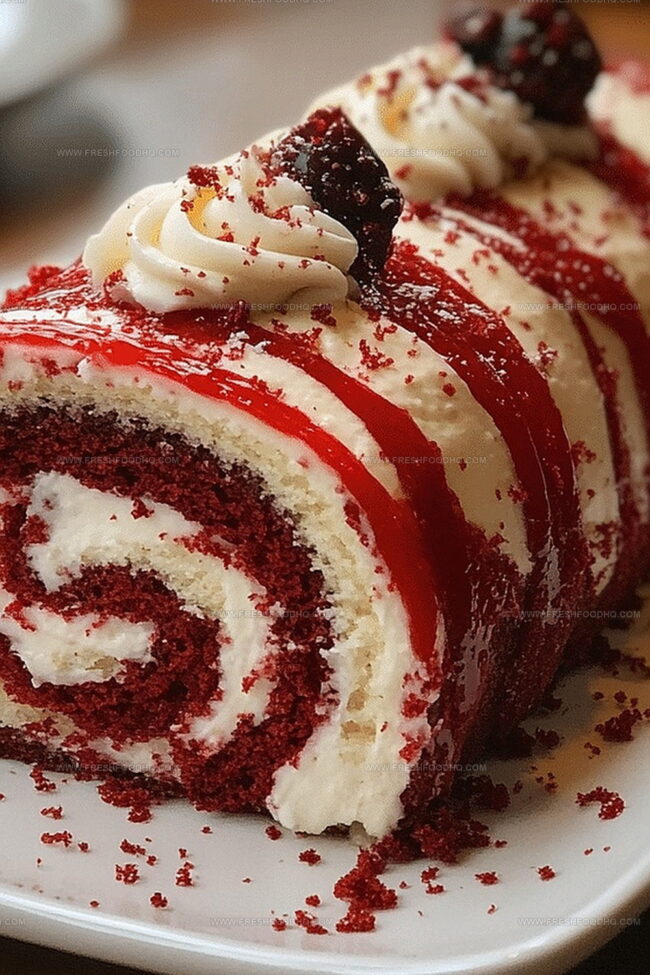
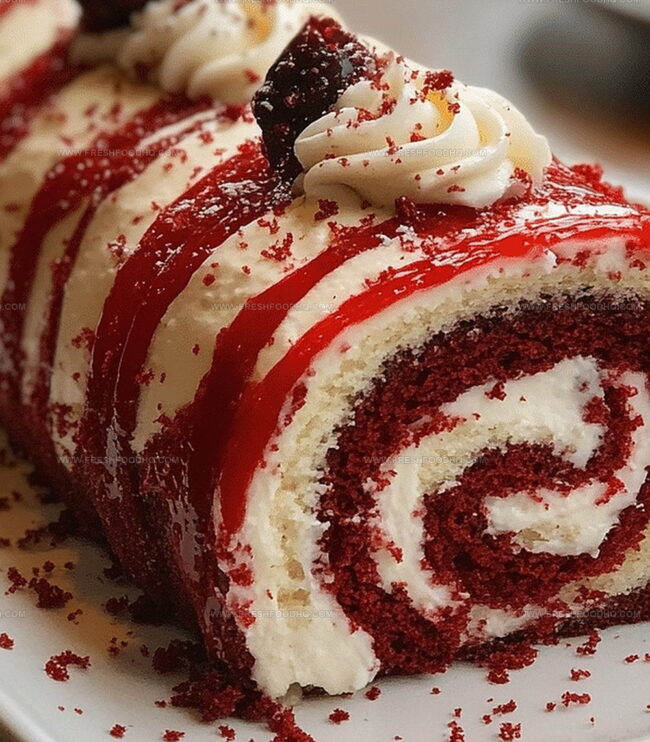
Sweet layers of crimson-hued sponge promise an elegant twist on a classic favorite.
Soft cream cheese filling adds luxurious depth to each delicate slice.
Baking this stunning dessert might seem challenging, but strategic techniques make the process surprisingly simple.
Smooth rolling techniques ensure a picture-perfect presentation that impresses everyone at the table.
Subtle cocoa notes blend seamlessly with rich cream cheese, creating a harmonious flavor profile.
You’ll find this recipe transforms an ordinary afternoon into a memorable culinary adventure.
Let’s unveil the secrets behind this show-stopping dessert that will have everyone asking for seconds.
Why Red Velvet Cake Roll Is A Must-Try
What You’ll Need For Red Velvet Cake Roll
Cake Base Ingredients:Leavening Agents:Flavor Enhancers:Color and Decoration:Frosting Ingredients:How To Make Red Velvet Cake Roll Easily
Step 1: Prepare Baking Station
Grab a jelly roll pan and line it with parchment paper. Set your oven to warm up at 350°F. Make sure all your tools are clean and ready.
Step 2: Mix Dry Ingredients
Combine in a bowl:Whisk these ingredients until perfectly blended.
Step 3: Create Egg Base
In a separate bowl, whip eggs and sugar together until they transform into a light, fluffy mixture. This should take around 3 minutes of energetic mixing.
Step 4: Blend Wet Ingredients
Add to the egg mixture:Mix everything until fully incorporated and smooth.
Step 5: Combine Wet and Dry Mixtures
Slowly fold dry ingredients into wet ingredients. Stir gently to create a silky batter.
Step 6: Add Vibrant Color
Introduce red food coloring, starting with a small amount. Adjust until you achieve that classic rich red shade.
Step 7: Bake Cake Base
Pour batter into prepared pan. Spread evenly and smooth the top. Slide into preheated oven and bake for 12-15 minutes. The cake is ready when it springs back after a gentle touch.
Step 8: Craft Ermine Frosting
Create flour mixture by whisking flour and milk in a saucepan. Cook over medium heat until thickened. Let cool completely.
Step 9: Finish Frosting
Beat together:Add cooled flour mixture and vanilla. Continue beating until creamy and smooth.
Step 10: Roll Cake
Dust a clean kitchen towel with powdered sugar. Carefully flip cake onto towel. Gently remove parchment paper.
Step 11: Fill and Roll
Spread frosting evenly across cake surface. Starting from a short end, roll cake tightly.
Step 12: Chill and Serve
Refrigerate cake roll for 1-2 hours to set. Slice and dust with extra powdered sugar if desired. Enjoy your spectacular dessert!
Useful Tricks For Red Velvet Cake Roll Success
Creative Spins On Red Velvet Cake Roll
Tasty Sides For Red Velvet Cake Roll
Red Velvet Cake Roll Storage Made Easy
Your Top Questions On Red Velvet Cake Roll
The combination of cocoa powder and red food coloring creates its signature deep red color and subtle chocolate flavor that sets it apart from other cake rolls.
Natural cocoa powder works best in this recipe because it reacts better with the vinegar and baking soda, helping the cake rise and maintain a tender texture.
Vinegar helps activate the baking soda, creates a more tender crumb, and enhances the cake’s unique tangy flavor characteristic of traditional red velvet recipes.
Ermine frosting, also called boiled milk frosting, is less sweet and more stable than cream cheese frosting, with a silky smooth texture that complements the red velvet cake roll perfectly.
Print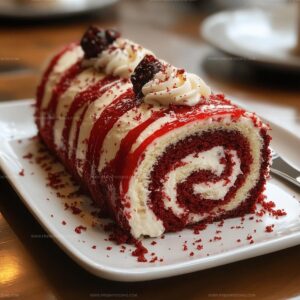
Red Velvet Cake Roll Recipe
- Total Time: Approximately 1 hour 40 minutes to 2 hours (including chilling)
- Yield: 8 1x
Description
Indulgent red velvet cake roll brings classic Southern charm to dessert tables with its elegant spiral of cream cheese frosting. Velvety cake layers swirl around luscious filling, promising a delightful slice you can’t resist savoring.
Ingredients
Cake Base:
- 1 cup (120 grams) cake flour
- 4 eggs, room temperature
- 3/4 cup plus 2 tablespoons (175 grams) sugar
Flavoring and Color:
- 3 tablespoons (15 grams) unsweetened cocoa powder
- 1 to 3 teaspoons red food coloring
- 1 teaspoon white vinegar
- 1 teaspoon vanilla extract
- 2 tablespoons (30 grams) buttermilk
Leavening and Seasoning:
- 3/4 teaspoon baking powder
- 1/2 teaspoon baking soda
- 1/2 teaspoon salt
- 3 tablespoons (64 grams) vegetable oil
Instructions
- Heat oven to 350F (175C) and line a 15×10-inch jelly roll pan with parchment paper, ensuring complete coverage.
- Combine cake flour, cocoa powder, baking powder, baking soda, and salt in a medium mixing bowl, whisking thoroughly to eliminate any lumps.
- In a separate large bowl, vigorously beat eggs and sugar until the mixture becomes pale, voluminous, and forms soft peaks, approximately 3 minutes.
- Incorporate oil, buttermilk, vinegar, and vanilla extract into the egg mixture, blending until fully integrated.
- Gradually fold dry ingredients into wet ingredients, stirring gently to create a smooth, consistent batter.
- Add red food coloring incrementally, adjusting until achieving the desired vibrant crimson shade.
- Pour batter into prepared pan, using a spatula to distribute evenly and eliminate air pockets.
- Bake for 12-15 minutes, checking for doneness by gently pressing the surface – it should spring back immediately.
- While cake bakes, prepare ermine frosting by whisking flour and milk in a saucepan over medium heat until thickened and pudding-like.
- Remove flour mixture from heat, allowing complete cooling to room temperature.
- Cream butter, sugar, and salt until light and fluffy, then integrate cooled flour mixture and vanilla extract, beating until silky smooth.
- After cake cools, dust a clean kitchen towel with powdered sugar and carefully invert cake onto towel.
- Delicately remove parchment paper, then spread a generous layer of ermine frosting across the cake’s surface.
- Tightly roll cake from one short end, using the towel to assist in creating a compact, uniform roll.
- Refrigerate cake roll for 1-2 hours to stabilize structure and enhance flavor melding.
- Slice into elegant portions and dust with additional powdered sugar for a decorative finish.
Notes
- Use room temperature ingredients to ensure smooth blending and consistent texture throughout the cake batter.
- Avoid overmixing the cake batter, which can lead to a tough and dense cake roll with less delicate crumb.
- Dust the kitchen towel generously with powdered sugar to prevent the cake from sticking during the rolling process.
- When spreading the frosting, leave a small border around the edges to prevent excess frosting from squeezing out during rolling.
- Prep Time: Approximately 20 minutes
- Cook Time: 12-15 minutes
- Category: Desserts
- Method: Baking
- Cuisine: American
Nutrition
- Serving Size: 8
- Calories: 228 kcal
- Sugar: 22 g
- Sodium: 180 mg
- Fat: 10 g
- Saturated Fat: 2 g
- Unsaturated Fat: 8 g
- Trans Fat: 0 g
- Carbohydrates: 30 g
- Fiber: 1 g
- Protein: 4 g
- Cholesterol: 55 mg
Samantha Lee
Recipe Developer & Content Creator
Expertise
Plant-based and vegetarian recipes, Recipe testing and development, Food blogging and digital content creation, Culinary education and workshops
Education
Oregon Culinary Institute (Portland, OR)
Samantha sees cooking like painting, every fresh herb, every juicy tomato, a new splash of color on a canvas.
After graduating from Oregon Culinary Institute, she blended her love of global cuisines and plant-based cooking into recipes that feel fresh, fearless, and full of heart.
Samantha’s kitchen is a place where comfort food gets a modern remix and every meal feels like a little adventure. When she’s not cooking, she’s out exploring farmers’ markets, sketching new recipe ideas, or getting her hands dirty in a community garden.