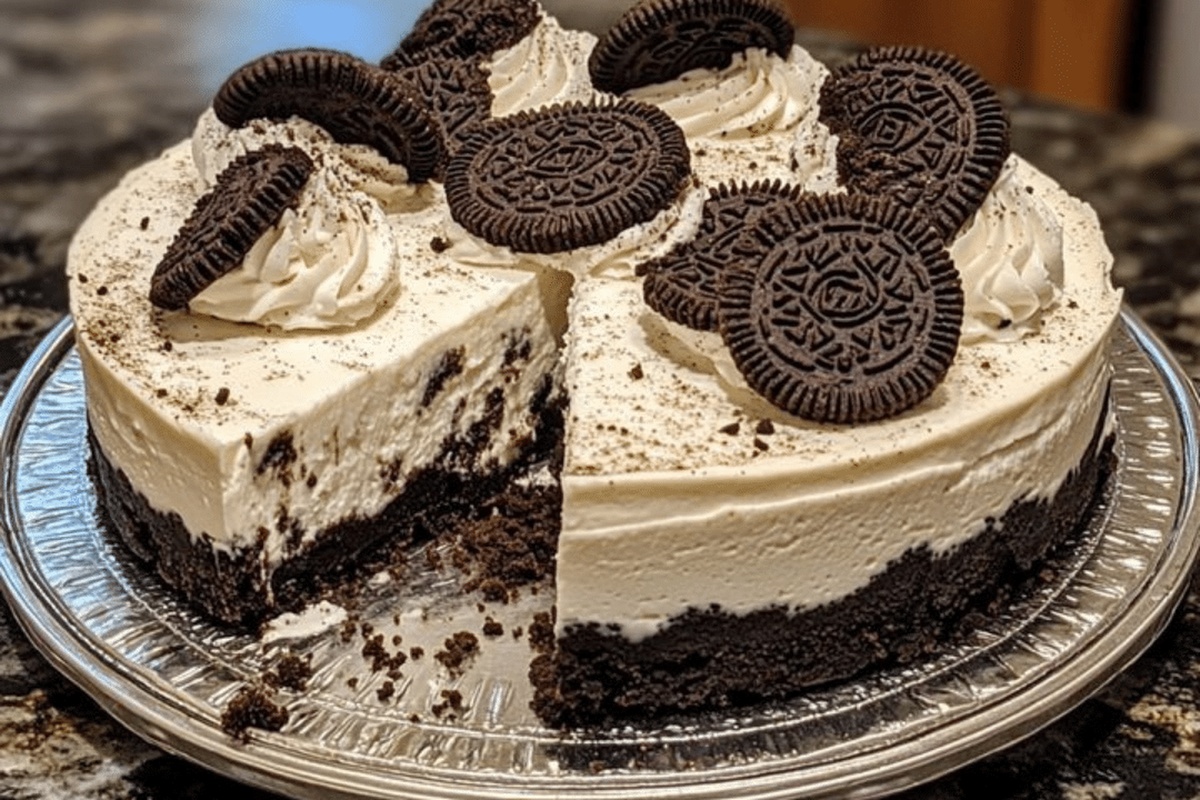
Simple No-Bake Oreo Cheesecake Recipe That’s Dreamy & Creamy
Sweet dreams come true with this no-bake oreo cheesecake that promises pure indulgence without turning on the oven.
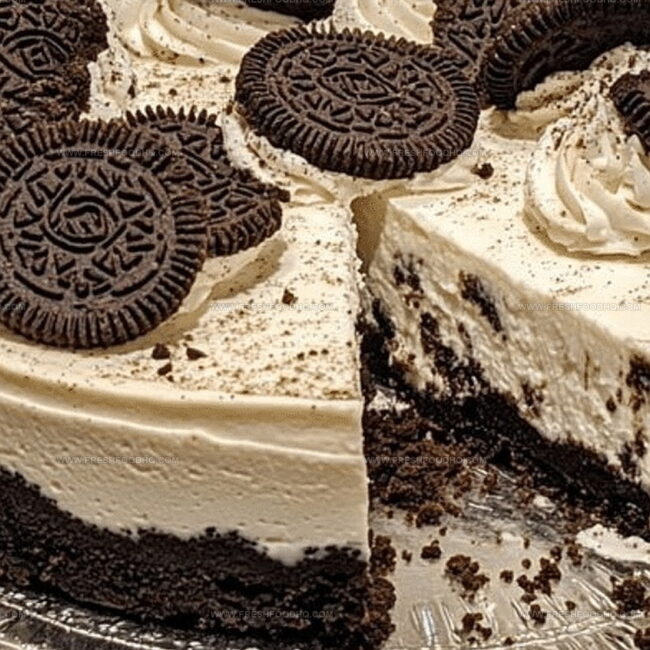
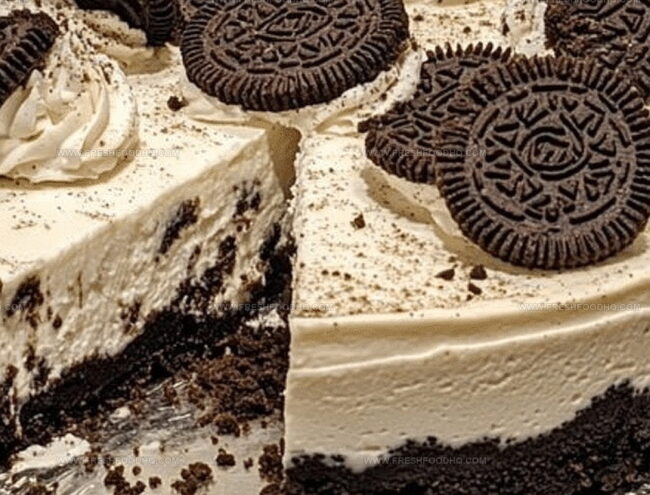
Creamy layers of chocolate cookie goodness melt into a smooth, rich dessert perfect for any celebration.
Crushing oreos becomes an art form as you blend them into a buttery crust that crumbles delightfully.
Decadent cream cheese whispers promises of delectable moments waiting to be savored.
Cool and luxurious, each spoonful delivers a symphony of textures that dance across your palate.
Summer afternoons or midnight cravings find their match in this effortless treat that requires zero baking skills.
Grab a fork and let the magic begin – this cheesecake is about to become your new obsession.
Why No-Bake Oreo Cheesecake Is a Crowd Favorite
Ingredients Needed for No-Bake Oreo Cheesecake
Base Ingredients:Cream Cheese Mixture:Whipping Components:Step-by-Step No-Bake Oreo Cheesecake Instructions
Step 1: Pulverize Oreo Cookies
Toss Oreo cookies into a food processor and blend until they transform into fine, sandy crumbs. The goal is to create a uniform texture that will form the perfect base for your dreamy dessert.
Step 2: Create Crunchy Crust Foundation
Combine the crushed Oreo crumbs with melted butter. Use your hands or a spatula to press this mixture firmly into the bottom of a springform pan, creating an even, compact layer that will serve as the cheesecake’s delicious base.
Step 3: Whip Cream Cheese Mixture
In a large mixing bowl, blend cream cheese, sugar, and vanilla extract. Beat these ingredients until they become silky smooth and free of any lumps. The mixture should look creamy and have a glossy appearance.
Step 4: Prepare Whipped Cream
In a separate bowl, whip heavy cream until it develops stiff, billowy peaks. This step is crucial for creating a light and airy texture in your cheesecake.
Step 5: Combine Cream Cheese and Whipped Cream
Gently fold the whipped cream into the cream cheese mixture. Use a spatula and incorporate with a delicate touch to maintain the airiness of the whipped cream.
Step 6: Fill and Smooth Cheesecake
Pour the combined mixture over the Oreo crust. Use a spatula to spread the filling evenly, ensuring a smooth and level surface.
Step 7: Chill and Set
Refrigerate the cheesecake for a minimum of 6 hours, though overnight is recommended. This allows the dessert to set perfectly and develop its rich, creamy texture.
Step 8: Serve and Indulge
Remove the cheesecake from the refrigerator, release from the springform pan, slice, and serve chilled. Enjoy the decadent, creamy, and utterly irresistible dessert!
Pro Tips for No-Bake Oreo Cheesecake
Variations on No-Bake Oreo Cheesecake to Explore
Perfect Pairings for No-Bake Oreo Cheesecake
Storage Tips for No-Bake Oreo Cheesecake
FAQs on No-Bake Oreo Cheesecake
No, it’s super easy! This no-bake recipe requires no baking skills and minimal cooking, making it perfect for beginners and dessert lovers who want a quick, delicious treat.
Yes, you can substitute regular cream cheese with reduced-fat or light cream cheese. However, the texture and richness might slightly change, so full-fat cream cheese is recommended for the best taste.
The cheesecake will stay fresh in the refrigerator for 3-4 days when stored in an airtight container. Always keep it chilled to maintain its creamy texture and prevent spoilage.
Print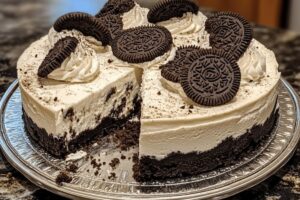
No-Bake Oreo Cheesecake Recipe
- Total Time: 6 hours 20 minutes
- Yield: 8 1x
Description
Creamy no-bake Oreo cheesecake delivers a luxurious dessert experience that melts in your mouth. Cool chocolate cookie crust and silky cream cheese filling promise pure indulgence for sweet seekers.
Ingredients
Main Ingredients:
- 24 Oreo cookies
- 16 ounces (454 grams) cream cheese, softened
- 1 cup heavy cream
Sweeteners and Flavoring:
- 1/2 cup granulated sugar
- 1 teaspoon vanilla extract
Binding and Crust Ingredients:
- 1/2 cup unsalted butter, melted
Instructions
- Pulverize Oreo cookies into fine, uniform crumbs using a food processor, ensuring no large chunks remain.
- Mix cookie crumbs with melted butter, then firmly press the mixture into the bottom of a 9-inch springform pan, creating a compact, even base.
- Using an electric mixer, whip cream cheese, sugar, and vanilla extract until achieving a silky, lump-free consistency.
- Separately, whisk heavy cream until it forms stiff, peaked textures that hold their shape when the whisk is lifted.
- Delicately incorporate whipped cream into the cream cheese mixture, folding gently to maintain the airy volume and prevent deflation.
- Transfer the creamy filling onto the prepared Oreo crust, using a spatula to spread evenly and eliminate any air pockets.
- Chill the assembled cheesecake in the refrigerator for a minimum of 6 hours, preferably overnight, to allow complete setting and flavor development.
- Before serving, release the springform pan’s sides, slice carefully, and present the chilled dessert.
Notes
- Crush cookies finely to prevent a crumbly, uneven crust that might fall apart when serving.
- Ensure cream cheese is at room temperature for smooth, lump-free mixing and a silky texture.
- Use full-fat cream cheese and heavy cream for the richest, most decadent cheesecake experience.
- Chill the cheesecake overnight to develop deeper flavors and allow the texture to set perfectly.
- Prep Time: 20 minutes
- Cook Time: 0 minutes
- Category: Desserts
- Method: Refrigerating
- Cuisine: American
Nutrition
- Serving Size: 8
- Calories: 434
- Sugar: 27 g
- Sodium: 200 mg
- Fat: 34 g
- Saturated Fat: 20 g
- Unsaturated Fat: 12 g
- Trans Fat: 0.5 g
- Carbohydrates: 29 g
- Fiber: 1 g
- Protein: 6 g
- Cholesterol: 85 mg
Samantha Lee
Recipe Developer & Content Creator
Expertise
Plant-based and vegetarian recipes, Recipe testing and development, Food blogging and digital content creation, Culinary education and workshops
Education
Oregon Culinary Institute (Portland, OR)
Samantha sees cooking like painting, every fresh herb, every juicy tomato, a new splash of color on a canvas.
After graduating from Oregon Culinary Institute, she blended her love of global cuisines and plant-based cooking into recipes that feel fresh, fearless, and full of heart.
Samantha’s kitchen is a place where comfort food gets a modern remix and every meal feels like a little adventure. When she’s not cooking, she’s out exploring farmers’ markets, sketching new recipe ideas, or getting her hands dirty in a community garden.