
Joyful No-Bake Funfetti Oreo Icebox Cake Recipe for Sweet Days
Crafting an irresistible no-bake funfetti oreo icebox cake brings pure childhood joy right to your dessert table.
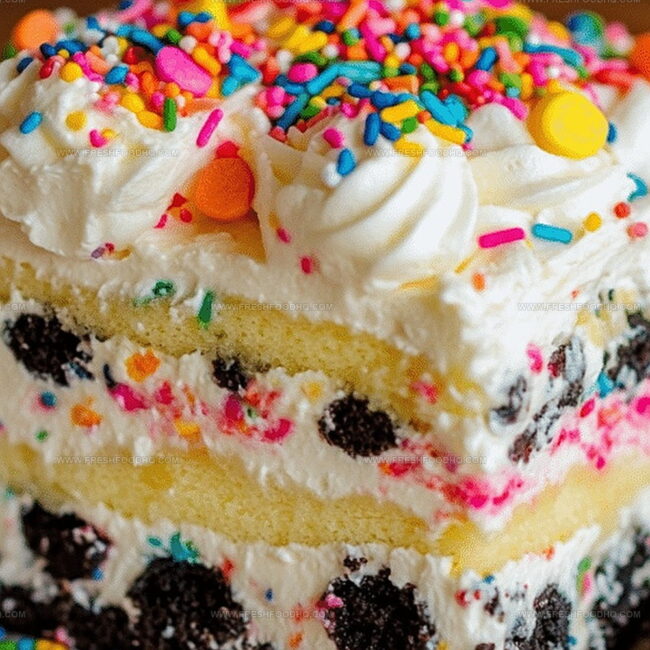
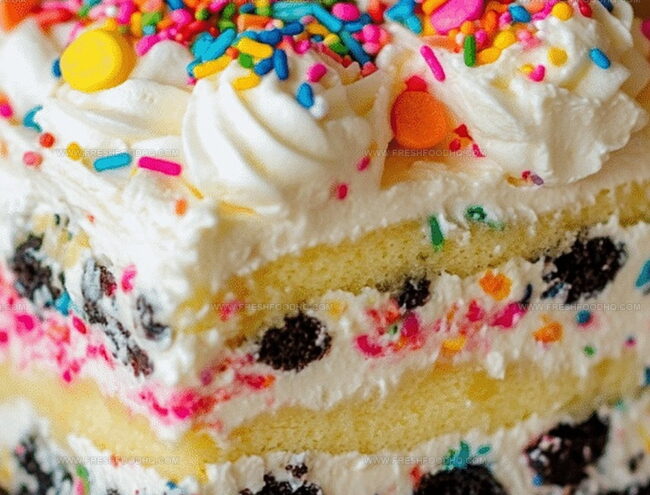
Sweet memories dance between layers of creamy goodness and crunchy cookie bits.
Colorful sprinkles peek through each delectable slice, promising a playful treat that screams celebration.
Minimal effort meets maximum flavor in this ridiculously simple dessert adventure.
Cool and decadent, this icebox wonder requires zero oven time and maximum excitement.
Chilled perfection awaits with every spoonful of this crowd-pleasing masterpiece.
Jump in and create magic that will have everyone asking for seconds.
Why No-Bake Funfetti Oreo Icebox Cake Is A Festive Treat
Ingredients For No-Bake Funfetti Oreo Icebox Cake
Main Ingredients:Oreo Components:Decorative Ingredients:Preparation Ingredient:How To Make No-Bake Funfetti Oreo Icebox Cake
Step 1: Whip Up the Base
Grab a spacious mixing bowl and combine the Funfetti cake mix with whole milk. Stir vigorously until the mixture becomes completely smooth and free of lumps.
Step 2: Incorporate Creamy Goodness
Add the instant vanilla pudding mix to the cake mixture. Blend thoroughly until the ingredients marry together seamlessly, creating a silky-smooth texture.
Step 3: Fold in Fluffy Clouds
Gently fold the Cool Whip into the mixture, ensuring it’s fully integrated. Use a soft, sweeping motion to keep the mixture light and airy.
Step 4: Create Oreo Foundation
Crush the Golden Oreos into delightful crumbs. Spread these cookies evenly across the bottom of a 9×13 inch pan, creating a crunchy base.
Step 5: First Cake Layer
Pour half of the cake mixture over the Oreo foundation. Use a spatula to spread the mixture evenly, ensuring complete coverage of the cookie layer.
Step 6: Build Additional Layers
Sprinkle another layer of crushed Oreos over the first cake mixture layer. Top with the remaining cake mixture, creating a beautiful marbled effect.
Step 7: Add Festive Flair
Shower the top of the cake with colorful sprinkles, adding a playful and celebratory touch to your dessert.
Step 8: Chill and Set
Cover the pan with plastic wrap and slide it into the refrigerator. Let the cake rest and develop its flavors for at least 4 hours, or ideally overnight.
Step 9: Serve and Enjoy
Remove from the refrigerator, slice into generous portions, and serve chilled. Watch as your friends and family dive into this delightful no-bake treat!
Pro Tips For No-Bake Funfetti Oreo Icebox Cake
Creative Twists For No-Bake Funfetti Oreo Icebox Cake
Ideal Pairings For No-Bake Funfetti Oreo Icebox Cake
Storage Advice For No-Bake Funfetti Oreo Icebox Cake
FAQs About No-Bake Funfetti Oreo Icebox Cake
The main ingredients include Funfetti cake mix, whole milk, instant vanilla pudding mix, Cool Whip, Golden Oreos, and sprinkles.
Yes, it’s an easy no-bake dessert that requires minimal cooking skills and only basic mixing and layering techniques.
Absolutely! This cake actually needs to be prepared in advance and refrigerated for at least 4 hours or overnight to set properly.
You’ll only need a large mixing bowl, a 9×13 inch pan, and basic utensils like a spatula for mixing and spreading.
Print
No-Bake Funfetti Oreo Icebox Cake Recipe
- Total Time: 4 hours 15 minutes
- Yield: 12 1x
Description
Creamy no-bake funfetti oreo icebox cake brings nostalgic birthday party vibes to dessert lovers. Cool layers of crushed cookies and smooth cream create a playful celebration perfect for summer gatherings you’ll want to devour.
Ingredients
Cake and Crumb Base:
- 1 package (15.25 ounces/432 grams) Funfetti cake mix
- 1 package (15.25 ounces/432 grams) Golden Oreos, crushed
Liquid and Creamy Ingredients:
- 1 1/4 cups (296 milliliters) whole milk
- 1 package (3.4 ounces/96 grams) instant vanilla pudding mix
- 1 container (8 ounces/227 grams) Cool Whip
Decoration:
- Sprinkles, for garnish
Instructions
- Crush Golden Oreos into fine crumbs, creating a delectable base for the no-bake dessert.
- In a spacious mixing bowl, whisk Funfetti cake mix with whole milk until achieving a silky, lump-free consistency.
- Incorporate instant vanilla pudding mix, stirring thoroughly to create a creamy, smooth foundation.
- Delicately fold Cool Whip into the mixture, ensuring a light and airy texture throughout.
- Prepare a 9×13 inch pan by evenly distributing a layer of crushed Oreo crumbs across the bottom.
- Gently spread half of the cake mixture over the Oreo base, creating a uniform layer.
- Sprinkle another layer of crushed Oreos atop the initial cake mixture.
- Pour the remaining cake mixture over the Oreo layer, carefully smoothing the surface.
- Generously garnish the top with colorful sprinkles for a festive appearance.
- Seal the pan with plastic wrap and refrigerate for a minimum of 4 hours, preferably overnight.
- Allow the icebox cake to set completely, enabling the flavors to meld and create a decadent, chilled dessert.
Notes
- Crush Oreos finely for a more uniform base that binds better with the cake mixture.
- Use room temperature ingredients to ensure smoother blending and prevent lumps in the mixture.
- Substitute whole milk with almond or oat milk for a dairy-free version that maintains creamy texture.
- Decorate with extra sprinkles or crushed Oreos just before serving to keep the topping crisp and vibrant.
- Prep Time: 15 minutes
- Cook Time: 0 minutes
- Category: Desserts
- Method: Refrigerating
- Cuisine: American
Nutrition
- Serving Size: 12
- Calories: 360
- Sugar: 28 g
- Sodium: 230 mg
- Fat: 14 g
- Saturated Fat: 9 g
- Unsaturated Fat: 4 g
- Trans Fat: 0.2 g
- Carbohydrates: 51 g
- Fiber: 1 g
- Protein: 3 g
- Cholesterol: 25 mg
Samantha Lee
Recipe Developer & Content Creator
Expertise
Plant-based and vegetarian recipes, Recipe testing and development, Food blogging and digital content creation, Culinary education and workshops
Education
Oregon Culinary Institute (Portland, OR)
Samantha sees cooking like painting, every fresh herb, every juicy tomato, a new splash of color on a canvas.
After graduating from Oregon Culinary Institute, she blended her love of global cuisines and plant-based cooking into recipes that feel fresh, fearless, and full of heart.
Samantha’s kitchen is a place where comfort food gets a modern remix and every meal feels like a little adventure. When she’s not cooking, she’s out exploring farmers’ markets, sketching new recipe ideas, or getting her hands dirty in a community garden.