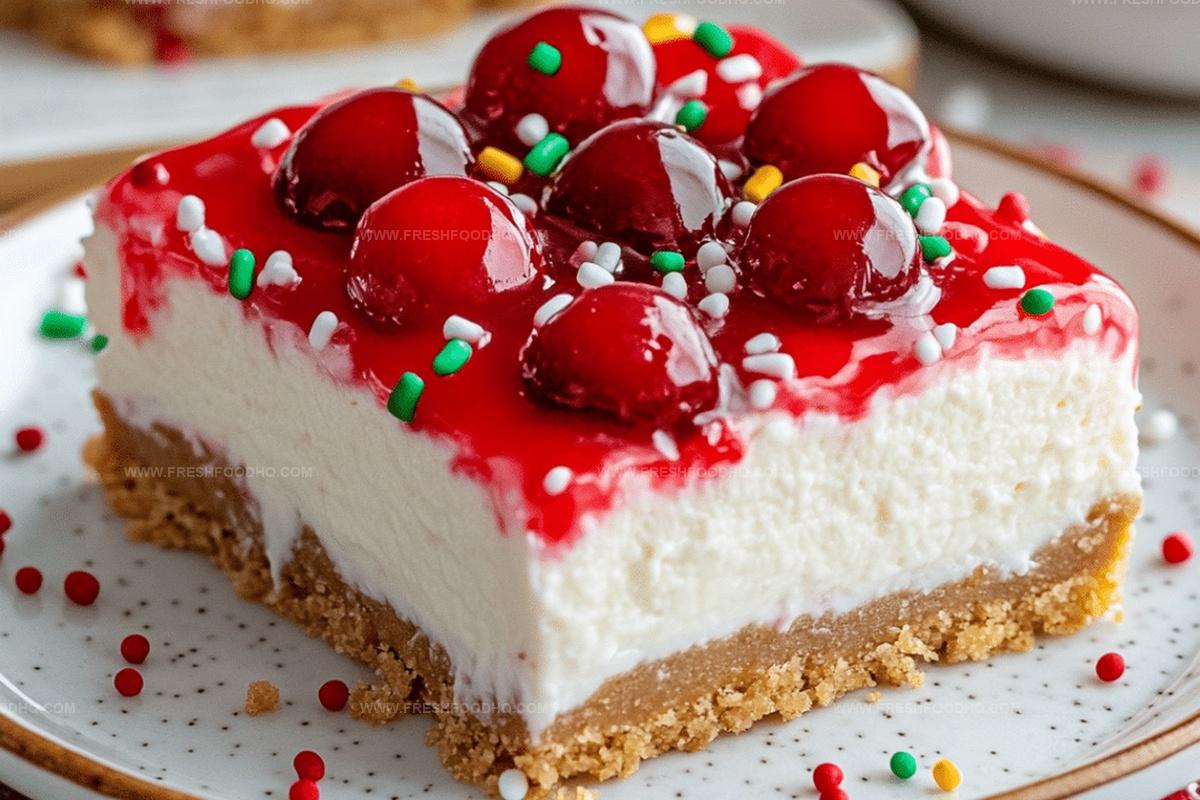
Festive Merry Cherry Christmas Cheesecake Bars Recipe
Sweet holiday magic sparks with these merry cherry christmas cheesecake bars that promise pure deliciousness.
Festive layers blend creamy cheesecake and bright cherry goodness into one irresistible dessert.
Seasonal treats rarely come more delightful than this crowd-pleasing recipe.
Smooth cream cheese mingles perfectly with tangy cherries, creating a mouthwatering combination.
Guests will swoon over these elegant yet simple bars that scream celebration.
Winter gatherings deserve something special, and these bars definitely deliver.
Whip up this dessert and watch everyone’s faces light up with joy.
What Makes Merry Cherry Christmas Cheesecake Bars So Special
Ingredients for Merry Cherry Christmas Cheesecake Bars
Crust Ingredients:Cheesecake Filling Ingredients:Topping Ingredient:How to Bake Merry Cherry Christmas Cheesecake Bars
Step 1: Prepare Oven and Baking Dish
Warm up your oven to 350°F. Grab a 9×9 inch baking pan and lightly grease the interior to prevent sticking.
Step 2: Create Crumbly Crust
Grab a mixing bowl and combine:Use a fork or your hands to blend everything until the mixture looks like damp sand. Press this mixture firmly into the bottom of the prepared pan, creating an even layer.
Step 3: Whip Up Creamy Cheesecake Filling
In a separate large mixing bowl, grab your electric mixer and blend:Beat these ingredients until they become silky smooth and free of lumps. Add eggs one at a time, mixing thoroughly after each addition to ensure a perfectly uniform texture.
Step 4: Bake the Cheesecake Base
Pour the luscious cream cheese mixture over the graham cracker crust. Slide the pan into the preheated oven and bake for about 25 minutes. The filling should look set but still have a slight jiggle in the center.
Step 5: Cool and Chill
Remove the cheesecake from the oven and let it cool completely at room temperature. Once cooled, transfer to the refrigerator and chill for at least 2 hours to help the bars set perfectly.
Step 6: Add Cherry Topping
After chilling, spread a generous layer of cherry pie filling across the top of the cheesecake, creating a vibrant and festive surface.
Step 7: Slice and Serve
Cut the chilled cheesecake into neat bars. Serve and watch everyone’s eyes light up with holiday delight!
Pro Tips for Cherry Cheesecake Bars
Variations to Try With Merry Cherry Cheesecake Bars
Pairing Ideas for Merry Cherry Christmas Cheesecake Bars
Storage Guidelines for Cherry Cheesecake Bars
FAQs on Merry Cherry Christmas Cheesecake Bars
Graham cracker crumbs are finely ground graham crackers used as a base for many desserts, providing a sweet and crunchy texture that works perfectly in cheesecake crusts.
While pie filling is recommended for convenience, you can use fresh pitted cherries. Just cook them with a bit of sugar and cornstarch to create a similar consistency.
The edges will look set and slightly golden, and the center will have a slight jiggle but not be liquid. When you gently shake the pan, it should wobble like soft jelly.
Print
Merry Cherry Christmas Cheesecake Bars Recipe
- Total Time: 2 hours 40 minutes
- Yield: 9 1x
Description
Cherry-studded Christmas cheesecake bars dance with festive cheer, bringing holiday magic to dessert tables. Creamy layers and buttery crust invite sweet celebrations, promising delightful moments of seasonal indulgence you’ll savor with each delectable bite.
Ingredients
Crust Ingredients:
- 1 cup (240 ml) graham cracker crumbs
- 1/4 cup (50 g) sugar
- 1/4 cup (60 ml) melted butter
Filling Ingredients:
- 8 ounces (226 g) cream cheese, softened
- 1/2 cup (100 g) sugar
- 1 teaspoon vanilla extract
- 2 eggs
Topping Ingredients:
- 1 can cherry pie filling
Instructions
- Prepare a 9×9 inch baking pan by lining with parchment paper for easy removal.
- Crush graham crackers into fine crumbs and combine with melted butter and sugar, creating a compact base mixture.
- Press the graham cracker mixture firmly and evenly into the bottom of the prepared pan, creating a smooth foundation.
- Using an electric mixer, blend cream cheese until velvety and incorporate sugar and vanilla extract, whipping until completely smooth.
- Gently introduce eggs one at a time, thoroughly mixing after each addition to maintain a silky consistency.
- Carefully pour the cream cheese mixture over the graham cracker crust, ensuring an even distribution.
- Slide the pan into a preheated 350°F oven and bake for approximately 25-30 minutes, watching for a slight jiggle in the center indicating proper setting.
- Remove from oven and allow the cheesecake to cool completely at room temperature, which helps prevent cracking.
- Refrigerate the cooled cheesecake for a minimum of 2 hours to achieve a firm, sliceable texture.
- Once chilled, generously spread cherry pie filling across the entire surface of the cheesecake.
- Using a sharp knife, slice into elegant rectangular bars and serve chilled for maximum flavor enjoyment.
Notes
- Swap graham crackers with gluten-free alternatives like almond flour or oat cookies for a celiac-friendly version.
- Reduce sugar content by using natural sweeteners like stevia or monk fruit for a lower-calorie dessert.
- Enhance cherry flavor by adding a splash of almond extract or a sprinkle of fresh orange zest to the cream cheese mixture.
- Create mini cheesecake bites by using a muffin tin instead of a 9×9 inch pan for individual servings and easier portion control.
- Prep Time: 15 minutes
- Cook Time: 25 minutes
- Category: Desserts
- Method: Baking
- Cuisine: American
Nutrition
- Serving Size: 9
- Calories: 248 kcal
- Sugar: 21 g
- Sodium: 120 mg
- Fat: 16 g
- Saturated Fat: 9 g
- Unsaturated Fat: 6 g
- Trans Fat: 0.5 g
- Carbohydrates: 23 g
- Fiber: 1 g
- Protein: 4 g
- Cholesterol: 80 mg
Samantha Lee
Recipe Developer & Content Creator
Expertise
Plant-based and vegetarian recipes, Recipe testing and development, Food blogging and digital content creation, Culinary education and workshops
Education
Oregon Culinary Institute (Portland, OR)
Samantha sees cooking like painting, every fresh herb, every juicy tomato, a new splash of color on a canvas.
After graduating from Oregon Culinary Institute, she blended her love of global cuisines and plant-based cooking into recipes that feel fresh, fearless, and full of heart.
Samantha’s kitchen is a place where comfort food gets a modern remix and every meal feels like a little adventure. When she’s not cooking, she’s out exploring farmers’ markets, sketching new recipe ideas, or getting her hands dirty in a community garden.