The Jolliest Little Debbie Christmas Tree Cheesecake Recipe
Little debbie christmas tree cheesecake brings festive cheer right to your dessert table with minimal effort.
Memories of childhood snack cakes dance through this delightful reimagined treat.
Creamy layers mimicking the iconic green tree cake create nostalgia in every bite.
Sweet cream cheese blends seamlessly with classic holiday flavors.
Marshmallow frosting adds a whimsical touch that delights both kids and adults.
Seasonal magic sparkles through each slice of this playful dessert.
Why Little Debbie Christmas Tree Cheesecake Shines
Ingredients to Make Little Debbie Christmas Tree Cheesecake
Base Ingredients:Cake Layer:Finishing Ingredients:How to Bake Little Debbie Christmas Tree Cheesecake
Step 1: Whip Cream Cheese
Grab a mixing bowl and beat the cream cheese until it becomes silky smooth and free of lumps. Use an electric mixer for the best results, making sure to scrape down the sides of the bowl to incorporate all the cream cheese.
Step 2: Blend Sweet Flavors
Pour in the sugar and vanilla extract. Mix these ingredients thoroughly until they create a creamy, well-integrated mixture. The vanilla will add a delightful aromatic touch to your dessert.
Step 3: Fold in Fluffy Cream
Gently incorporate the whipped cream into the mixture. Use a spatula to fold carefully, ensuring a light and airy texture. The goal is to maintain the volume of the whipped cream while creating a smooth, creamy base.
Step 4: Add Festive Color
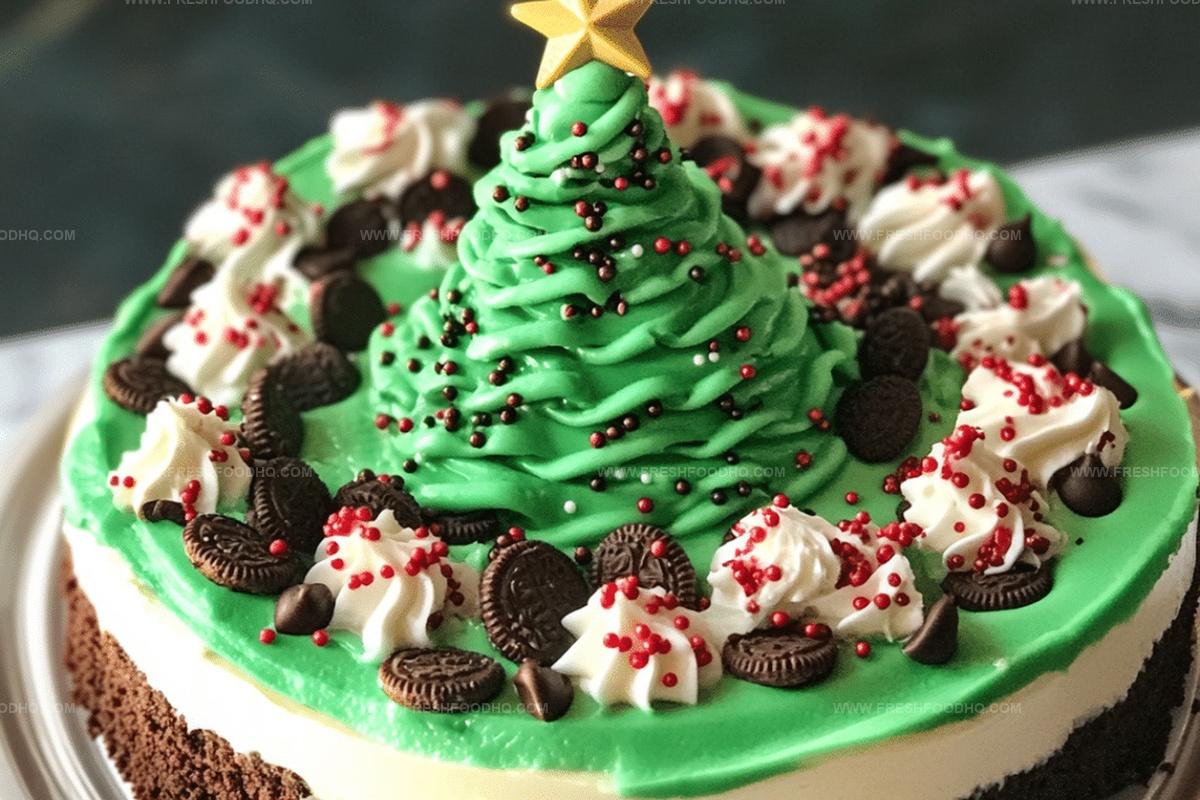
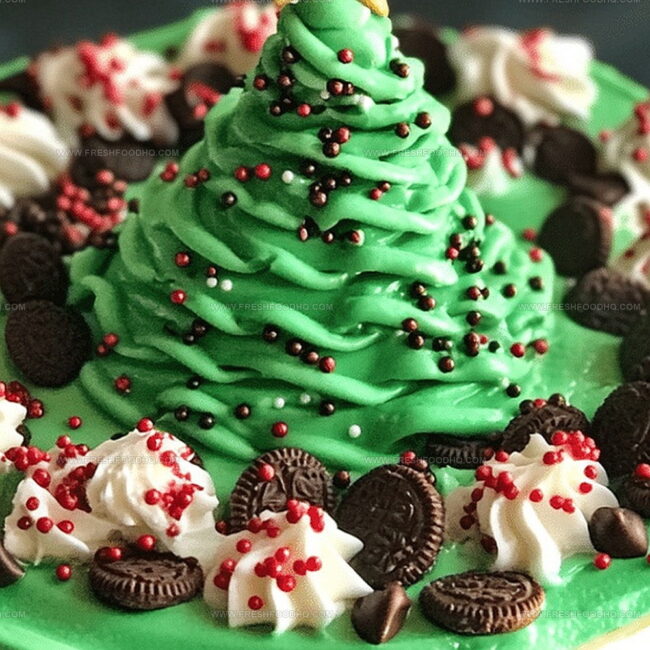
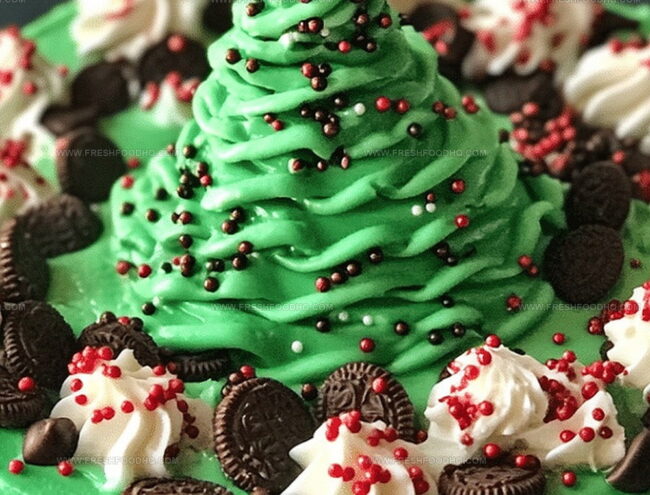
Introduce a few drops of green food coloring to transform your cheesecake into a holiday-themed treat. Mix carefully until you achieve the perfect Christmas tree green shade.
Step 5: Create the Cake Base
Take your serving dish and create a single layer of Little Debbie Christmas Tree Snack Cakes. Arrange them carefully to cover the bottom of the dish completely.
Step 6: Spread the Cheesecake Layer
Generously spread the green-tinted cheesecake mixture over the snack cakes. Use a spatula to smooth the top, creating an even and attractive surface.
Step 7: Chill and Set
Place the dessert in the refrigerator for at least 2 hours. This allows the cheesecake to firm up and the flavors to meld together beautifully.
Step 8: Add Festive Finishing Touches
Just before serving, sprinkle some colorful decorative sprinkles on top. This adds a playful and festive final touch to your holiday dessert.
Insider Tips for Perfect Christmas Tree Cheesecake
Fun Variations of Little Debbie Christmas Tree Cheesecake
Pairing Ideas for Holiday Cheesecake Treats
Storage Solutions for Little Debbie Cheesecake
Your Questions About Christmas Tree Cheesecake Answered
These are seasonal holiday-themed snack cakes shaped like Christmas trees, featuring a festive green color and typically sold during the winter holiday season by Little Debbie.
Yes, you can substitute with similar flat snack cakes like Swiss Rolls or Cosmic Brownies, though the flavor and presentation might slightly differ.
While green food coloring helps create a festive look, it’s optional. The cheesecake will taste the same without it, so you can skip it if you prefer.
Print
Little Debbie Christmas Tree Cheesecake Recipe
- Total Time: 2 hours 15 minutes
- Yield: 8 1x
Description
Christmas magic sparkles in this Little Debbie Christmas Tree Cheesecake, blending nostalgic holiday treats with creamy indulgence. Sweet memories and festive flavors dance together, inviting you to savor each delightful bite of this seasonal dessert.
Ingredients
Cake Base:
- 1 box Little Debbie Christmas Tree Snack Cakes
Dairy:
- 1 package (8 ounces / 226 grams) cream cheese, softened
- 1 cup whipped cream
Sweeteners and Flavoring:
- 1/2 cup sugar
- 1 teaspoon vanilla extract
Decorations:
- Green food coloring
- Sprinkles
Instructions
- Cream the cream cheese in a large mixing bowl until velvety and lump-free, using an electric mixer on medium speed for 2-3 minutes.
- Gradually incorporate sugar and vanilla extract, blending until the mixture becomes smooth and creamy.
- Delicately fold whipped cream into the mixture, ensuring a light and airy texture without deflating the volume.
- Introduce green food coloring, stirring gently to create an even, festive emerald hue throughout the cheesecake mixture.
- Create a foundational layer by strategically placing Christmas Tree Snack Cakes in a uniform arrangement within the serving dish.
- Carefully pour and evenly distribute the prepared cheesecake mixture over the snack cake base, using a spatula to smooth the surface and eliminate any air pockets.
- Transfer the dessert to the refrigerator and allow it to chill and solidify for approximately 2-3 hours, ensuring the filling sets completely.
- Just before serving, embellish the top with a sprinkle of festive decorative garnishes to enhance visual appeal and add a touch of holiday cheer.
Notes
- Swap regular cream cheese for a lighter, low-fat version to reduce calories without compromising taste.
- Use dairy-free cream cheese and whipped coconut cream to make this dessert vegan-friendly and inclusive.
- Crush some of the Christmas Tree Snack Cakes and mix into the cheesecake filling for extra texture and cake crunch.
- Enhance the festive look by adding red and green sprinkles or crushed candy canes on top for a more holiday-themed presentation.
- Prep Time: 15 minutes
- Cook Time: 0 minutes
- Category: Desserts
- Method: Refrigerating
- Cuisine: American
Nutrition
- Serving Size: 8
- Calories: 289 kcal
- Sugar: 20 g
- Sodium: 140 mg
- Fat: 21 g
- Saturated Fat: 12 g
- Unsaturated Fat: 7 g
- Trans Fat: 0.5 g
- Carbohydrates: 22 g
- Fiber: 0.5 g
- Protein: 3 g
- Cholesterol: 55 mg
Samantha Lee
Recipe Developer & Content Creator
Expertise
Plant-based and vegetarian recipes, Recipe testing and development, Food blogging and digital content creation, Culinary education and workshops
Education
Oregon Culinary Institute (Portland, OR)
Samantha sees cooking like painting, every fresh herb, every juicy tomato, a new splash of color on a canvas.
After graduating from Oregon Culinary Institute, she blended her love of global cuisines and plant-based cooking into recipes that feel fresh, fearless, and full of heart.
Samantha’s kitchen is a place where comfort food gets a modern remix and every meal feels like a little adventure. When she’s not cooking, she’s out exploring farmers’ markets, sketching new recipe ideas, or getting her hands dirty in a community garden.