Easy Garlic Butter Cheese Bombs Recipe: Irresistible Flavor Pops
Whipping up these mouthwatering garlic butter cheese bombs promises pure culinary magic that’ll make your taste buds dance.
Small pockets of cheesy goodness await your kitchen adventure.
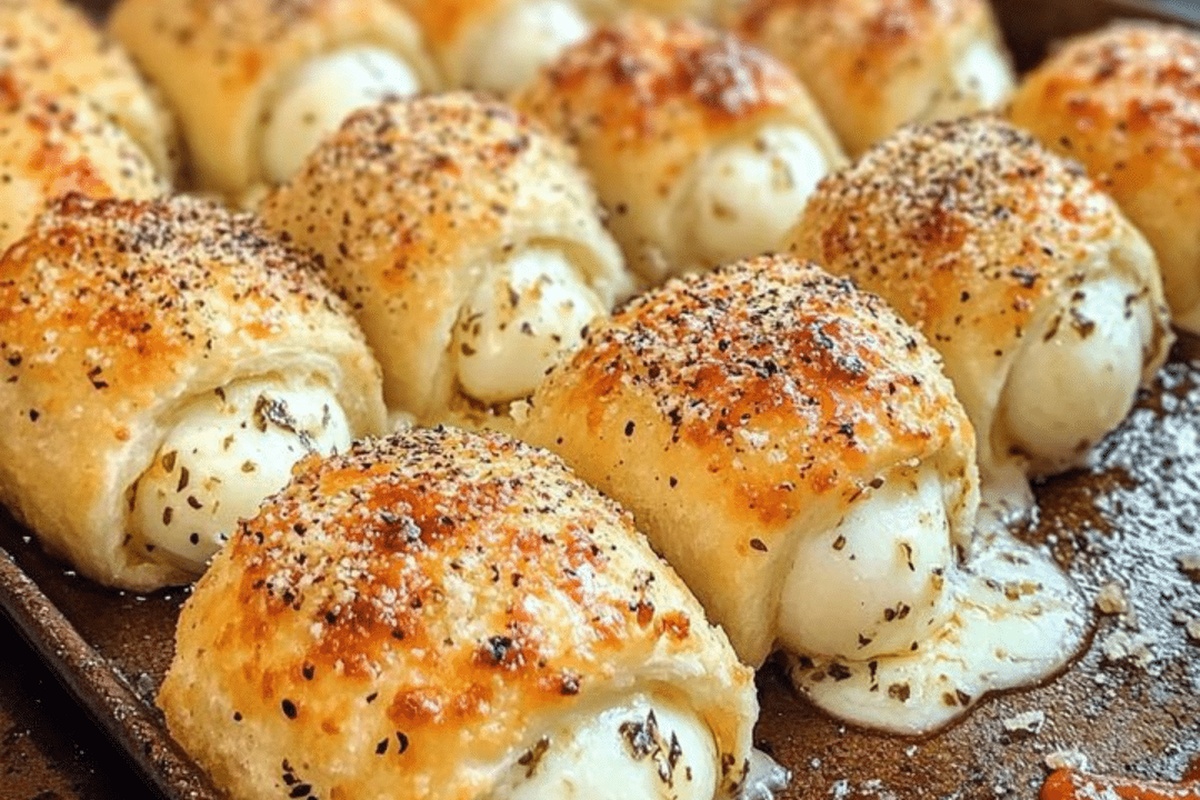
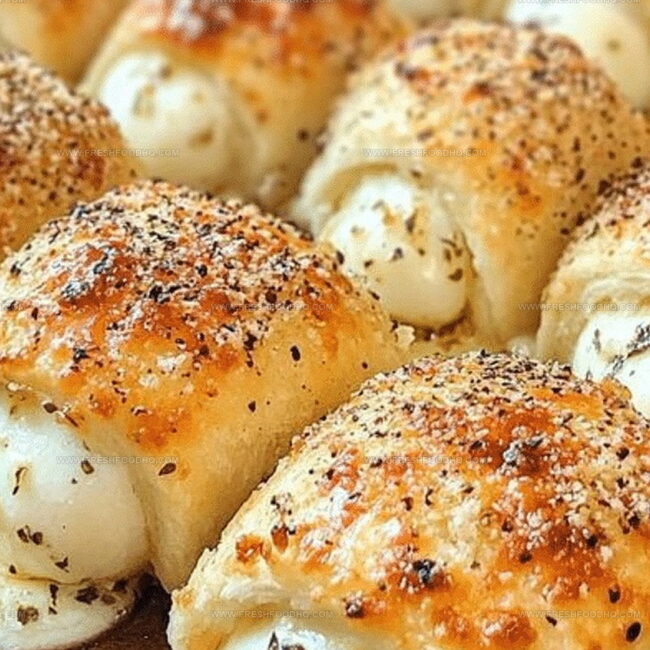
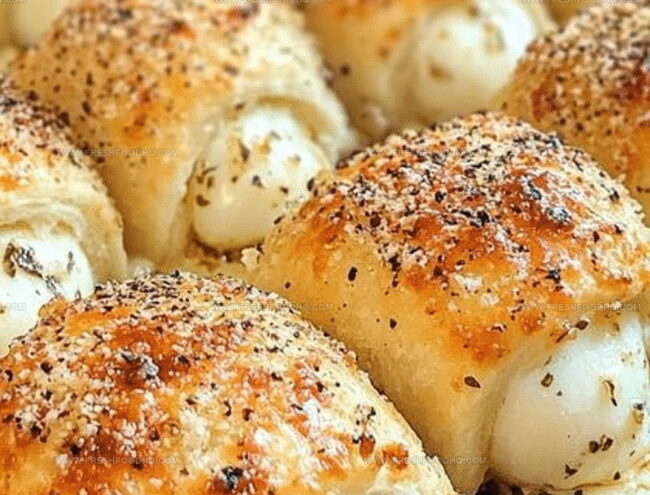
Pillowy dough embraces melted cheese and rich garlic butter like a warm hug.
Crisp edges and soft centers create an irresistible texture that beckons everyone to the table.
Each bite delivers a burst of savory flavors that melt perfectly in your mouth.
Quick to prepare and guaranteed to impress, these little bombs pack a serious punch of deliciousness.
Seriously, you won’t be able to stop at just one.
How to Make Garlic Butter Cheese Bombs
Ingredients for Garlic Butter Cheese Bombs
Main Ingredients:Flavor Enhancers:Cooking Elements:Preparation Steps for Garlic Butter Cheese Bombs
Step 1: Warm Up the Cooking Zone
Fire up your oven to a toasty 375F (190C) and grab a baking sheet for your delicious adventure.
Step 2: Transform Dough into Cheese Pockets
Gently stretch out each biscuit dough into a soft circle. Place a creamy mozzarella cube right in the center.
Step 3: Create Sealed Cheese Treasures
Carefully fold the dough around the cheese, pinching and sealing the edges like a delicate package. Make sure no cheesy goodness can escape!
Step 4: Craft Magical Garlic Butter
In a small pan, melt butter over gentle heat. Drop in minced garlic and let it dance and release its aromatic magic for 1-2 minutes. Watch carefully to prevent burning.
Step 5: Add Herbal Magic
Pull the pan off the heat and stir in fresh, vibrant parsley, creating a fragrant butter sauce.
Step 6: Dress Your Cheese Parcels
Lavishly brush each dough pocket with the golden garlic butter. Sprinkle a whisper of salt to enhance the flavors.
Step 7: Bake to Perfection
Arrange your cheese parcels on the baking sheet and slide into the oven. Bake for 10-12 minutes until they turn a gorgeous golden brown.
Step 8: Serve and Devour
Pull out these heavenly parcels and serve immediately while they’re hot and oozing with cheesy deliciousness.
Pro Tips for Garlic Butter Cheese Bombs
Variations of Garlic Butter Cheese Bombs to Try
Serving Suggestions for Garlic Butter Cheese Bombs
Storage Advice for Garlic Butter Cheese Bombs
FAQs About Garlic Butter Cheese Bombs
The combination of melted mozzarella, garlic butter, and fresh parsley creates a rich, savory taste that makes these bombs irresistibly delicious.
Mozzarella works best because it melts smoothly, but you can experiment with cheddar or monterey jack for similar results.
Seal the edges of the biscuit dough tightly and make sure there are no gaps when wrapping the cheese to keep it inside during baking.
Yes, they’re most delicious when served warm right out of the oven, with the cheese still gooey and the garlic butter fresh and aromatic.
Print
Garlic Butter Cheese Bombs Recipe
- Total Time: 22 minutes
- Yield: 20 1x
Description
Gooey garlic butter cheese bombs bring explosive flavor to your appetizer game with irresistible melted cheese centers. Crispy golden edges and rich herb-infused butter create an indulgent snack you’ll crave at every gathering.
Ingredients
Main Ingredients:
- 1 can refrigerated biscuits
- 4 ounces (113 grams) mozzarella cheese, cut into 20 cubes
Cheese and Dairy:
- 4 tablespoons (60 milliliters) butter
Herbs and Seasonings:
- 3 cloves garlic, minced
- 1 tablespoon (15 milliliters) fresh parsley, chopped
- Salt, to taste
Instructions
- Prepare a baking sheet and set the oven to 375F (190C) for optimal heating.
- Gently press each biscuit dough into a thin, flat circular shape using your fingertips.
- Position a single mozzarella cheese cube precisely in the center of each flattened dough circle.
- Carefully fold the dough edges over the cheese, creating a complete seal with no openings.
- Melt butter in a small saucepan over low heat, watching carefully to prevent scorching.
- Introduce minced garlic to the melted butter, allowing it to simmer and release its aromatic essence for approximately 1-2 minutes.
- Remove the butter mixture from heat and incorporate freshly chopped parsley, stirring thoroughly.
- Liberally coat each cheese-filled dough packet with the fragrant garlic butter mixture.
- Lightly sprinkle kosher or sea salt across the surface of each prepared bomb.
- Arrange the prepared bombs on the baking sheet, ensuring they are not touching.
- Bake in the preheated oven for 10-12 minutes until they transform into a golden, crispy exterior.
- Remove from oven and allow to cool for 2-3 minutes before serving to prevent molten cheese burns.
- Serve immediately while warm for maximum flavor and gooey cheese experience.
Notes
- Seal cheese completely inside the dough to prevent leakage during baking, creating perfect molten cheese centers.
- Experiment with different cheese varieties like cheddar or pepper jack for unique flavor combinations that match personal preferences.
- Use room temperature butter and garlic for smoother, more evenly distributed coating on the cheese bombs.
- Transform this recipe into a gluten-free version by substituting biscuit dough with gluten-free alternatives or using almond flour-based dough.
- Prep Time: 10 minutes
- Cook Time: 12 minutes
- Category: Appetizer, Snacks
- Method: Baking
- Cuisine: American
Nutrition
- Serving Size: 20
- Calories: 134kcal
- Sugar: 0.3g
- Sodium: 160mg
- Fat: 9g
- Saturated Fat: 5.6g
- Unsaturated Fat: 3g
- Trans Fat: 0.2g
- Carbohydrates: 8g
- Fiber: 0.2g
- Protein: 4g
- Cholesterol: 21mg
Samantha Lee
Recipe Developer & Content Creator
Expertise
Plant-based and vegetarian recipes, Recipe testing and development, Food blogging and digital content creation, Culinary education and workshops
Education
Oregon Culinary Institute (Portland, OR)
Samantha sees cooking like painting, every fresh herb, every juicy tomato, a new splash of color on a canvas.
After graduating from Oregon Culinary Institute, she blended her love of global cuisines and plant-based cooking into recipes that feel fresh, fearless, and full of heart.
Samantha’s kitchen is a place where comfort food gets a modern remix and every meal feels like a little adventure. When she’s not cooking, she’s out exploring farmers’ markets, sketching new recipe ideas, or getting her hands dirty in a community garden.