
Easiest No-Bake Cherry Cheesecake Recipe That Wows Every Time
Crafting a delightful no-bake cherry cheesecake recipe becomes a breeze when you follow these simple steps.
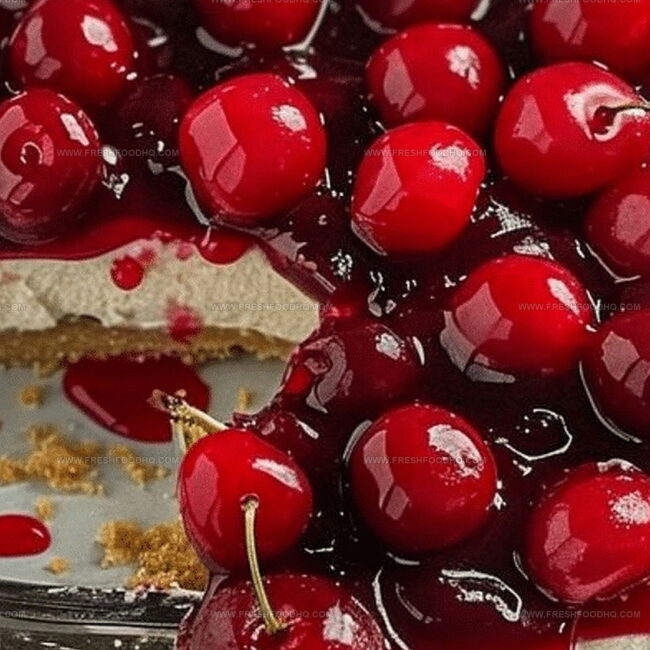
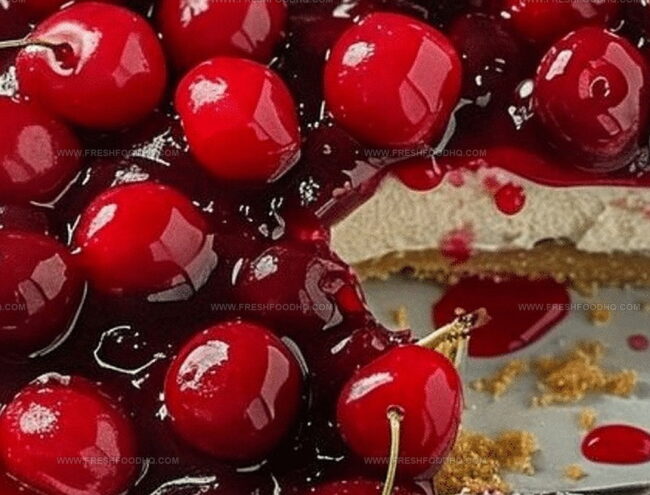
Smooth cream cheese blends perfectly with sweet graham cracker crust for a dreamy dessert.
Cool summer evenings call for something light and refreshing.
Minimal ingredients and zero oven time make this treat a go-to for busy home cooks.
Creamy textures and bright cherry flavors promise a crowd-pleasing experience.
Whip up this decadent dessert in minutes and watch everyone’s eyes light up with excitement.
Let’s create a dessert that delivers pure indulgence without breaking a sweat.
Why Easiest No-Bake Cherry Cheesecake Is a Quick Favorite
Ingredients for Easiest No-Bake Cherry Cheesecake
Crust Ingredients:Filling Ingredients:Topping Ingredients:How to Assemble Easiest No-Bake Cherry Cheesecake
Step 1: Prepare The Crumbly Crust
Grab your graham crackers and crush them into fine, delectable crumbs. Mix the crumbs with sugar and melted butter until they form a perfect, slightly moist texture. Press this mixture firmly into the bottom of a 9×13 inch dish, creating a solid, even foundation for your cheesecake.
Step 2: Whip Up The Creamy Filling
In a separate mixing bowl, combine cream cheese, powdered sugar, and vanilla extract. Beat these ingredients together until they transform into a silky, smooth mixture with no lumps. Use an electric mixer for the smoothest consistency possible. Carefully spread this luscious cream cheese layer over the prepared graham cracker crust, ensuring an even distribution.
Step 3: Add The Cherry Topping
Generously spoon cherry pie filling across the entire surface of the cream cheese layer. Make sure to cover the entire top evenly, creating a vibrant and tempting cherry landscape that will make mouths water.
Step 4: Chill And Set The Cheesecake
Place the assembled cheesecake into the refrigerator. Allow it to rest and set for a minimum of 4 hours. This chilling time helps the flavors meld and the texture become perfectly firm. The longer it chills, the more delightful and structured your cheesecake will become.
Pro Tips for Easiest No-Bake Cherry Cheesecake Success
Flavor Variations for Easiest No-Bake Cherry Cheesecake
Suggested Pairings for Easiest No-Bake Cherry Cheesecake
How to Store Easiest No-Bake Cherry Cheesecake Properly
FAQs on Easiest No-Bake Cherry Cheesecake
Yes, you can substitute cherry pie filling with other fruit fillings like strawberry, blueberry, or raspberry to create variety and match your taste preferences.
Absolutely! This no-bake cheesecake is perfect for beginners or those without an oven. It requires simple mixing and chilling, making it a foolproof dessert.
The cheesecake can be stored in the refrigerator for up to 3-4 days when covered properly with plastic wrap or in an airtight container.
Print
Easiest No-Bake Cherry Cheesecake Recipe
- Total Time: 4 hours 15 minutes
- Yield: 8 1x
Description
Smooth and silky cherry cheesecake promises pure dessert bliss without turning on the oven. Creamy Philadelphia cream cheese and luscious cherry topping create a quick, irresistible treat perfect for casual gatherings or sweet midnight indulgences you’ll savor.
Ingredients
Main Ingredients:
- 2 (8 ounces/226 grams) packages cream cheese, softened
- 1 (21 ounces/595 grams) can cherry pie filling
Crust Ingredients:
- 1 1/2 cups graham cracker crumbs
- 1/3 cup sugar
- 1/2 cup butter, melted
Filling Ingredients:
- 1 cup powdered sugar
- 1 teaspoon vanilla extract
Instructions
- Crush graham crackers into fine crumbs and blend thoroughly with sugar and melted butter, creating a cohesive mixture that will firmly hold together when pressed.
- Firmly compact the cracker mixture into the bottom of a rectangular dish, ensuring an even, compact base for the cheesecake.
- Using an electric mixer, whip cream cheese until silky, gradually incorporating powdered sugar and vanilla extract to achieve a smooth, lump-free consistency.
- Gently spread the cream cheese mixture across the graham cracker crust, creating an uniform layer that completely covers the base.
- Carefully distribute cherry pie filling over the cream cheese layer, allowing it to cascade evenly across the surface.
- Chill the assembled dessert in the refrigerator for a minimum of 4 hours, permitting the layers to set and flavors to meld together.
- Before serving, remove from refrigerator and slice into clean, precise portions to showcase the distinct layers of crust, cream cheese, and fruity topping.
Notes
- Swap traditional graham crackers with gluten-free alternatives for those with dietary restrictions, ensuring everyone can enjoy this delightful dessert.
- Experiment with different fruit fillings like blueberry, strawberry, or mixed berry to create unique flavor variations and keep the recipe exciting.
- Enhance the cheesecake’s texture by gently folding whipped cream into the cream cheese mixture for an extra light and airy consistency.
- Use room temperature cream cheese to prevent lumps and achieve a smoother, more velvety filling that spreads effortlessly across the crust.
- Prep Time: 15 minutes
- Cook Time: 0 minutes
- Category: Desserts
- Method: Refrigerating
- Cuisine: American
Nutrition
- Serving Size: 8
- Calories: 355 kcal
- Sugar: 27 g
- Sodium: 210 mg
- Fat: 25 g
- Saturated Fat: 15 g
- Unsaturated Fat: 10 g
- Trans Fat: 0.5 g
- Carbohydrates: 28 g
- Fiber: 1 g
- Protein: 4 g
- Cholesterol: 70 mg
Samantha Lee
Recipe Developer & Content Creator
Expertise
Plant-based and vegetarian recipes, Recipe testing and development, Food blogging and digital content creation, Culinary education and workshops
Education
Oregon Culinary Institute (Portland, OR)
Samantha sees cooking like painting, every fresh herb, every juicy tomato, a new splash of color on a canvas.
After graduating from Oregon Culinary Institute, she blended her love of global cuisines and plant-based cooking into recipes that feel fresh, fearless, and full of heart.
Samantha’s kitchen is a place where comfort food gets a modern remix and every meal feels like a little adventure. When she’s not cooking, she’s out exploring farmers’ markets, sketching new recipe ideas, or getting her hands dirty in a community garden.