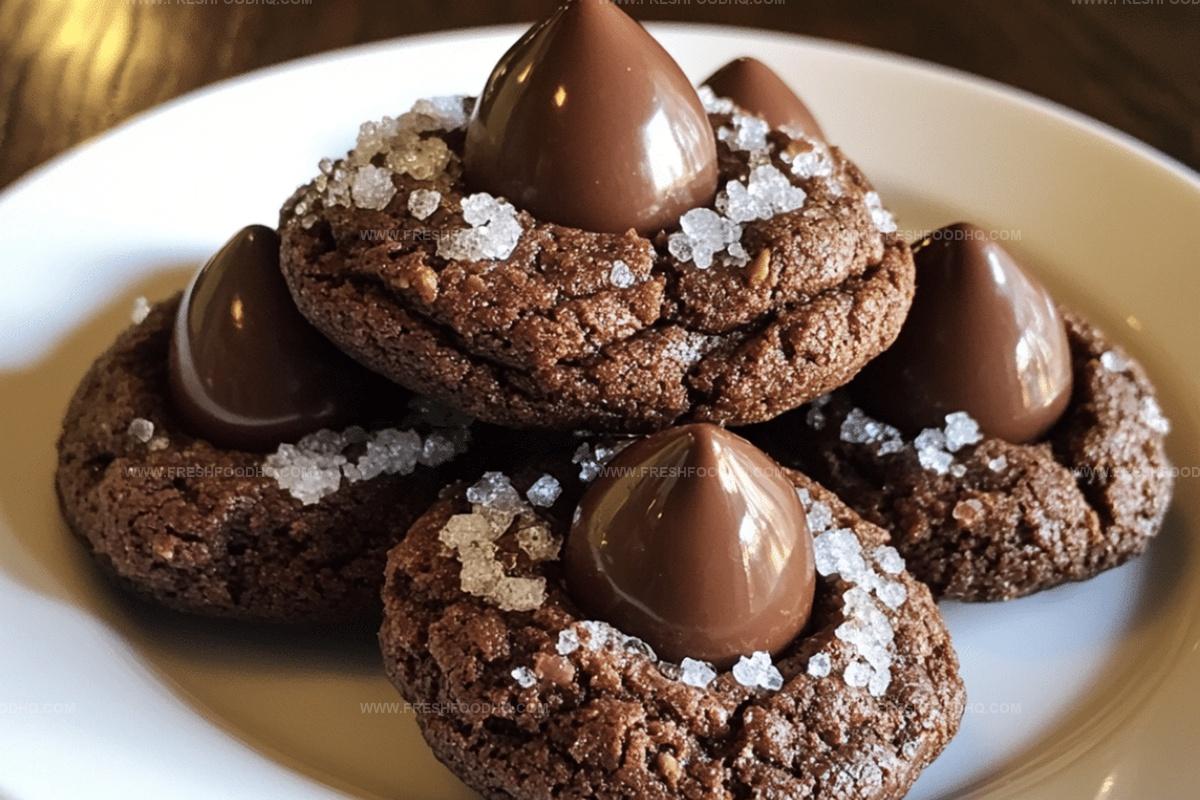
Dreamy Chocolate Sugar Kiss Cookies Recipe That Melts Hearts
Sweet chocolate sugar kiss cookies carry a magical essence of homemade comfort that instantly sparks joy.
Memories of childhood baking adventures dance through my kitchen whenever these delightful treats emerge from the warm oven.
Soft, pillowy dough cradles a perfect chocolate kiss nestled right in its center.
Delicate crumbles melt across your tongue with each tender bite.
Sharing these cookies means spreading happiness through simple, pure ingredients.
My grandmother’s cherished recipe inspired this particular version, blending classic techniques with modern baking love.
Why Chocolate Sugar Kiss Cookies Are a Sweet Delight
Ingredients for Chocolate Sugar Kiss Cookies
Main Ingredients:Flavor Enhancers:Leavening and Seasoning:Topping:How to Bake Chocolate Sugar Kiss Cookies
Step 1: Warm Up The Oven
Set your oven to a cozy 350°F (177°C) so it’s ready for baking deliciousness.
Step 2: Create Creamy Butter Mixture
In a spacious mixing bowl, blend softened butter and sugar until the mixture becomes light, airy, and looks like fluffy clouds.
Step 3: Add Liquid Ingredients
Gently incorporate eggs and vanilla extract, stirring until everything is beautifully combined.
Step 4: Prepare Dry Ingredients
In a separate bowl, whisk together:Blend these ingredients until they’re perfectly mixed.
Step 5: Combine Wet and Dry Mixtures
Slowly fold the dry ingredients into the creamy butter mixture, stirring until a smooth dough forms.
Step 6: Shape Cookie Balls
Roll the dough into small, adorable 1-inch balls, then coat each ball generously with sugar.
Step 7: Arrange On Baking Sheet
Place the sugary dough balls about 2 inches apart on an ungreased baking sheet.
Step 8: Bake To Perfection
Slide the baking sheet into the oven and bake for 8-10 minutes until the cookies are set.
Step 9: Add Chocolate Kisses
Immediately after removing from the oven, gently press a chocolate kiss into the center of each warm cookie.
Step 10: Cool And Enjoy
Transfer the cookies to wire cooling racks and let them cool completely before devouring.
Pro Tips for Chocolate Sugar Kiss Cookies
Variations for Chocolate Sugar Kiss Cookies
Pairing Ideas for Chocolate Sugar Kiss Cookies
Storage Advice for Chocolate Sugar Kiss Cookies
FAQs on Chocolate Sugar Kiss Cookies
No, these chocolate sugar kiss cookies are beginner-friendly and easy to prepare with basic baking skills and simple ingredients.
Yes, you can prepare the cookie dough in advance and refrigerate it for up to 2-3 days before baking, which helps develop richer flavors.
You’ll only need standard baking tools like a mixing bowl, baking sheet, electric mixer, and wire cooling rack – nothing fancy or complicated.
Press the chocolate kiss into the warm cookie immediately after baking, but be gentle to maintain its shape and prevent total melting.
Print
Chocolate Sugar Kiss Cookies Recipe
- Total Time: 23-25 minutes
- Yield: 24 1x
Description
Sweet chocolate sugar kiss cookies offer a delightful dance of rich cocoa and sugary bliss. Irresistible morsels melt in your mouth, promising pure indulgence with each heavenly bite.
Ingredients
Main Ingredients:
- 2 cups all-purpose flour
- 2/3 cup cocoa powder
- 1 cup unsalted butter, softened (226 grams)
- 1.5 cups sugar
- 2 large eggs
Flavor Enhancers:
- 2 teaspoons vanilla extract
- 3/4 teaspoon baking soda
- 1/4 teaspoon salt
Finishing/Topping:
- 0.5 cup sugar, for rolling
- 24 Hershey’s Kisses, unwrapped
Instructions
- Warm the oven to a toasty 350°F (177°C), preparing a welcoming environment for the chocolate delights.
- Blend softened butter with sugar in a spacious mixing bowl, whipping until the mixture transforms into a cloud-like, airy texture.
- Introduce eggs and vanilla essence, mixing thoroughly to create a smooth, uniform base.
- In a separate vessel, combine flour, cocoa powder, baking soda, and salt, whisking to eliminate any potential lumps.
- Gradually fold the dry ingredients into the creamy mixture, stirring until a cohesive chocolate dough emerges.
- Craft small, uniform spheres of dough, each approximately 1 inch in diameter.
- Gently roll each dough ball in a blanket of granulated sugar, ensuring a complete, sparkling coating.
- Arrange the sugar-kissed dough balls on ungreased baking sheets, spacing them 2 inches apart to allow for graceful expansion.
- Slide the sheets into the preheated oven, baking for 8-10 minutes until the cookies set with a subtle firmness.
- Immediately upon removal, crown each warm cookie with a chocolate kiss, pressing gently to create a delectable centerpiece.
- Transfer the adorned cookies to wire cooling racks, allowing them to reach a perfect, delicate temperature.
Notes
- Use room temperature butter and eggs for smoother cookie dough and better mixing.
- Chill the dough for 30 minutes before rolling to prevent spreading and maintain cookie shape.
- Gently press chocolate kisses into warm cookies to help them stick without breaking.
- For gluten-free version, substitute all-purpose flour with a gluten-free 1:1 baking blend.
- Prep Time: 15 minutes
- Cook Time: 8-10 minutes
- Category: Snacks, Desserts
- Method: Baking
- Cuisine: American
Nutrition
- Serving Size: 24
- Calories: 153
- Sugar: 11 g
- Sodium: 70 mg
- Fat: 8 g
- Saturated Fat: 5 g
- Unsaturated Fat: 3 g
- Trans Fat: 0 g
- Carbohydrates: 20 g
- Fiber: 1 g
- Protein: 2 g
- Cholesterol: 18 mg


Samantha Lee
Recipe Developer & Content Creator
Expertise
Plant-based and vegetarian recipes, Recipe testing and development, Food blogging and digital content creation, Culinary education and workshops
Education
Oregon Culinary Institute (Portland, OR)
Samantha sees cooking like painting, every fresh herb, every juicy tomato, a new splash of color on a canvas.
After graduating from Oregon Culinary Institute, she blended her love of global cuisines and plant-based cooking into recipes that feel fresh, fearless, and full of heart.
Samantha’s kitchen is a place where comfort food gets a modern remix and every meal feels like a little adventure. When she’s not cooking, she’s out exploring farmers’ markets, sketching new recipe ideas, or getting her hands dirty in a community garden.