
Irresistible Chocolate Lava Brownie Cookies Recipe For Sweet Tooths
Molten chocolate lava brownie cookies promise an irresistible dessert adventure that’ll make your taste buds dance.
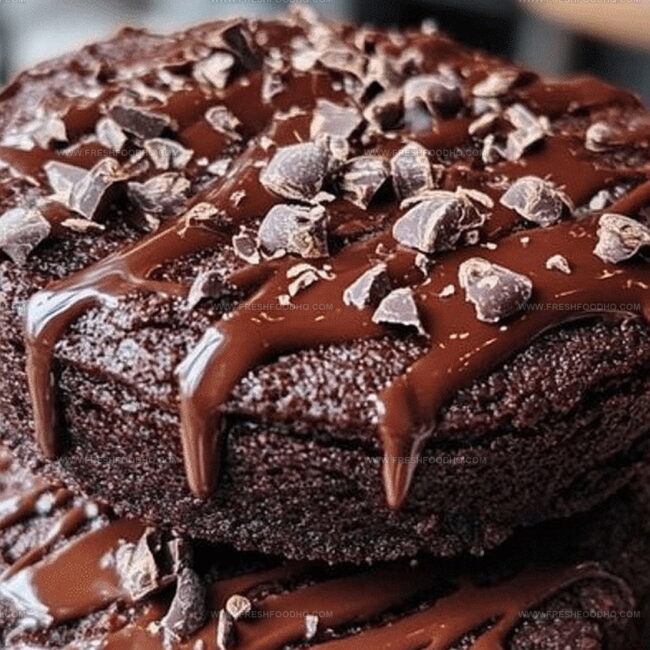
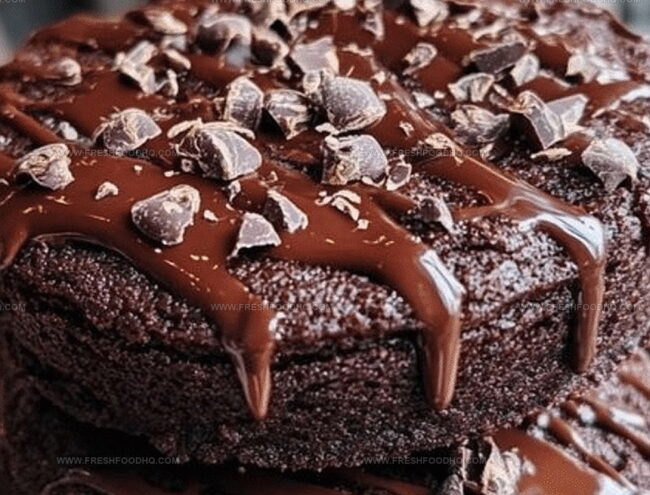
Sweet aromas will fill your kitchen as these decadent treats melt perfectly.
Crisp edges blend seamlessly with gooey chocolate centers, creating pure magic.
Rich cocoa notes whisper indulgence with each delectable bite.
Crinkled surfaces hint at the incredible surprise waiting inside these incredible cookies.
Warm from the oven, they offer a luxurious experience that satisfies deepest chocolate cravings.
You won’t be able to resist grabbing another of these incredible morsels.
What Makes Chocolate Lava Brownie Cookies So Decadent
Ingredients for Chocolate Lava Brownie Cookies
Chocolate Base:Sweeteners:Wet Ingredients:Dry Ingredients:Additional Chocolate:How to Prepare Chocolate Lava Brownie Cookies
Step 1: Prepare Baking Station
Warm up the oven to 350°F (175°C). Line a baking sheet with parchment paper for easy cookie removal and cleanup.
Step 2: Create Chocolate Base
Melt butter and chocolate chips in a microwave-safe bowl. Use short 20-second bursts, stirring between each interval until the mixture becomes silky smooth. Let the mixture cool down slightly to prevent scrambling eggs later.
Step 3: Blend Sugars and Chocolate
Combine granulated and brown sugars in a large mixing bowl. Pour in the slightly cooled chocolate mixture and beat until the mixture looks glossy and well-integrated.
Step 4: Incorporate Wet Ingredients
Add eggs and vanilla extract to the chocolate sugar blend. Mix thoroughly until the ingredients are completely combined and the mixture looks uniform.
Step 5: Develop Cookie Dough
In a separate bowl, whisk together:Slowly fold the dry ingredients into the wet mixture, creating a soft, rich dough.
Step 6: Shape Lava Cookies
Scoop tablespoon-sized dough balls onto the prepared baking sheet. Press extra chocolate chips or chocolate pieces into the center of each cookie. Space the cookies about 2 inches apart to allow for spreading.
Step 7: Bake to Perfection
Slide the baking sheet into the preheated oven. Bake for 10-12 minutes until the cookie edges look set but the centers remain soft and gooey.
Step 8: Cool and Serve
Let the cookies rest on the baking sheet for a few minutes. Transfer to a wire rack. Serve warm to experience the ultimate molten chocolate center that gives these cookies their magical lava-like quality.
Pro Tips for Chocolate Lava Brownie Cookies
Variations to Try With Chocolate Lava Brownie Cookies
Pairing Recommendations for Chocolate Lava Brownie Cookies
Storage Tips for Chocolate Lava Brownie Cookies
FAQs About Chocolate Lava Brownie Cookies
Brown sugar adds moisture and creates a deeper, caramel-like flavor that enhances the overall richness of the cookies, while granulated sugar helps with sweetness and structure.
Yes, you can experiment with dark, milk, or even white chocolate chips, but semisweet chocolate works best for maintaining the classic brownie cookie flavor and gooey texture.
The secret is not overbaking the cookies. Remove them from the oven when the edges are set but the center still looks slightly soft, which allows the middle to remain molten and create that signature lava effect.
Print
Chocolate Lava Brownie Cookies Recipe
- Total Time: 25-27 minutes
- Yield: 24 1x
Description
Rich chocolate lava brownie cookies melt hearts with gooey centers that ooze pure indulgence. Chocolate lovers will dive into this irresistible dessert, experiencing a perfect blend of crisp edges and molten chocolate magic.
Ingredients
Main Ingredients:
- 1 cup semisweet chocolate chips
- 2 large eggs
- 1 cup all-purpose flour
- 1/2 cup unsalted butter, softened
- 1 cup granulated sugar
Sweeteners and Flavor Enhancers:
- 1/2 cup brown sugar, packed
- 1 teaspoon vanilla extract
Baking and Seasoning Ingredients:
- 1/4 cup unsweetened cocoa powder
- 1/2 teaspoon baking powder
- 1/4 teaspoon salt
- Additional chocolate chips or chocolate squares (for filling)
Instructions
- Heat the oven to 350F (175C) and prepare a parchment-lined baking sheet for optimal cookie performance.
- Create a silky chocolate base by gently melting butter and chocolate chips in the microwave, stirring between 20-second intervals until completely smooth. Let the mixture cool slightly to prevent egg scrambling.
- Combine granulated and brown sugars in a mixing bowl, then incorporate the cooled chocolate mixture until achieving a uniform consistency.
- Integrate eggs and vanilla extract, blending thoroughly to ensure even distribution of ingredients.
- Separately whisk together flour, cocoa powder, baking powder, and salt to eliminate potential dry ingredient clumps.
- Gradually fold dry ingredients into the wet mixture, creating a soft, pliable dough that holds its shape.
- Portion dough into tablespoon-sized rounds, strategically embedding extra chocolate chips or chocolate pieces into the center of each cookie.
- Arrange cookie dough balls on the prepared baking sheet, spacing them approximately 2 inches apart to allow proper spreading during baking.
- Bake for 10-12 minutes, watching for set edges and a slightly soft center – the hallmark of a perfect lava cookie.
- Allow cookies to rest briefly on the baking sheet to stabilize, then transfer to a wire rack for complete cooling.
- Serve immediately while warm to experience the decadent, molten chocolate center that defines these luxurious brownie cookies.
Notes
- Ensure chocolate is high-quality for rich, intense flavor that elevates the entire cookie experience.
- Refrigerate dough for 15-20 minutes before baking to prevent excessive spreading and maintain perfect shape.
- Use room temperature eggs for smoother batter integration and consistent texture throughout the cookies.
- For gluten-free option, substitute all-purpose flour with almond or gluten-free blend, maintaining same measurements.
- Prep Time: 15 minutes
- Cook Time: 10-12 minutes
- Category: Desserts, Snacks
- Method: Baking
- Cuisine: American
Nutrition
- Serving Size: 24
- Calories: 172 kcal
- Sugar: 14 g
- Sodium: 74 mg
- Fat: 9 g
- Saturated Fat: 5 g
- Unsaturated Fat: 3 g
- Trans Fat: 0.1 g
- Carbohydrates: 23 g
- Fiber: 2 g
- Protein: 2 g
- Cholesterol: 31 mg
Samantha Lee
Recipe Developer & Content Creator
Expertise
Plant-based and vegetarian recipes, Recipe testing and development, Food blogging and digital content creation, Culinary education and workshops
Education
Oregon Culinary Institute (Portland, OR)
Samantha sees cooking like painting, every fresh herb, every juicy tomato, a new splash of color on a canvas.
After graduating from Oregon Culinary Institute, she blended her love of global cuisines and plant-based cooking into recipes that feel fresh, fearless, and full of heart.
Samantha’s kitchen is a place where comfort food gets a modern remix and every meal feels like a little adventure. When she’s not cooking, she’s out exploring farmers’ markets, sketching new recipe ideas, or getting her hands dirty in a community garden.