Sensational Chocolate Cherry Layered Ice Cream Cake Recipe
Crafting a decadent chocolate cherry layered ice cream cake promises pure indulgence for dessert enthusiasts.
Sweet cherries and rich chocolate create a mesmerizing combination that melts hearts instantly.
Cool layers of creamy goodness beckon with tempting elegance.
Summer celebrations demand something extraordinary beyond ordinary treats.
Sophisticated yet playful, this dessert captures the essence of delightful culinary creativity.
Chilling and assembling require minimal effort but deliver maximum impact.
Why You’ll Love Chocolate Cherry Ice Cream Cake
Ingredients For Chocolate Cherry Ice Cream Cake
Cake Base:Ice Cream Layer:Toppings and Garnishes:Steps To Make Chocolate Cherry Ice Cream Cake
Step 1: Whip Up Chocolate Cake Base
Create the chocolate cake following the package directions. Use a 9×13 inch pan for baking. Let the cake cool down completely until it reaches room temperature.
Step 2: Spread Creamy Cherry Layer
Carefully spread the cherry ice cream across the entire surface of the cooled chocolate cake. Ensure the ice cream layer is smooth and even for a perfect dessert foundation.
Step 3: Drizzle Decadent Chocolate Sauce
Pour the chocolate fudge sauce over the cherry ice cream layer. Allow the sauce to create beautiful swirls and patterns across the surface.
Step 4: Sprinkle Fruity Cherry Bits
Scatter chopped maraschino cherries over the chocolate sauce. These vibrant red pieces will add bursts of flavor and visual appeal to the dessert.
Step 5: Crown with Fluffy Cream
Top the entire cake with a generous layer of whipped cream. Create soft peaks or a smooth surface depending on your preference.
Step 6: Chill and Set
Place the assembled cake in the freezer. Let it rest for a minimum of 4 hours to allow all layers to firm up and blend flavors perfectly. The waiting time will help the cake set into a delightful frozen treat.
Tips That Help With Chocolate Cherry Ice Cream Cake
Creative Twists On Chocolate Cherry Ice Cream Cake
What To Serve With Chocolate Cherry Ice Cream Cake
How To Store Chocolate Cherry Ice Cream Cake
Chocolate Cherry Ice Cream Cake FAQs
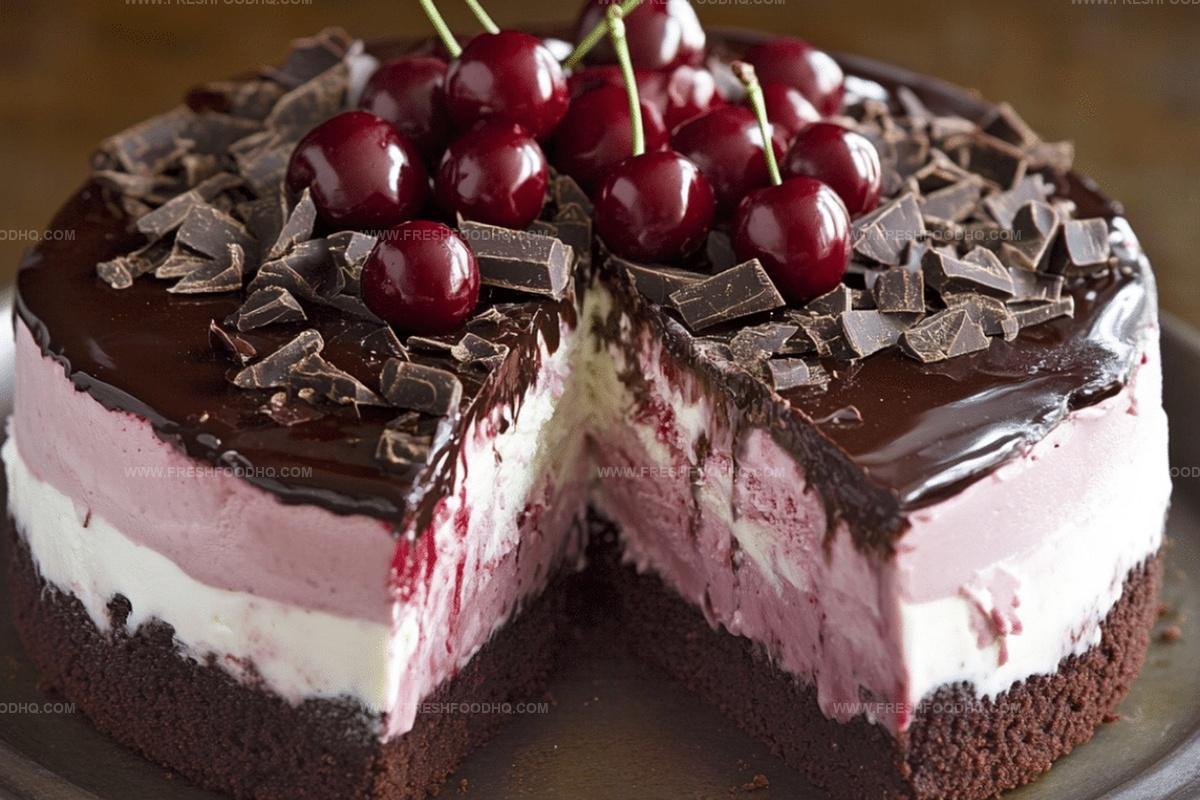
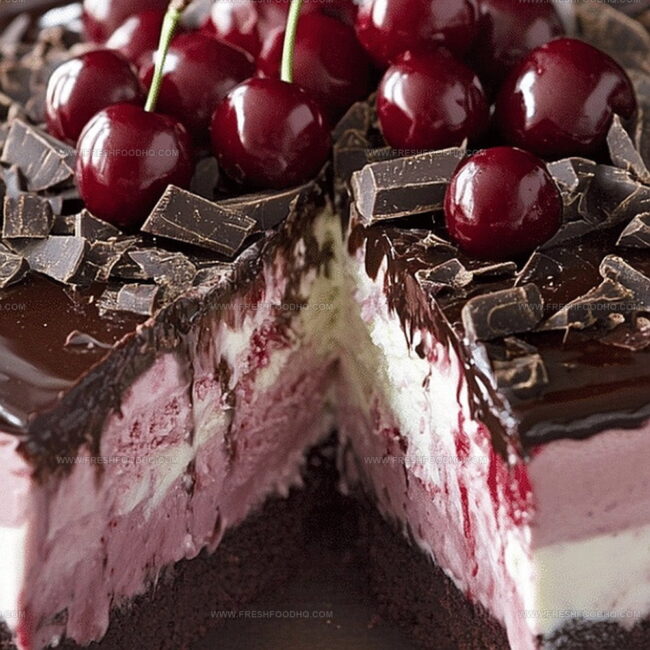
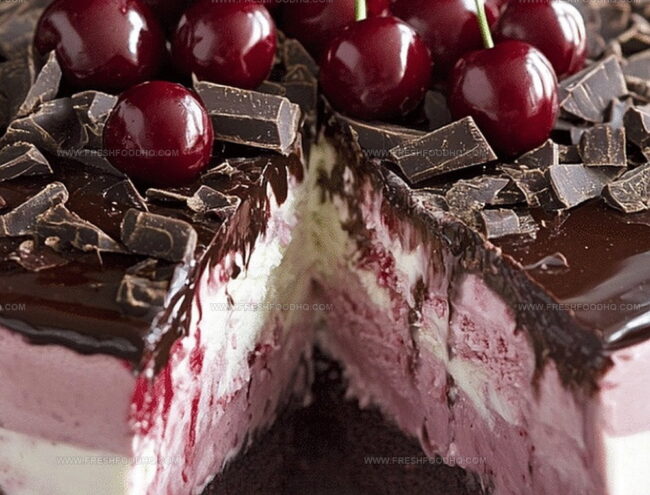
The combination of rich chocolate cake, creamy cherry ice cream, chocolate fudge sauce, and maraschino cherries creates a decadent dessert with layers of complementary flavors.
Yes, you can substitute a homemade chocolate cake, which might enhance the cake’s overall taste and texture.
You’ll need a 9×13 inch pan, an offset spatula for spreading ice cream evenly, and freezer space to set the cake.
You can make this cake up to 3 days in advance, keeping it tightly covered in the freezer until ready to serve.
Print
Chocolate Cherry Layered Ice Cream Cake Recipe
- Total Time: 4 hours 45 minutes
- Yield: 8 1x
Description
Indulgent chocolate cherry layered ice cream cake brings summer’s sweetest dreams to life with rich chocolate and tangy cherries dancing through creamy frozen layers. Dessert enthusiasts will discover pure bliss in each spoonful of this irresistible chilled masterpiece.
Ingredients
Cake Base:
- 1 box chocolate cake mix
Main Ingredients:
- 2 pints (946 milliliters) cherry ice cream
Toppings and Decorations:
- 1 cup (240 milliliters) chocolate fudge sauce
- 1 cup (237 milliliters) maraschino cherries, chopped
- Whipped cream for topping
Instructions
- Craft the chocolate cake batter following package guidelines, utilizing a 9×13 inch pan. Bake until a toothpick emerges clean, approximately 25-30 minutes at 350°F.
- Allow the chocolate cake to cool entirely at room temperature, which prevents ice cream from melting during assembly.
- Gently spread softened cherry ice cream across the cake’s surface, creating a uniform layer about 1-inch thick.
- Drizzle warm chocolate fudge sauce in artistic zigzag patterns, ensuring even distribution over the ice cream.
- Delicately scatter finely chopped maraschino cherries across the fudge-covered surface, providing bursts of fruity texture.
- Pipe or spread a luxurious whipped cream topping, covering the entire dessert with elegant swirls.
- Transfer the assembled cake to the freezer, allowing it to solidify and meld flavors for a minimum of 4 hours or overnight for optimal consistency.
- Before serving, let the cake rest at room temperature for 5-10 minutes to facilitate easier slicing and enhance flavor presentation.
Notes
- Choose a high-quality chocolate cake mix for richer flavor and better texture.
- Allow the cake to cool completely to prevent melting the ice cream when spreading.
- Soften the cherry ice cream slightly at room temperature for easier spreading without tearing the cake.
- Use well-drained maraschino cherries to prevent excess liquid from making the cake soggy.
- For a gluten-free version, substitute the chocolate cake mix with a gluten-free alternative.
- Create a dairy-free option by using non-dairy whipped topping and vegan ice cream alternatives.
- Enhance the cherry flavor by adding a splash of kirsch or cherry liqueur to the fudge sauce.
- Prepare the cake in advance and freeze up to 3 days for a make-ahead dessert that impresses guests.
- Prep Time: 15 minutes
- Cook Time: 30 minutes
- Category: Desserts
- Method: Baking
- Cuisine: American
Nutrition
- Serving Size: 8
- Calories: 410 kcal
- Sugar: 45 g
- Sodium: 280 mg
- Fat: 18 g
- Saturated Fat: 11 g
- Unsaturated Fat: 5 g
- Trans Fat: 0.5 g
- Carbohydrates: 58 g
- Fiber: 2 g
- Protein: 4 g
- Cholesterol: 55 mg
Samantha Lee
Recipe Developer & Content Creator
Expertise
Plant-based and vegetarian recipes, Recipe testing and development, Food blogging and digital content creation, Culinary education and workshops
Education
Oregon Culinary Institute (Portland, OR)
Samantha sees cooking like painting, every fresh herb, every juicy tomato, a new splash of color on a canvas.
After graduating from Oregon Culinary Institute, she blended her love of global cuisines and plant-based cooking into recipes that feel fresh, fearless, and full of heart.
Samantha’s kitchen is a place where comfort food gets a modern remix and every meal feels like a little adventure. When she’s not cooking, she’s out exploring farmers’ markets, sketching new recipe ideas, or getting her hands dirty in a community garden.