Homemade Cherry Pie Bars Recipe: Sweet Summer Bliss
Sweet summer memories dance through this cherry pie bars recipe that captures pure dessert magic.
Memories of grandma’s kitchen sparked my love for these delightful treats.
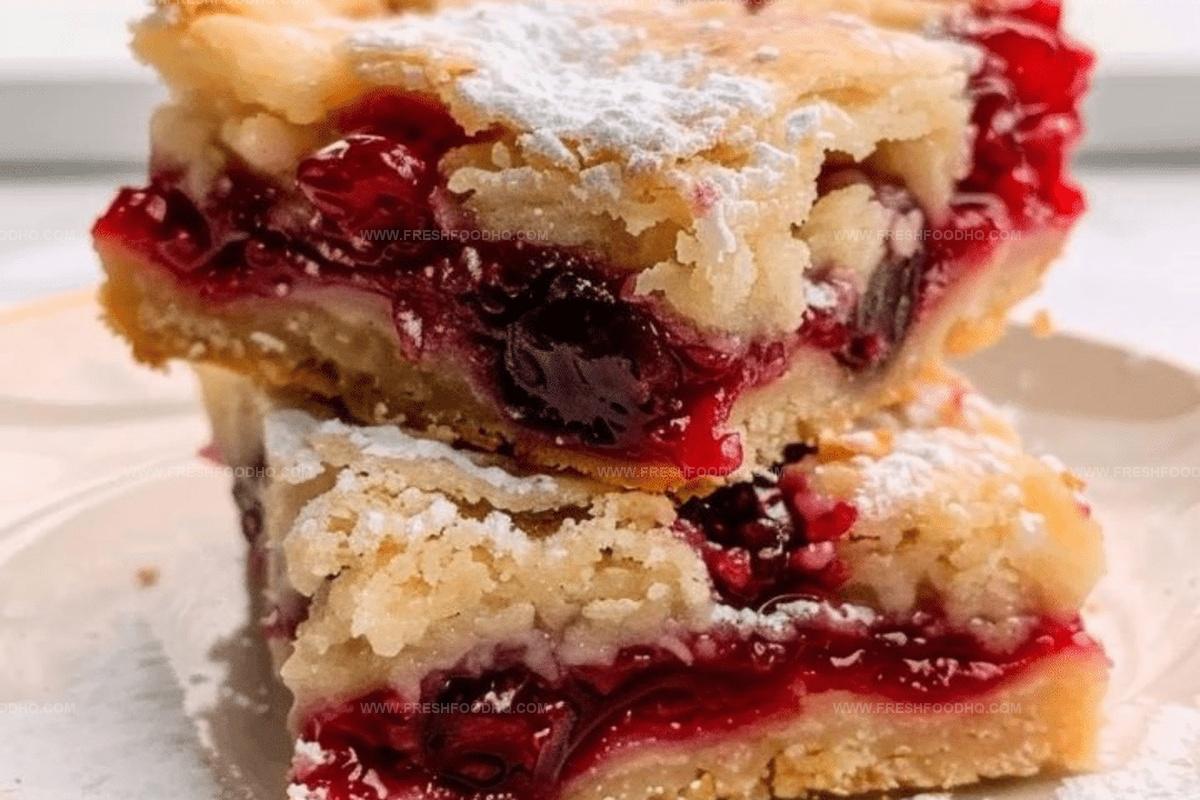
Juicy cherries nestled between buttery, crumbly layers create an irresistible homemade delight.
Delicate and rich, these bars promise a slice of comfort in every bite.
Fresh ingredients bring warmth and nostalgia to your baking adventure.
One taste transports you to lazy afternoon gatherings with loved ones.
Bake these bars and watch smiles bloom around your kitchen table.
Why Cherry Pie Bars Make a Sweet Snack

Ingredients Needed for Cherry Pie Bars
Base Ingredients:Flavor Enhancers:Filling and Topping:Instructions for Making Cherry Pie Bars

Step 1: Warm Up the Oven
Crank your oven to a toasty 350°F and generously grease a 9×13 inch baking pan with butter or cooking spray.
Step 2: Whip the Butter and Sugar
In a spacious mixing bowl, blend softened butter and sugar until the mixture becomes creamy and light, creating a smooth base for your bars.
Step 3: Incorporate Eggs and Flavor Boosters
Gently add eggs one at a time, whisking thoroughly after each addition. Stir in vanilla and almond extracts to elevate the flavor profile.
Step 4: Create the Dry Mixture
Combine flour and salt in a separate bowl, then gradually fold these dry ingredients into the creamy butter mixture until just combined.
Step 5: Prepare the First Layer
Spread half of the batter evenly across the bottom of the prepared baking pan, creating a solid foundation for your cherry bars.
Step 6: Add Cherry Goodness
Carefully distribute the cherry pie filling over the first batter layer, ensuring an even coverage from edge to edge.
Step 7: Top with Remaining Batter
Drop spoonfuls of the remaining batter across the cherry filling, creating a rustic and inviting top layer.
Step 8: Bake to Perfection
Place the pan in the preheated oven and bake for 45-50 minutes. The top should look set and slightly golden when it’s ready.
Step 9: Cool and Slice
Allow the bars to cool completely in the pan before cutting into delectable squares. This helps them set and makes cutting easier.
Tips to Perfect Your Cherry Pie Bars
Flavor Variations of Cherry Pie Bars to Try
Pairing Suggestions for Cherry Pie Bars
How to Store Cherry Pie Bars Properly
FAQs About Cherry Pie Bars
Cherry pie bars are a more convenient, easier-to-serve version of classic cherry pie, featuring a similar fruity filling but in a bar-style format that’s perfect for casual gatherings.
Homemade cherry pie filling works great, but canned filling is more consistent and saves time. If using fresh cherries, cook them down first with sugar and cornstarch to create the right texture.
Look for a golden-brown top and slightly firm edges. A toothpick inserted near the center should come out mostly clean with just a few moist crumbs.
The combination adds depth and complexity to the flavor, but you can use just vanilla if almond extract isn’t available.
Print
Cherry Pie Bars Recipe
- Total Time: 60-65 minutes
- Yield: 12 1x
Description
Delightful Cherry Pie Bars bring classic American dessert comfort to a convenient, handheld treat. Buttery crumble layers and sweet-tart cherry filling create a perfect balance of flavors that home bakers will savor with pure joy.
Ingredients
Fruit:
- 1 can (21 ounces / 595 grams) cherry pie filling
Dry Ingredients:
- 3 cups all-purpose flour
- 2 cups sugar
- 1 teaspoon salt
Wet Ingredients:
- 1 cup (227 grams) butter, softened
- 4 eggs
- 1 teaspoon vanilla extract
- 1/4 teaspoon almond extract
Instructions
- Warm the oven to 350F and prepare a 9×13 inch baking dish with a light coating of grease to prevent sticking.
- Using an electric mixer, blend butter and sugar until achieving a creamy, uniform consistency.
- Incorporate eggs individually into the mixture, then gently fold in vanilla and almond extracts to enhance the flavor profile.
- Sift together flour and salt, then gradually integrate into the wet ingredients, mixing until a smooth batter forms.
- Carefully distribute half of the batter across the bottom of the prepared pan, creating an even base layer.
- Generously spread cherry pie filling over the initial batter layer, ensuring complete and uniform coverage.
- Delicately dollop remaining batter across the cherry filling, creating a rustic, textured top surface.
- Place in preheated oven and bake for 45-50 minutes, watching for a set and lightly golden top that indicates complete cooking.
- Remove from oven and allow to cool completely at room temperature before cutting into individual bars.
Notes
- Swap fresh cherries for canned pie filling to control sweetness and texture, ensuring a more balanced dessert.
- For gluten-free version, replace all-purpose flour with a one-to-one gluten-free flour blend, maintaining the same measurements.
- Enhance flavor by adding a pinch of cinnamon or almond extract to the batter, creating a more complex taste profile.
- Prevent soggy bottom by lining the baking pan with parchment paper, which helps easy removal and even baking.
- Prep Time: 15 minutes
- Cook Time: 45-50 minutes
- Category: Desserts, Snacks
- Method: Baking
- Cuisine: American
Nutrition
- Serving Size: 12
- Calories: 374 kcal
- Sugar: 30 g
- Sodium: 171 mg
- Fat: 18 g
- Saturated Fat: 11 g
- Unsaturated Fat: 7 g
- Trans Fat: 0.5 g
- Carbohydrates: 51 g
- Fiber: 1 g
- Protein: 4 g
- Cholesterol: 55 mg
Samantha Lee
Recipe Developer & Content Creator
Expertise
Plant-based and vegetarian recipes, Recipe testing and development, Food blogging and digital content creation, Culinary education and workshops
Education
Oregon Culinary Institute (Portland, OR)
Samantha sees cooking like painting, every fresh herb, every juicy tomato, a new splash of color on a canvas.
After graduating from Oregon Culinary Institute, she blended her love of global cuisines and plant-based cooking into recipes that feel fresh, fearless, and full of heart.
Samantha’s kitchen is a place where comfort food gets a modern remix and every meal feels like a little adventure. When she’s not cooking, she’s out exploring farmers’ markets, sketching new recipe ideas, or getting her hands dirty in a community garden.