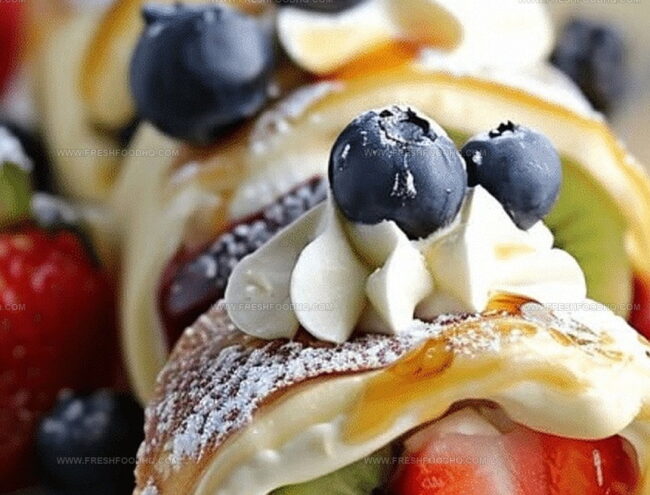
Dreamy Cheesecake Fruit Salad Roll-Ups Recipe for Sweet Cravings
Delightful cheesecake fruit salad roll-ups promise a quick dessert adventure that will make your taste buds dance.
Soft tortillas wrapped around creamy cheese and fresh seasonal fruits create a playful twist on traditional sweets.
Sweet meets tangy in every magical bite of these simple treats.
Crisp and smooth textures combine effortlessly in this no-bake sensation.
Kids and adults alike will fall in love with these colorful snacks that come together in minutes.
Minimal ingredients and zero cooking skills mean anyone can master this delectable recipe.
You won’t believe how something so easy can taste so incredible.
What Makes Cheesecake Fruit Salad Roll-Ups So Fun and Flavorful
Ingredients for Cheesecake Fruit Salad Roll-Ups
Main Base Ingredients:Sweeteners and Flavor Enhancers:Preparation Accessories:How to Assemble Cheesecake Fruit Salad Roll-Ups
Step 1: Whip Creamy Filling
Grab a mixing bowl and combine cream cheese, powdered sugar, and vanilla extract. Blend these ingredients until they transform into a silky, smooth mixture that looks irresistibly rich and creamy.
Step 2: Spread Delicious Base
Take your soft flour tortillas and generously spread the cream cheese mixture across each one, making sure to cover the entire surface with an even layer of delightful goodness.
Step 3: Add Fruity Charm
Sprinkle a colorful medley of mixed berries on top of the cream cheese spread. Choose from:Step 4: Drizzle Sweet Nectar
Gracefully drizzle honey over the berries, allowing the golden liquid to weave between the fruits and add a natural sweetness to your roll-ups.
Step 5: Roll and Secure
Carefully roll each tortilla into a tight spiral, ensuring the filling stays snug inside. Use toothpicks to hold the rolls together and prevent them from unraveling.
Step 6: Chill and Set
Place the rolled tortillas in the refrigerator for at least one hour. This cooling time helps the flavors meld and allows the roll-ups to firm up perfectly.
Step 7: Slice and Serve
Remove the chilled roll-ups from the refrigerator, slice them into bite-sized pieces, and arrange on a platter. Watch as your guests devour these delectable treats!
Helpful Tips for Cheesecake Fruit Salad Roll-Ups
Flavor Variations for Cheesecake Fruit Salad Roll-Ups
Pairing Ideas for Cheesecake Fruit Salad Roll-Ups
Storage Tips for Cheesecake Fruit Salad Roll-Ups
FAQs Regarding Cheesecake Fruit Salad Roll-Ups
Yes, you can swap mixed berries with any soft fruits like sliced strawberries, raspberries, or peaches that complement the cream cheese filling.
Fresh, soft flour tortillas work best for rolling and preventing cracks. Room temperature tortillas are easier to fold without breaking.
These roll-ups can be stored in the refrigerator for up to 2 days when wrapped tightly in plastic wrap or kept in an airtight container.
Absolutely! Kids love the sweet and creamy combination, and the bite-sized pieces make them perfect for snacking or parties.
Print
Cheesecake Fruit Salad Roll-Ups Recipe
- Total Time: 1 hour 10 minutes
- Yield: 6 1x
Description
Silky smooth cheesecake fruit salad roll-ups deliver a delightful fusion of creamy and fresh flavors. Sweet strawberries and tangy cream cheese wrap into elegant pinwheels that elevate summer dessert experiences you’ll crave again and again.
Ingredients
Cream Cheese and Base Ingredients:
- 1 package (8 ounces/226 grams) cream cheese, softened
- 6 flour tortillas
Fruit Ingredients:
- 2 cups mixed berries (strawberries, blueberries, raspberries)
Sweeteners and Flavoring:
- 1/4 cup powdered sugar
- 1/2 teaspoon vanilla extract
- 1/4 cup honey
Instructions
- Whip cream cheese, powdered sugar, and vanilla extract in a large bowl until velvety and uniform in texture.
- Gently layer the creamy mixture across each tortilla, ensuring complete and even coverage to the edges.
- Arrange a colorful assortment of fresh mixed berries atop the cream cheese spread, distributing them evenly.
- Drizzle golden honey in delicate streams over the vibrant berries, adding a touch of natural sweetness.
- Carefully roll each tortilla into tight, compact cylinders, pressing gently to seal the edges.
- Secure each roll with strategically placed toothpicks to maintain their shape.
- Refrigerate the rolls for a minimum of 60 minutes, allowing flavors to meld and texture to set.
- Remove toothpicks and slice each roll into elegant, bite-sized segments just before serving.
- Present the chilled fruit-filled rolls on a decorative platter for an enticing dessert or refreshing snack.
Notes
- Customize the filling by swapping cream cheese with Greek yogurt for a lighter, protein-packed version that’s perfect for health-conscious individuals.
- Experiment with different fruit combinations like diced peaches, mango, or kiwi to add variety and seasonal freshness to the roll-ups.
- Use whole wheat or gluten-free tortillas to accommodate different dietary needs and preferences, ensuring everyone can enjoy this delightful treat.
- For a more decadent dessert, sprinkle crushed graham crackers or toasted nuts on top before rolling to add extra crunch and flavor complexity.
- Prep Time: 10 minutes
- Cook Time: 0 minutes
- Category: Desserts, Snacks
- Method: Chilling
- Cuisine: American
Nutrition
- Serving Size: 6
- Calories: 265 kcal
- Sugar: 22 g
- Sodium: 170 mg
- Fat: 13 g
- Saturated Fat: 8 g
- Unsaturated Fat: 4 g
- Trans Fat: 0.3 g
- Carbohydrates: 29 g
- Fiber: 2 g
- Protein: 5 g
- Cholesterol: 35 mg


Samantha Lee
Recipe Developer & Content Creator
Expertise
Plant-based and vegetarian recipes, Recipe testing and development, Food blogging and digital content creation, Culinary education and workshops
Education
Oregon Culinary Institute (Portland, OR)
Samantha sees cooking like painting, every fresh herb, every juicy tomato, a new splash of color on a canvas.
After graduating from Oregon Culinary Institute, she blended her love of global cuisines and plant-based cooking into recipes that feel fresh, fearless, and full of heart.
Samantha’s kitchen is a place where comfort food gets a modern remix and every meal feels like a little adventure. When she’s not cooking, she’s out exploring farmers’ markets, sketching new recipe ideas, or getting her hands dirty in a community garden.