
The Gooey Butterfinger Caramel Crunch Bars Recipe You’ll Love
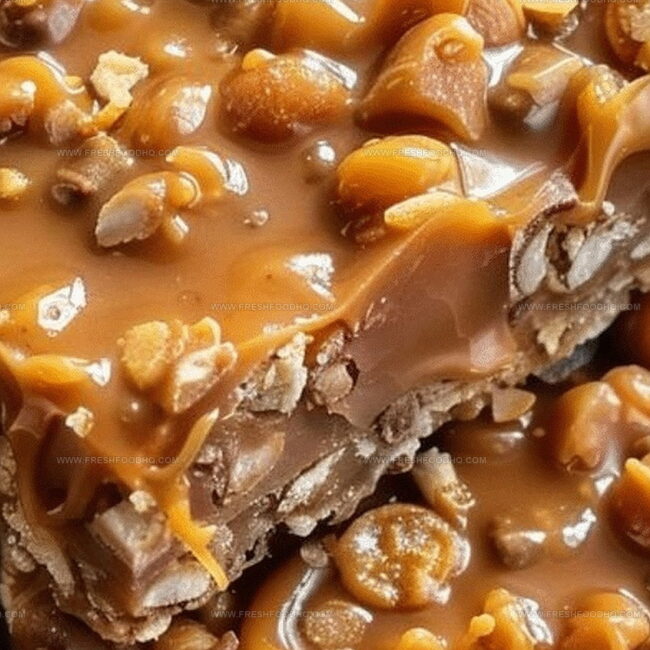
Sweet and salty cravings meet their match in these decadent butterfinger caramel crunch bars that blend creamy textures with irresistible crunch.
Chocolate layers meld perfectly with crispy candy pieces for an unforgettable treat.
Crunchy peanut butter chips dance alongside smooth caramel ribbons in this killer dessert.
Each bite promises a symphony of contrasting flavors that will make your taste buds sing.
Homemade goodness beats store-bought treats every single time.
Crafting these bars becomes a delightful adventure in your kitchen.
One taste, and you’ll be hooked on this magical dessert that transforms simple ingredients into something extraordinary.
What Makes Butterfinger Caramel Crunch Bars Irresistible
Ingredients for Butterfinger Caramel Crunch Bars
Base Layer:Topping Ingredients:Baking Essentials:How to Make Butterfinger Caramel Crunch Bars
Step 1: Warm Up the Oven
Crank your oven to a toasty 350F (175C) and give your 9×13 inch baking dish a quick spray of cooking oil to prevent sticking.
Step 2: Create the Magical Base
In a spacious mixing bowl, whip together:Beat these ingredients until they transform into a silky smooth blend.
Step 3: Incorporate the Flour
Gently fold flour into the creamy mixture, stirring until everything combines perfectly.
Step 4: Build the First Layer
Press half of the delightful crust mixture evenly into the prepared baking dish, creating a solid foundation.
Step 5: Initial Baking Session
Slide the dish into the preheated oven and bake for 20 minutes until the base looks lightly golden.
Step 6: Sprinkle Candy Crunch
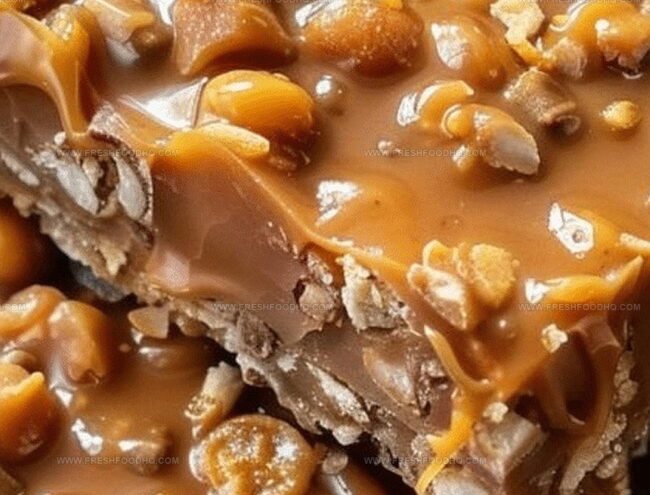
Remove the dish and generously scatter chopped Butterfinger bars across the warm crust.
Step 7: Drizzle Caramel Magic
Pour rich caramel sauce over the candy pieces, letting it weave between the Butterfinger chunks.
Step 8: Top with Remaining Crust
Crumble the remaining crust mixture over the caramel and candy layer, creating a rustic, delicious topping.
Step 9: Final Baking
Return the dish to the oven and bake for another 20 minutes until the top turns golden brown.
Step 10: Cool and Slice
Let the bars cool completely before cutting into delectable squares. Enjoy your sweet creation!
Pro Tips for Butterfinger Caramel Crunch Bars
Flavorful Variations for Butterfinger Caramel Crunch Bars
Pairing Ideas for Butterfinger Caramel Crunch Bars
Storage Instructions for Butterfinger Caramel Crunch Bars
FAQs on Butterfinger Caramel Crunch Bars
Yes, you can substitute with similar crispy candy bars like Crunch or Heath bars for a similar texture and flavor profile.
Reduce the amount of caramel sauce or use a dark caramel with less sugar content to balance the sweetness of the Butterfinger bars.
You’ll only need a 9×13 inch baking dish, mixing bowl, and standard baking tools like a spatula and measuring cups.
Look for golden brown edges and a slightly firm center. The top should be set and have a light golden color when done.
Print
Butterfinger Caramel Crunch Bars Recipe
- Total Time: 55 minutes
- Yield: 9 1x
Description
Indulgent Butterfinger Caramel Crunch Bars bring layers of sweet and salty goodness to dessert lovers. Chocolate, caramel, and crispy peanut butter candy combine in a simple treat you’ll crave again and again.
Ingredients
Butterfinger Candy Bars:
- 1 cup chopped Butterfinger candy bars
Base Ingredients:
- 1 cup (226 grams) butter
- 2 cups (240 grams) flour
- 1 cup (220 grams) brown sugar
- 1 teaspoon (5 milliliters) vanilla extract
Sauce and Topping:
- 1 cup (240 milliliters) caramel sauce
Instructions
- Prepare the oven at 350°F (175°C) and thoroughly coat a 9×13 inch baking pan with non-stick spray.
- In a spacious mixing bowl, whip butter, brown sugar, and vanilla until achieving a silky, uniform consistency.
- Gradually incorporate flour into the creamy mixture, ensuring complete integration.
- Distribute and firmly compress half of the dough across the entire pan bottom, creating an even base layer.
- Slide the pan into the preheated oven and bake for 20 minutes until the crust turns light golden and slightly firm.
- Carefully extract the pan and generously scatter chopped Butterfinger pieces across the partially baked crust.
- Elegantly drizzle caramel sauce, allowing it to cascade over the candy fragments for maximum flavor distribution.
- Delicately crumble the remaining dough mixture, creating a rustic, uneven topping that covers the caramel and candy layer.
- Return the pan to the oven and continue baking for an additional 20 minutes until the top turns a rich, golden brown.
- Remove from oven and allow the dessert to cool completely at room temperature, which helps the layers set and makes cutting into bars easier.
- Once cooled, slice into individual bars using a sharp knife, ensuring clean, precise cuts.
Notes
- Crush Butterfinger bars finely for a more even, delectable texture throughout the dessert.
- Opt for homemade caramel sauce to control sweetness and enhance the overall flavor complexity.
- Consider using gluten-free flour blend for a celiac-friendly version without compromising the rich, crumbly base.
- Let bars cool completely to ensure clean, precise cutting and optimal caramel setting for a picture-perfect presentation.
- Prep Time: 15 minutes
- Cook Time: 40 minutes
- Category: Snacks, Desserts
- Method: Baking
- Cuisine: American
Nutrition
- Serving Size: 9
- Calories: 338 kcal
- Sugar: 27 g
- Sodium: 85 mg
- Fat: 19 g
- Saturated Fat: 11 g
- Unsaturated Fat: 6 g
- Trans Fat: 0.5 g
- Carbohydrates: 38 g
- Fiber: 1 g
- Protein: 3 g
- Cholesterol: 49 mg
Samantha Lee
Recipe Developer & Content Creator
Expertise
Plant-based and vegetarian recipes, Recipe testing and development, Food blogging and digital content creation, Culinary education and workshops
Education
Oregon Culinary Institute (Portland, OR)
Samantha sees cooking like painting, every fresh herb, every juicy tomato, a new splash of color on a canvas.
After graduating from Oregon Culinary Institute, she blended her love of global cuisines and plant-based cooking into recipes that feel fresh, fearless, and full of heart.
Samantha’s kitchen is a place where comfort food gets a modern remix and every meal feels like a little adventure. When she’s not cooking, she’s out exploring farmers’ markets, sketching new recipe ideas, or getting her hands dirty in a community garden.