Easy Aussie Crunch Chocolate Coconut Slice Recipe for Sweet Fans
Crafting an irresistible aussie crunch chocolate coconut slice brings pure delight to any sweet adventure.
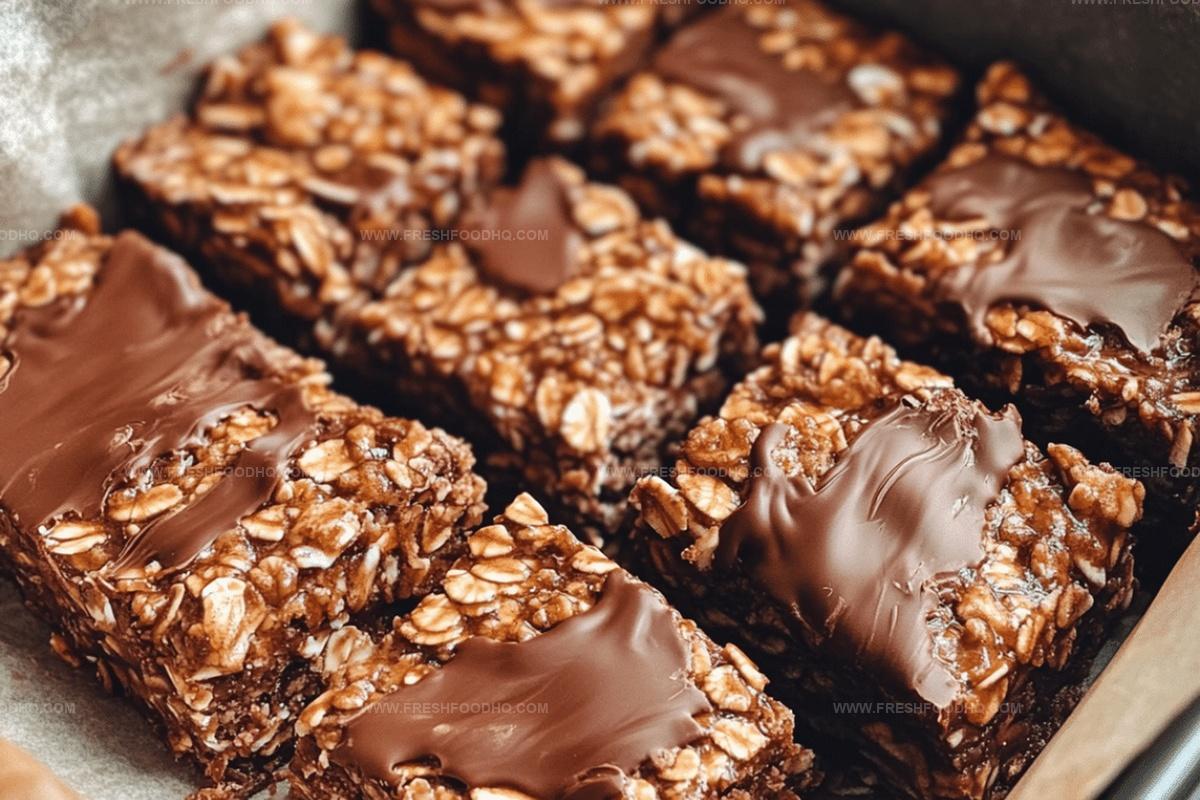
Nostalgia swirls through this classic Australian treat with its crispy layers and decadent chocolate coating.
Memories of childhood bakery visits flood back when you bite into these crunchy, golden squares.
Pantry staples transform into a magical dessert that promises pure indulgence.
Coconut and chocolate create a harmony of textures that dance across your palate.
Rich, buttery crumbs melt seamlessly with smooth chocolate, creating an experience beyond ordinary snacks.
Let’s unlock this simple yet spectacular recipe that will become your new favorite dessert companion.
Aussie Crunch Chocolate Coconut Slice That Hits The Spot

Ingredients For Aussie Crunch Chocolate Coconut Slice
Base Ingredients:Crunch Ingredients:Flavor Enhancers:How To Bake Aussie Crunch Chocolate Coconut Slice

Step 1: Warm Up The Oven
Turn on the oven and set the temperature to 350°F (175°C). Allow the oven to fully preheat while you prepare the other ingredients.
Step 2: Melt The Butter
Place butter in a saucepan and heat gently until completely melted and smooth. Use low to medium heat to prevent burning.
Step 3: Combine Dry Ingredients
In a large mixing bowl, gather your dry ingredients:Stir these ingredients together until they are well mixed and evenly distributed.
Step 4: Create The Base Mixture
Pour the melted butter into the dry ingredient mixture. Stir thoroughly until all ingredients are completely incorporated and form a cohesive, crumbly texture.
Step 5: Prepare The Baking Pan
Grease a rectangular baking pan with butter or cooking spray. Ensure the entire surface is lightly coated to prevent sticking.
Step 6: Press And Smooth
Transfer the mixture into the prepared baking pan. Use your hands or the back of a spoon to press the mixture firmly and evenly across the entire pan surface.
Step 7: Bake To Perfection
Place the pan in the preheated oven and bake for 20-25 minutes. The edges should look slightly golden and the top should appear set.
Step 8: Cool And Slice
Remove the pan from the oven and let it cool completely at room temperature. Once cooled, cut into square or rectangular pieces using a sharp knife.
Top Tips For Aussie Crunch Chocolate Coconut Slice
Creative Twists To Try With Aussie Crunch Chocolate Coconut Slice
Perfect Pairings For Aussie Crunch Chocolate Coconut Slice
How To Keep Aussie Crunch Chocolate Coconut Slice Fresh
Aussie Crunch Chocolate Coconut Slice FAQs Answered
Yes, cornflakes provide a unique crunch and texture that defines the Aussie Crunch.
Butter is recommended for the best flavor, but margarine can work as a substitute if needed.
Absolutely! It’s an easy no-fuss slice that kids love making and eating, with simple ingredients and minimal steps.
The recipe has a balanced sweetness from sugar and cocoa, making it enjoyable for those who don’t prefer overly sugary treats.
Print
Aussie Crunch Chocolate Coconut Slice Recipe
- Total Time: 30-35 minutes
- Yield: 12 1x
Description
Indulgent Aussie Crunch blends rich chocolate and coconut into a heavenly no-bake treat straight from Australian kitchens. Sweet layers of nostalgia promise delightful moments that transport your taste buds to sunshine-filled memories.
Ingredients
Main Ingredients:
- 1 cup flour
- 1 cup sugar
- 1 cup coconut
- 1 cup cornflakes
Binding/Fat Ingredients:
- 1/2 cup butter (113 grams)
Flavor Enhancers:
- 2 tablespoons cocoa powder
- 1 teaspoon baking powder
Instructions
- Prepare your baking workspace by lining a rectangular pan with parchment paper, ensuring complete coverage of the base and sides.
- Position the oven rack in the middle and heat to 350F (175C), creating an ideal baking environment.
- Gently melt butter in a large saucepan over low heat, stirring continuously to prevent burning.
- Remove the melted butter from heat and incorporate all dry ingredients systematically, stirring until a cohesive, crumbly mixture forms.
- Transfer the mixture into the prepared pan, using the back of a spatula to compress and distribute evenly, creating a uniform layer approximately 1/2 inch thick.
- Place the pan in the preheated oven and bake for 22 minutes, watching for slight golden edges as an indicator of doneness.
- Remove from oven and allow the slice to cool completely in the pan for 45-60 minutes, which helps the texture set and makes cutting easier.
- Once thoroughly cooled, lift the slice out using the parchment paper edges and slice into rectangular or square portions using a sharp knife.
- Store in an airtight container at room temperature for up to 5 days, maintaining optimal texture and flavor.
Notes
- Always use room temperature butter for smoother mixing and better incorporation of dry ingredients.
- Crush cornflakes slightly before adding to enhance texture and prevent large chunks in the slice.
- Line the baking pan with parchment paper for easy removal and clean cutting of the squares.
- For a gluten-free version, substitute regular flour with almond flour or gluten-free flour blend.
- Prep Time: 10 minutes
- Cook Time: 20-25 minutes
- Category: Desserts, Snacks
- Method: Baking
- Cuisine: Australian
Nutrition
- Serving Size: 12
- Calories: 224 kcal
- Sugar: 19 g
- Sodium: 50 mg
- Fat: 11 g
- Saturated Fat: 7 g
- Unsaturated Fat: 3 g
- Trans Fat: 0.2 g
- Carbohydrates: 29 g
- Fiber: 2 g
- Protein: 2 g
- Cholesterol: 25 mg
Samantha Lee
Recipe Developer & Content Creator
Expertise
Plant-based and vegetarian recipes, Recipe testing and development, Food blogging and digital content creation, Culinary education and workshops
Education
Oregon Culinary Institute (Portland, OR)
Samantha sees cooking like painting, every fresh herb, every juicy tomato, a new splash of color on a canvas.
After graduating from Oregon Culinary Institute, she blended her love of global cuisines and plant-based cooking into recipes that feel fresh, fearless, and full of heart.
Samantha’s kitchen is a place where comfort food gets a modern remix and every meal feels like a little adventure. When she’s not cooking, she’s out exploring farmers’ markets, sketching new recipe ideas, or getting her hands dirty in a community garden.